5 Filters That Can Transform Your Photography
by Alex W.
Lens filters have been around for decades, and back in the days of film they were used for all sorts of weird and wonderful effects. In fact, you can still get a whole array of filters to alter the tones in your images, but most of these are seen as either outdated or unnecessary in the digital age of photography.
Contents
However, there are some filters that are still incredibly useful in photography. While most alterations are easy to do in post-processing, there are some that are either impossible or very time consuming. In addition, there is a great satisfaction that comes with getting everything perfect in camera.
How do you separate the wheat from the chaff in the filter world though? Easy – Follow this guide and take our recommendations! You can also see the filters we recommend for landscape photography in our Ultimate Guide to Landscape Photography.
The following five filters can change your photography for the better, and all are worth considering. But first you must consider something else:
Square Filters or Screw In?
Lens filters come in two different forms, and with both of them having their own advantages and disadvantages it’s important that you make the decision that suits your photography the most.
Filters can end up being a big overall investment once you build up a collection of them, so making the right choice off the bat will not only save you frustration, but also save you money in the long run.
Screw In Filters
Screw in filters are the easier of the two types of filters for beginners. They are simply round pieces of glass that screw onto the front of your lens via the filter thread. Their beginner friendly design and cheaper individual cost means that they’re more commonly seen than the square filter systems, but as you would expect there are some drawbacks.
To keep things simple, here are the advantages and disadvantages of using screw in filters:
Advantages
- Cheaper individual price
- Lighter and smaller to transport
- Can be left on the lens to reduce setup time.
- Quicker initial setup time.
Disadvantages
- You need to buy the same filter multiple times if your lenses have different filter thread sizes.
- Difficult to operate in the cold.
- Graduated Neutral Density filters are unavailable.
You should choose screw in filters if... You want to test the waters and decide whether using filters are for you without the large initial cost.
Square Filter System
The square filter system is more suited to the experienced photographer. These filters are, unsurprisingly, square or rectangular in shape and rather than screw onto the front of your lens they slot into a filter holder attached to the lens.
The larger pieces of glass and need for a filter adaptor does increase the initial cost of setup substantially, but bear in mind that you can use each filter on all of your lenses. All you need to do is attach the filter adaptor to the other lens using a cheap adaptor ring that screws into your filter thread.
The basic setup of a filter system is similar across the board. You will have an adaptor ring that screws into your lens’ filter thread, and that adaptor ring can then have your filter holder mounted on it. Your filters are then simply slotted into the grooves on the filter holder.
Advantages
- No need to buy different sized filters for different lenses.
- Much easier to use Graduated Neutral Density filters.
- Easier to compose and focus when using strong Neutral Density filters.
Disadvantages
- Large initial outlay and individual filters often cost more.
- Some systems lack an integrated polariser.
- Often have to detach entire system before putting the camera away, which increases setup time.
- Bulkier and heavier than screw-ins.
You should choose a filter system if… You’re an experienced photographer with a large collection of lenses, or if you like to use ultra long exposures or graduated neutral density filters often.
Buying a Filter System
Buying a screw in filter is easy. You just find a recommended filter, choose your filter thread size, and click buy. However, a square filter system requires a bit more thought than that, and with so many brands flooding the market right now it’s easy to get bogged down in minute details. In reality, there are just a few things I ask from a filter system, and below are a couple of systems that pass these tests with flying colours:
- Does it have an integrated polarising filter? This is a must for me. I use a polarising filter so often that having a filter system which is actually less convenient than a screw-in filter with polarisers is unthinkable. Many systems nowadays have a polarising filter that fits between the lens and the filter holder, which is then operated by small wheels on the side of the system. This is perfect as it allows adjustment of the filter whilst other filters are mounted in front of it.
- Is the build quality up to scratch? I don’t want to shell out a large pocketful of money on something that’s flimsy. I want aircraft grade aluminium and well engineered connections.
- Is it quick to set up? Some filter systems are incredibly time consuming and fiddly to actually attach to your lens. The worst nightmare of any photographer is to be struggling to set up their equipment while they miss the best of the light. I want to be able to attach a system to my lens in no more than a minute.
I can personally recommend the NiSi V5 Pro Filter System and the Kase K8 System having owned and reviewed both on this site.
No products found.
1. Circular Polarising Filter
The polarising filter is number one for a reason – Because it’s irreplaceable! Many software packages have tried to emulate the effect of a polarising filter, but none have really come close and I doubt any will anytime soon.
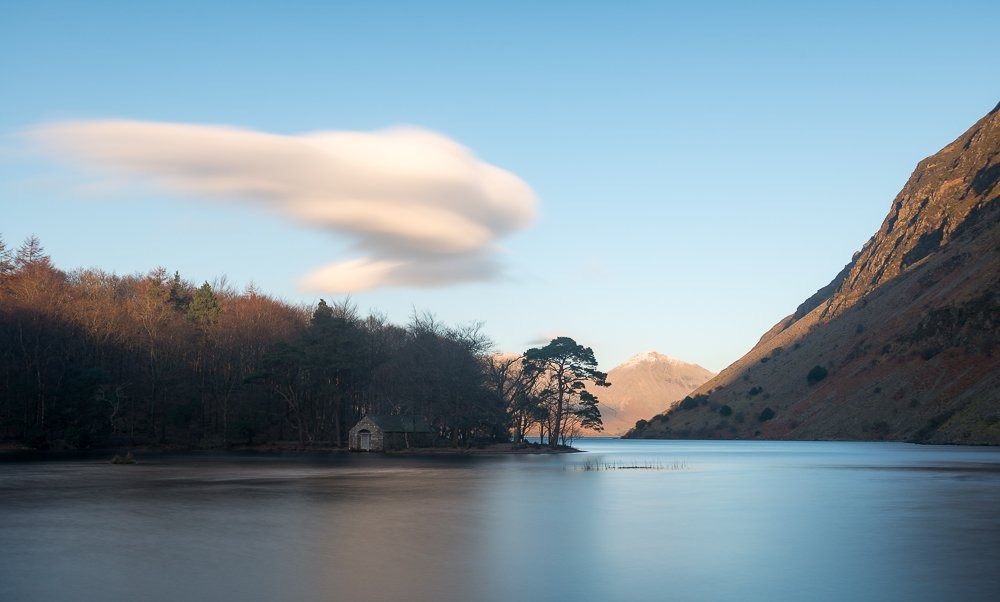
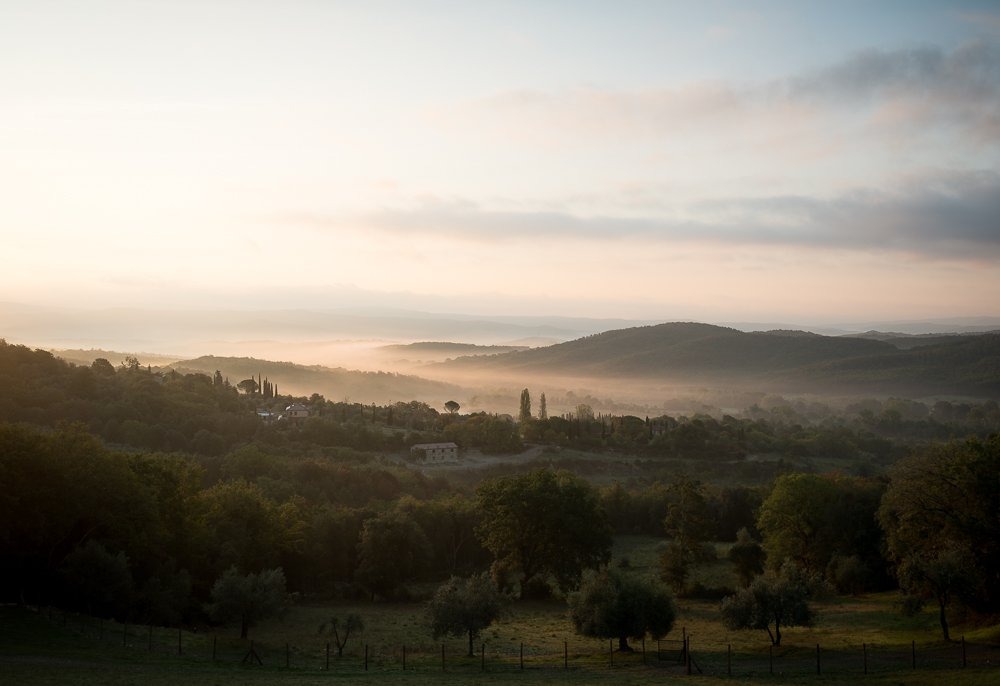
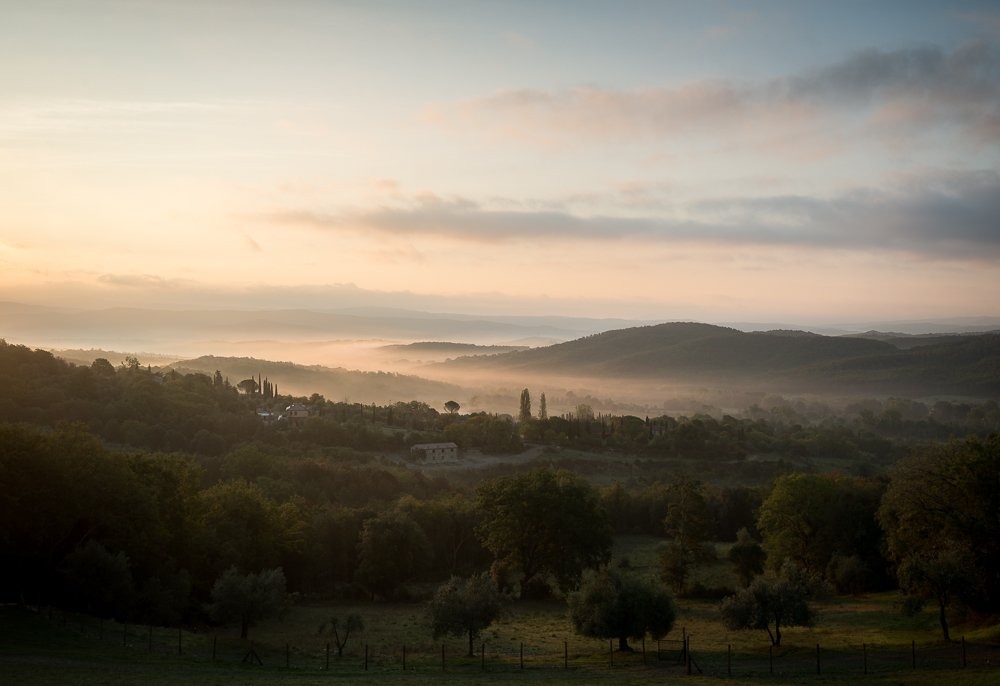
What the polarising filter does is, as the name suggests, filters out polarised light from the sun. In practise this has a few very noticeable effects, some of which you can see in the images above:
- Deepens the blues in the sky and enhances saturation naturally.
- Cuts through atmospheric haze to increase clarity.
- Reduces or eliminates glare on the surface of water.
All of these are very useful at times, especially for those of you focusing on landscape and nature photography. Not only is this the most useful filter on this list, but it is the only one that absolutely cannot be replicated in post processing. This is why we recommended getting one in our Ultimate Guide to Landscape Photography.
There are a couple of things to note though. Firstly, a polarising filter will darken your image by about a stop (it varies with brand) and will need to be compensated for using the Exposure Triangle.
Secondly, because of the laws of physics this filter works best at a 90 degree angle to the sun, and barely works at all when facing to or away from the sun. This becomes an issue when you’re using a wide-angle lens, because at times the field of view covered by your lens will be bigger than the area of light that is available to polarise. Confused? No problem – What this results in is an ugly and obvious section of deep blue, polarised sky, whilst the rest of the sky remains unaffected by the filter.
The take away from this is that you should be wary using a polarising filter with ultra wide-angle lenses.
However, as long as you remember to be cautious when using wide-angle lenses I guarantee that if you buy a polarising filter it will spend more time attached to the front of your lens than it will off it!
Buying a Circular Polariser
As with all photography related purchases, there are some duff brands out there who produce low quality polarising filters. Putting a cheap, low quality piece of glass in front of your expensive lens is more than a bit counter intuitive, but having tested many different polarising filters out I can highly recommend the two below.
You always want a Circular Polarising Filter rather than a Linear Polarising Filter, but the vast majority on the market these days are CPL anyway.
[amazon href=https://www.amazon.com/dp/B000KKVFD6?tag=clickandl-20&linkCode=ogi&th=1&psc=1]
The Hoya CPL is the best screw-in polarising filter I’ve ever used, despite it’s rather modest price tag. I’ve had this filter since the beginning of my photography career and it has never been superseded by the more expensive brands I’ve tested. This is for those of you without a square filter system.
[amazon href=https://www.amazon.com/dp/B01MA6F5OD?tag=clickandl-20&linkCode=ogi&th=1&psc=1]
The NiSi Landscape CPL comes included with their 100mm V5 Pro Filter Holder Kit, and is a fantastic piece of engineering. It’s incredibly thin but doesn’t sacrifice on quality, and the fact that it integrates seamlessly with the filter system itself is a massive bonus when doing any long exposure photography.
2. Neutral Density Filters
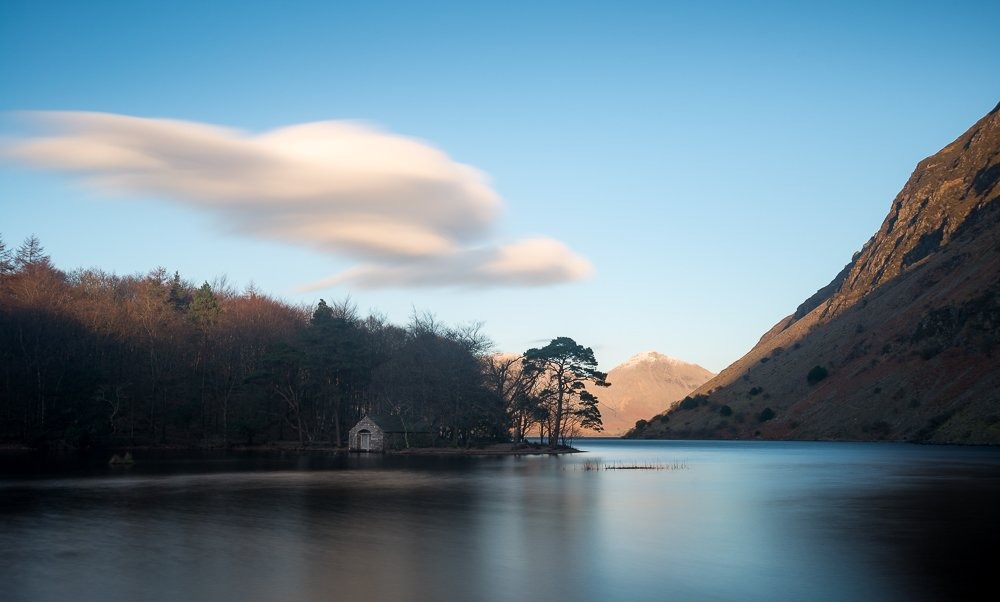
Neutral Density filters have exploded in popularity over the past decade as more and more photographers venture into the world of long exposure photography.
It’s easy to see why this form of photography is so popular, with the preferred subjects of silky smooth water and beautifully streaked clouds creating striking images.
But how do they work? Neutral Density Filters (ND Filters from now on) are simply dark pieces of glass that you place on the front of your lens. This restricts the amount of light reaching the sensor, increasing the shutter speed required to capture the image. The result of these longer shutter speeds is that any moving elements within your frame get blurred, with choppy water being rendered silky smooth and moving clouds blending into streaks. You can see this in effect above.
On the face of it, these ND Filters can seem ludicrously expensive for what they are. However, the precision that is needed to manufacture a piece of glass that is colour neutral and evenly darkened across the board is tremendous, so the cost is actually well within reason. Generally speaking, buying a cheap ND Filter will result in unsightly colour casts and/or vignetting appearing in the final images.
Using a Neutral Density Filter
ND Filters can be frustrating to beginners in long exposure photography, but as long as you remember a few things beforehand they don’t have to be:
- Obviously, because of the long exposure times you’ll need a tripod.
- Compose your image and focus before putting the ND Filter on, as the camera can struggle to find focus with strong ND Filters attached.
- Cover up the viewfinder to avoid light leaking in and hitting the sensor during the exposure.
Choosing a Neutral Density Filter
The first thing you need to decide on is the strength of ND Filter you want. They come in a variety of ‘stops’, which refers to exactly how much they reduce your exposure. Below is a comparison for some of the more common ND Filter strengths, showing how much each would increase a 1/50 second shutter speed to:
- 4-Stop ND Filter – 1/50 second exposure -> 0.3 second exposure
- 6-Stop ND Filter – 1/50 second exposure -> 1.3 second exposure
- 10-Stop ND Filter – 1/50 second exposure -> 20 second exposure
- 15-Stop ND Filter – 1/50 second exposure -> 10 minute 40 second exposure
As you can see these can have a massive impact on your exposure time and picking the right one is imperative. Remember, each stop in strength will double your exposure time. For example, if you choose a 10-stop ND Filter when you’re planning to use it during the Blue Hour for landscape photography you could end up with a long wait on your hands. A 2 second exposure turns into a 32 minute exposure with a 10-Stop attached. A 15-stop in this situation would extend your exposure to over 17 hours!
For those wanting to get started in long exposure photography I would recommend both a 6-stop and a 10-stop ND Filter, with this combination allowing you to tailor your exposure to suit most needs. Below are the ones I can recommend first hand.
No products found.
The Breakthrough Photography ND filter is billed as the world’s sharpest and most color neutral ND filters, and having used it I find it hard to disagree. The quality of this filter is incredible, the build quality is excellent, and the easily gripped ring makes it much easier to use in cold weather.
[amazon href=https://www.amazon.com/dp/B071DTWV9G?tag=clickandl-20&linkCode=ogi&th=1&psc=1]
The Haida 10-Stop ND Filter is made for 100mmx100mm square filter systems, and is my preferred 10-Stop of choice at the moment. It was used to take the demonstration shot above, and you can clearly see just how colour neutral it is in that image. We’ve also done a full review on the Haida 10-Stop NanoPro here.
3. Graduated Neutral Density Filters
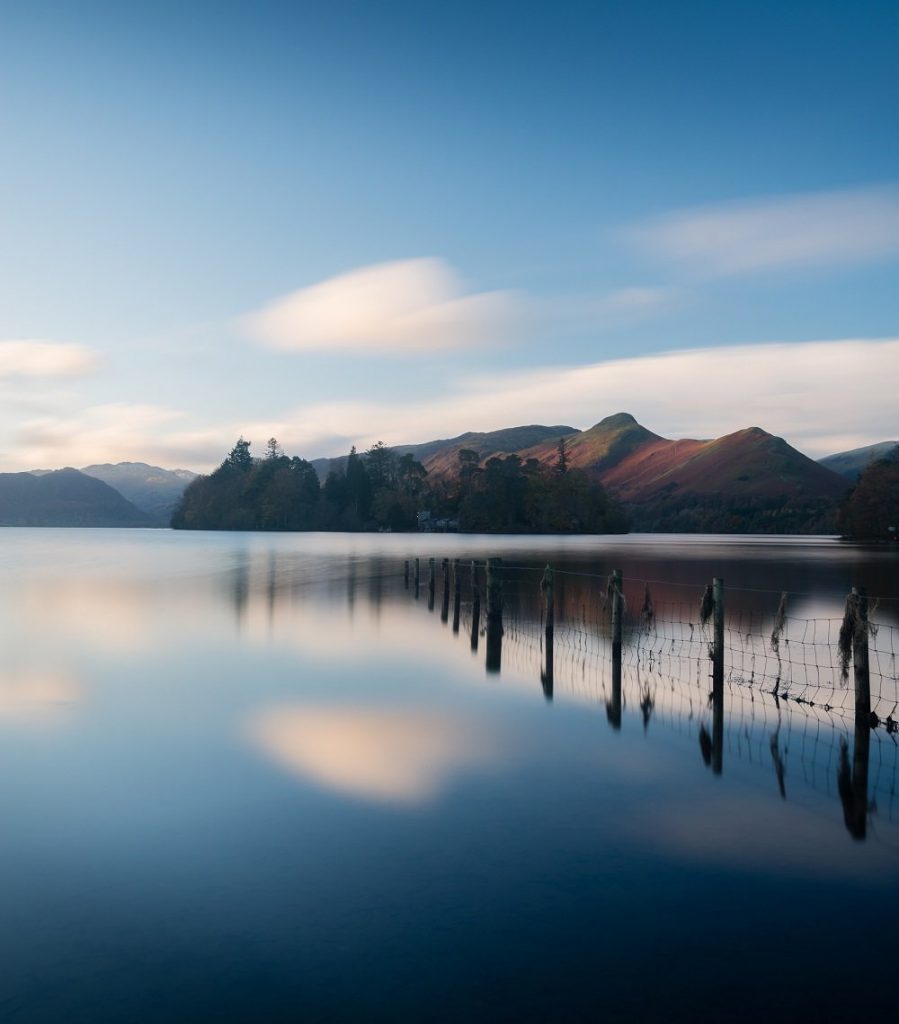
They may have a similar name, but Graduated Neutral Density Filters (GND Filters from now on) do a very different job to the ND Filters we discussed in the last section. Rather than reducing the overall amount of light reaching the camera’s sensor, GNDs only darken a portion of the scene.
This portion is generally the sky, and it compensates for the huge difference in brightness between sky and land. If you’re taking a shot and find that you can’t get detail in both the sky and the land then a graduated neutral density filter would help to solve this problem.
What you would need is a square filter system and one or more GND filters, which would then be slotted into the filter holder and aligned with the horizon to balance the exposure. You can see the effect this has by hovering over the image above.
Admittedly this is a problem that can be solved without the use of filters. You can either bracket the shot or, if the dynamic range isn’t too great, use a GND filter in post processing with Lightroom. However, there is a certain level of satisfaction that comes with getting everything perfectly exposed in camera. For the purists among you – A GND filter is a must-have.
Buying a Graduated Filter
Just like straightforward ND filters, there are a few considerations to make when buying a GND. The main one is what type of transition you want from it. They come in hard, medium, soft, and reverse transitions, which refers to the smoothness with with the dark portion transitions to clear.
- Hard GND Filter – This is a very clear transition between light and dark, and should only be used when the horizon is uninterrupted by mountains, trees or other subjects. Seascape photography is a perfect example.
- Soft GND Filter – As the name suggests, this has a very gradual transition between the dark and clear parts of the filter. This is used when the horizon is uneven, such as mountainous terrain, to avoid an obvious line between dark and bright.
- Medium GND Filter – This is a nice middle ground between Hard and Soft GND Filters.
- Reverse GND Filter – The reverse GND filter is a bit different. Instead of the darkest portion being at the top of the filter it’s actually in the middle, with the effect gradually fading off towards the top. It’s used almost exclusively for when the sun is very close to or below the horizon, as that will then be the brightest portion of the sky.
After that’s decided it’s simply a case of choosing the correct size for your filter holder and going with a reputable brand.
I would recommend Haida again here – They are excellently manufactured, almost completely free of colour cast, and cheaper than the majority of the competition. They certainly aren’t the cheapest out there, but if you’re looking for professional quality these are the most cost effective way of getting it.
[amazon href=https://www.amazon.com/dp/B071F1C36T?tag=clickandl-20&linkCode=ogi&th=1&psc=1]
4. UV Filter
While the rest of the filters in this article serve a clear purpose in improving your photographs, the UV Filter actually does very little to your images. Sometimes known as a Skylight Filter, this screw-in piece of glass is completely clear and only blocks ultraviolet light. Given that UV light is invisible to the naked eye, this seems rather pointless. They can reduce haze a small amount in certain conditions, but that’s not why we want one.
So why do we want a filter that does absolutely nothing to our images? Well, if you’re a clumsy oaf like me you’ll constantly be banging into things or falling over, and this is where a UV Filter can be a big help. It acts as the last line of defence between the outside world and the front element of your lens.
Imagine, completely hypothetical of course, that you slip over and fall into some shrubbery, or that you bang into a wall while squeezing through a tight gap. If the front element of your lens gets damaged during this you’re looking at hundreds of pounds worth of damage. With a UV filter attached, providing the damage isn’t cataclysmic, that cost is reduced to a fraction of the cost of a new lens. All you need to do is buy a new UV filter and go about your day.
Buying a UV Filter
Just because the UV Filter does nothing to enhance your images that doesn’t mean we can go to the bottom of the bargain bucket. If you’ve got a lens that was painstakingly crafted to provide the best image quality possible; a lens that you’ve spent a substantial amount of money on, do you really want to put a £2 middle-man of low quality, poorly made glass on the front of it?
Fortunately, even the good quality UV lenses tend to come cheap in comparison to some of the other filters we’ve looked at. The Hoya UV Filter to the right is excellent quality and comes with very little distortion, ghosting, or loss in sharpness and it comes at a very reasonable price. I’d recommend buying one for your most valuable lenses, especially if you’re visiting harsh conditions such as the beach or desert.
[amazon href=https://www.amazon.com/dp/B000BH5OW6?tag=clickandl-20&linkCode=ogi&th=1&psc=1]
5. Natural Night Filters
Natural Night Filters are a bit of a niche product in that they’re aimed almost exclusively at astrophotographers. However, for those who like to dabble in astrophotography it’s a complete game changer.
As anybody who’s tried to photograph the night sky anywhere near a city or town can confirm, light pollution is a big problem in astrophotography. The faintest glow from city lights will sneak into your photos unless you are well away from the hustle and bustle. This light pollution can completely ruin an otherwise fantastic shot, and that’s where this filter comes in.
The NiSi Natural Night Filter is available for 100mm square filter systems and what it does is block the wavelengths of light that are emitted from the likes of mercury and sodium streetlights. As a result, light pollution is vastly reduced and the unpleasant orange glow of light pollution is vastly reduced in your images. This, in turn, allows you to more effectively practise your astrophotography even near towns and cities.
Obviously it does have it’s limitations, so you won’t be able to photograph the Milky Way from Trafalgar Square for instance. You can also mimic this filter in post-processing for the most part, but for those scenes with lots of bright lights and unwanted flare this filter does what Photoshop can’t. If you’re interested in astrophotography I would highly recommend this filter!
No products found.
Conclusion
So there you have it – Your introduction to lens filters is complete. You are unlikely to need all of these filters right away of course, but it’s worth thinking about purchasing a few of the ones I recommend and testing them out.
I would implore everybody to get a good quality polarising filter as they really can transform an image, and long exposure photography is definitely worth trying out. Some people get so enamoured with long exposures that they forge an entire photographic career out of it.
Are there any filters I’ve missed out that you use? Let us know in the comments or on one of our social media channels below!
Read More…
The Photographer’s Wishlist – Perfect Gifts for Any Photographer
DSLR vs Mirrorless – Which System Works for You?
Upgrade Your Photography on a Budget
Ultimate Guide to Forest Photography
 |
 |
 |
 |

About Alex W.
Alex is the owner and lead writer for Click and Learn Photography. An avid landscape, equine, and pet photographer living and working in the beautiful Lake District, UK, Alex has had his work featured in a number of high profile publications, including the Take a View Landscape Photographer of the Year, Outdoor Photographer of the Year, and Amateur Photographer Magazine.
Thoughts on "5 Filters That Can Transform Your Photography"
|
|
|
|
Learn Photography
You can Get FREE Gifts. Furthermore, Free Items here. Disable Ad Blocker to receive them all.
Once done, hit anything below
|
|
|
|