How to Photograph Lightning – Top Tips for Shooting the Storm
by Alex W.
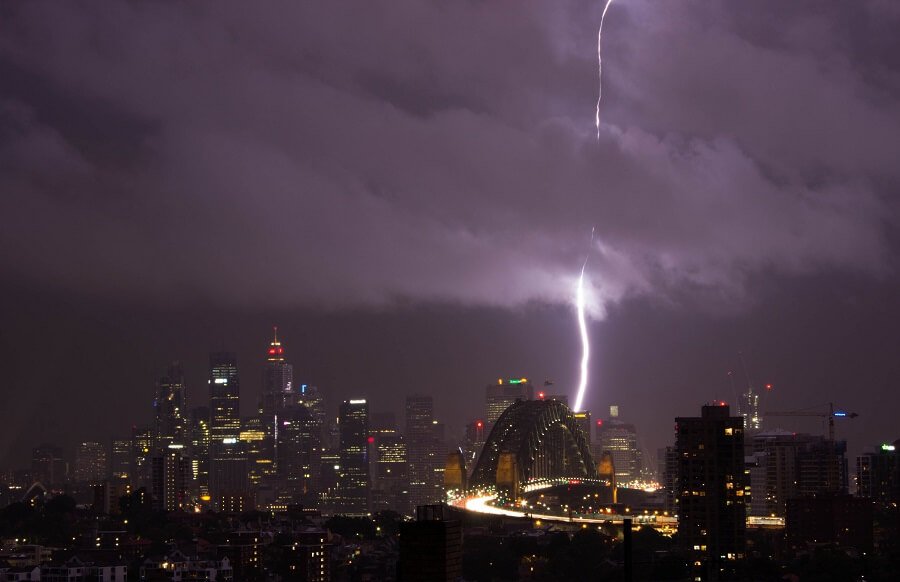
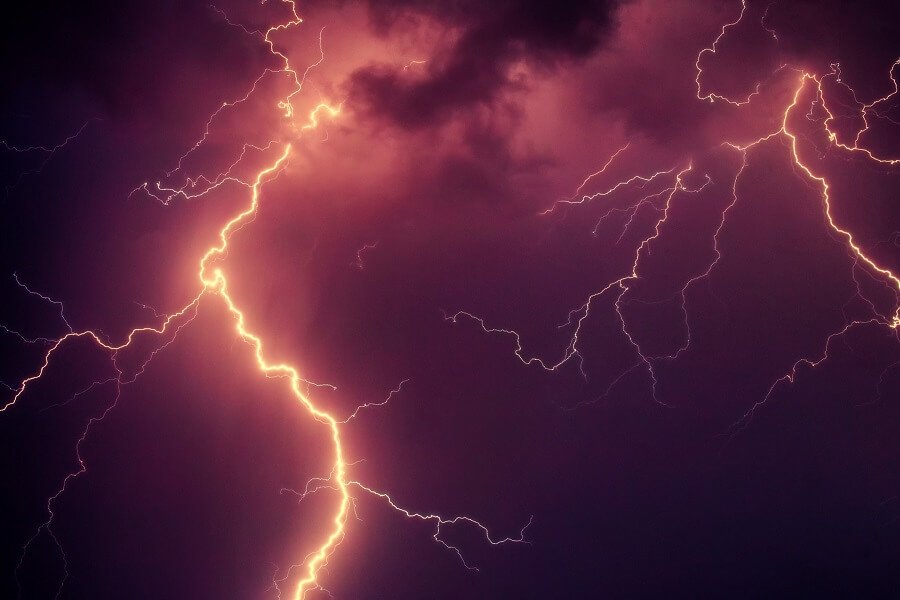
One of the first photos to ever take my breath away was a wonderfully composed landscape image with dark and brooding clouds looming ominously over the land. Those things weren’t what caught my eye though – A terrifying bolt of lightning dominated the scene, and it was at that moment I vowed to learn exactly how to photograph lightning.
It’s not an easy task, and in some areas of the world it’s just downright frustrating. First, you have to wait until there’s an incoming storm, and only then can you proceed to try and fail to capture the spectacular money shot time and time again.
Well, that’s what I did anyway. Eventually, though, I cracked it and captured my first bolt of lightning crashing down to earth. Hopefully, these tips on how to photograph lightning can help you succeed much more swiftly than I did.
In case you’re interested – Yes, this is exactly how I ended up learning to love shooting in the rain and bad weather!
Contents
Enough anecdotal storytelling (for now, anyway). Let’s get to it:
How to Photograph Lightning – Preparation
Before we get to the meat of the subject, it’s important to know a few things before even setting out. Firstly, there’s the obvious task of finding where the lightning will strike, and next is the incredibly important measures you should take to ensure your safety while shooting.
Finding the Lightning
We’ve covered a lot of weather forecasting and photography planning in our Ultimate Guide to Landscape Photography Pt 3, so make sure to read through that if you haven’t already.
Basically, what you need for this part of the process is a few weather forecasting websites and one very cool site specifically geared towards lightning itself.
- Wunderground – If you haven’t used Wunderground for your weather forecasting needs before, then it’s time to start! They gather data from over 250,000 members to provide fantastic localized weather forecasts. This, unsurprisingly, includes storms and lightning.
- Accuweather – Another weather forecasting site that provides detailed and (usually) accurate predictions across the globe.
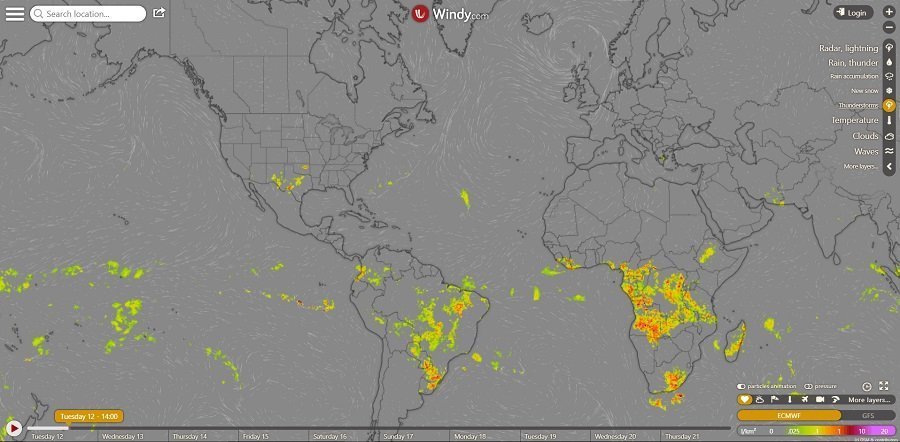
- Windy– I can’t sing the praises of Windy enough really. Originally designed for surfers and other watersports, Windy has evolved into a gorgeous, worldwide weather radar website and app. You can toggle layers on and off for dozens of different weather phenomenon and see real time graphics on the screen. It’s hard to do it justice by explaining, but take a look at the screenshot below and then check it out yourself!
- LightningMaps – If there’s a storm nearby and you want to see exactly where lightning is striking then this is the tool for you. Just zoom in to your desired location and watch the lightning bolts rain down. Even when you’re not out shooting, it’s strangely meditative to see those dots appear and radiate outwards.
That’s all there is to the weather forecasting side of things, although you can definitely go more in depth with storm chasing Facebook groups and extremely localized weather forecasts, of course.
Planning Your Lightning Photoshoot
So you’ve spotted a nearby storm that you can shoot and you’re excitedly monitoring the lightning situation using one of these excellent apps and websites… But what next?
Well, now you just have to quickly put together a plan for your photoshoot. Hopefully it’s an area you already know quite well, so you might already have some compositions in mind.
However, if it’s not then it’s time to refer back to our Ultimate Guide to Landscape Photography. Here are some quick refreshers for you:
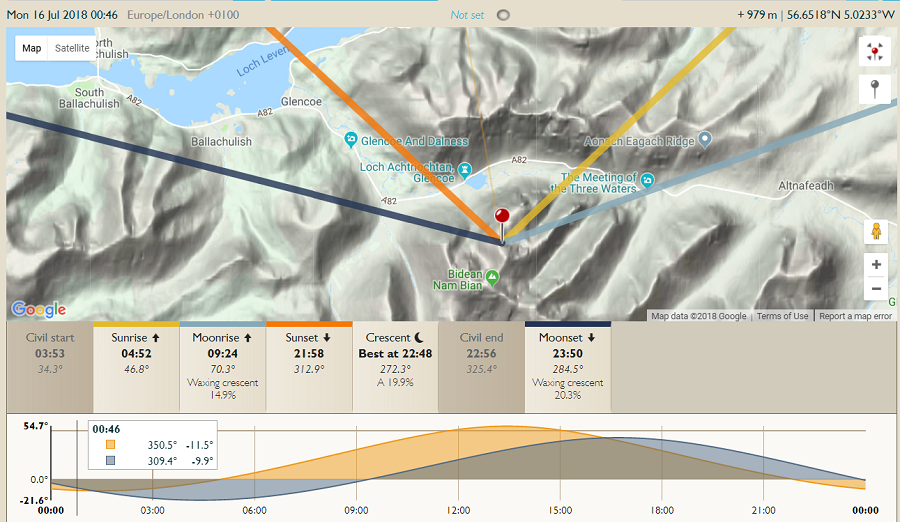
- Use The Photographer’s Ephemeris / PhotoPills – Both of these apps are absolute gems when it comes to planning an outdoor photoshoot.
- Look at a detailed map – Make sure to get up close and personal with a map. Look out for any interesting topological features to include in your composition.
- Take note of the storm’s direction – When you’re planning your compositions, make sure to take note of which direction the storm is travelling. You don’t want to get a shot all planned up in your head only to get there and find the lightning is out of shot!
Safety First
It should come as no surprise that lightning is a pretty dangerous beast. The crack of thunder that comes afterward should be enough to warn anybody that this isn’t something to be messed with.
With that in mind, safety is absolutely paramount when trying to photograph lightning.
Your best bet to stay safe is to shoot from inside a car or building. You can shelter in a building and operate your camera from there, set it up outside with a rain cover and use a remote trigger, or you can do my personal favourite.
Use a car window mount.
These are nifty little accessories that are perfect for storm chasers and wildlife photographers alike. They allow you to stabilise the camera by attaching it to the window of your car, and I make sure to take mine with me whenever I’m trying to photograph lightning.
-
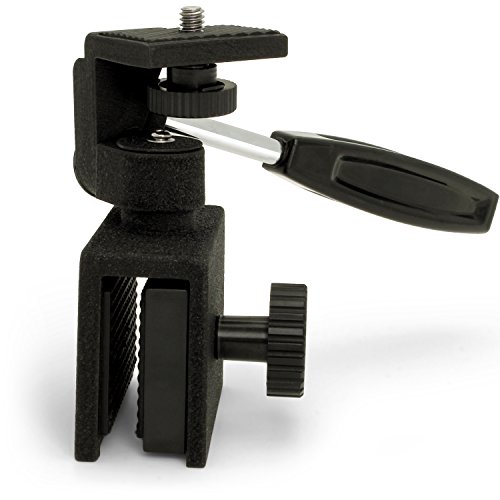
Optix Pro U5517 Car Window Clamp Mount Compatible with...
- Heavy duty clamp support with 1/4" screw thread for use on vehicle windows
- Two-way pan head for convenient adjustment and panning. The handle twists to tighten and loosen the pivot joints
Rating:

If you absolutely must venture out into the open, make sure to take precautions there as well. Stay away from trees, pylons, and open water for obvious reasons, and try to get yourself as close to the ground as possible (but with as little of your body actually touching the ground as possible.) This is a great write up regarding lightning safety.
All of this means you might not get the exact composition you were hoping for, but it’s a lot better than being dead.
Seriously everyone – Don’t mess with lightning and don’t take any stupid risks.
Lightning Photography Gear
Apart from that nifty little window clamp I just showed you, the chances are you already have most of the gear required for photographing lightning.
Camera
You’ll need a camera that allows you to set it in manual, preferably one of our recommended DSLR or Mirrorless cameras that you can find below:
Lenses
No need to go out and buy any special lenses for this. To be honest, any lens will do – However, your best bet is to have a small selection in your bag so you can choose depending on the situation.
Our Best Lens for Landscape Photography has all the lenses you’ll ever need for photographing lightning, but here’s an ideal kit bag:
- Standard Zoom Lens – We rarely want to go super wide when shooting lightning, simply because it makes the (hopefully) distant lightning bolts diminish in size the wider we go. A standard zoom lens ranging from 18mm to 55mm is perfect for a lot of scenarios.
- Telephoto Zoom Lens – Thunderstorms are often seen away in the distance, and being able to zoom in and get them filling the frame up can produce some incredibly dramatic images. A telephoto lens such as the Tamron 70-200mm f/2.8 is absolutely ideal. Of course, you do then need a very clear idea of where the lightning will strike.
-
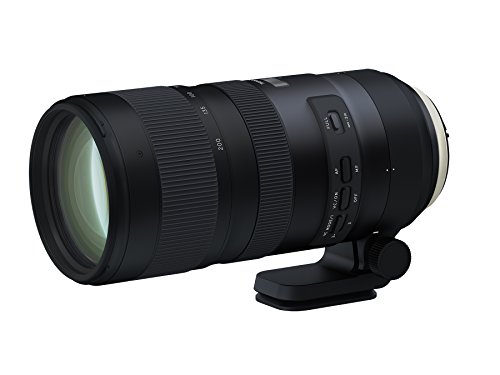
Tamron SP 70-200mm F/2.8 Di VC G2 for Nikon FX DSLR (6 Year...
- VC performance is 5 stops (VC mode 3) and offers three modes optimized for different shooting situations
- MOD reduced to 37.4" (1:6.1 max. mag. Ratio). Angle of view (diagonal): 34°21' - 12°21'(for full-frame format), 22°33' - 7°59'(for APS-C format)
Rating:
Tripod
A good quality tripod is an absolute must-have for lightning photography. We’re going to be using long exposures a lot as we try to get lucky with a lightning bolt, so having your camera steady is paramount.
Any good quality tripod will do really, and since we’re trying to stay close to a safe escape it doesn’t have to be a particularly lightweight one either.
The Vanguard Alta Pro 2+ we reviewed is a great candidate, but we’ve got a more comprehensive guide to buying a tripod coming up very soon.
Neutral Density Filters
These are by no means a necessity, but having a range of ND filters can make your life a lot easier when photographing lightning.
You Might Like… Haida 10 Stop ND Filter Review
If you’re trying to photograph lightning in the daylight hours we want to extend our exposure time as much as possible. A longer shutter speed gives us the most chance of capturing that elusive lightning bolt, making a good quality Neutral Density Filter worth it’s weight in gold.
-
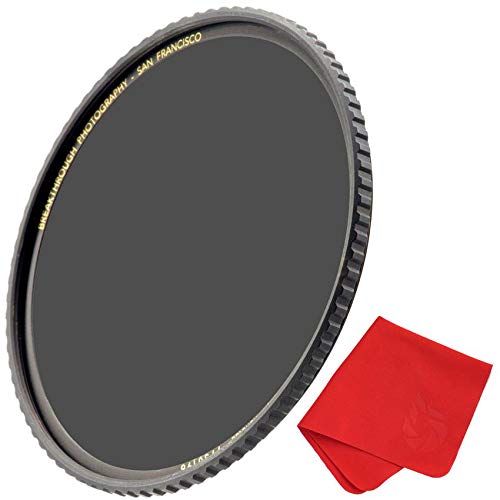
Breakthrough Photography 58mm X4 6-Stop Fixed ND Filter for...
- WORLDS SHARPEST AND MOST COLOR NEUTRAL ND: From the moment you pick up X4 nd filter you’ll immediately feel the craftsmanship and quality. X4 58mm nd filter maintains a very well controlled and flat transmission all the way throughout the visible spectrum and into IR, delivering the worlds most color neutral results.
- MRC16 OPTICAL COATING: 16 Layer Multi-Resistance Coated to significantly reduce lens flare and ghosting while making the filter Anti-Scratch, Reduce Reflection, Water Repellent, Increase Surface Durability, Oil & Dust Resistant. All these fantastic attributes are essential for working effectively outdoors. Our proprietary MRC coating is structurally harder than the glass itself and the reduced reflections improve the efficiency since less light is lost.
Rating:
Of course, if your thunderstorm rolls in during the night you don’t need these, but having them does increase that window of time where you can photograph lightning a lot.
Don’t worry, lightning bolts are bright enough to show up through your ND filter as well.
Miscellaneous
We’ve already discussed the window clamp, but there are a few more accessories you’ll want to bring along with you.
These include a remote trigger for your camera, a good quality rain cover, and a lot of lens cloths. All of these are covered in our Best Photography Accessories article here.
Or, if you want to get a bit advanced, you could always invest in a high speed trigger for your camera that will trip the shutter as soon as lightning strikes.
How to Photograph Lightning – In the Field
Hopefully you’re not actually in a field for this, because that would be dangerous, right?
So you’re all clued up on the safety aspects of photographing lightning, you’ve got the gear ready and a storm is on the way. Now it’s time to think about actually getting that elusive lightning shot.
Composition in Lightning Photography

First things first, don’t sacrifice composition in these scenarios. The lightning may be the main event, but tie that in with an excellent composition and you’re well on the way to a really special image.
I won’t bore you with all our photography composition advice again, so I’ll just leave you this list of articles for you to peruse at your leisure:
- Beginner’s Guide to Composition
- 5 More Composition Tips
- Leading Lines and Improving Your Composition
- Ultimate Guide to Landscape Photography Pt 4 – Shooting on Location
- Tearing Up the Rulebook – 12 Photography Rules and When to Break Them
One thing that is worth mentioning is that, often, we’ll want to include more sky in the image than your typical landscape image.
Lightning, obviously, occurs in the sky, so including as much of the dramatic sky as possible both enhances the mood of the image and increases your chances of capturing lightning.
Camera Settings for Lightning Photography
As with every type of photography, the exact camera settings you should use depend on the conditions you’re photographing in.
That being said, there are some guidelines you can refer to when setting your shot up:
Camera Mode
Manual all the way for this one. I recommend shooting in manual anyway, but for lightning photography it’s especially important to have full control over all your settings.
Shutter Speed
This is the most important factor in your camera settings. The longer your shutter is open, the higher your chances of lightning striking during your exposure.
Obviously this results in a balancing act between the overall brightness of the final image and the chances of capturing lightning.
What I recommend is altering your aperture and ISO to produce the longest shutter speed you can, and possibly even recruit the help of a neutral density filter.
Aperture and ISO
As mentioned above, use the aperture and ISO as tools to prolong your exposure time.
Bear in mind that a smaller aperture will also reduce the amount of light getting through to your sensor from the actual lightning bolt. So, if your resulting image has rendered the lightning too bright, narrow down the aperture.
Focus
If most of what you’re shooting is a good distance away from the camera, then I recommend switching to manual focus and focusing at infinity.
This stops any possibility of your autofocus getting confused and lightning striking while your lens is hunting for focus.
Shooting Mode
I use one of my cameras burst modes for lightning photography. This allows me to attach a remote shutter release and keep firing continuously without having to touch the camera.
This means I can set up my composition, test the camera settings, and then just keep shooting away until I get lucky with a lightning bolt.
Stacking the Shots
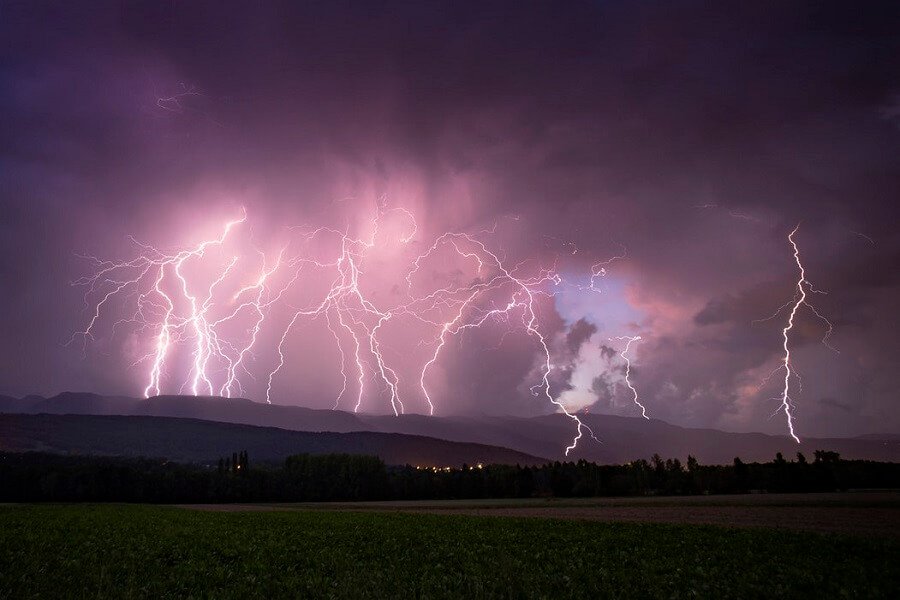
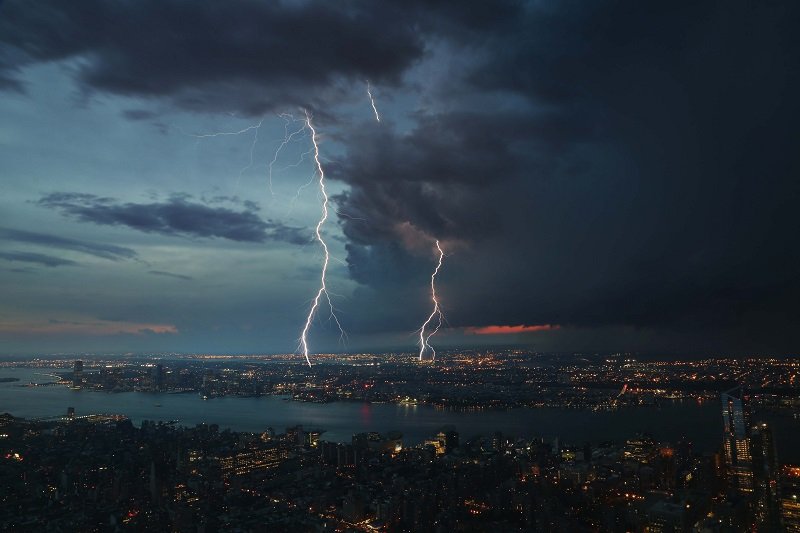
You’ve probably seen incredible images with multiple lightning bolts illuminating the scene.
The chances are that the photographer wasn’t witnessing some once in a lifetime flurry of lightning, but instead stacked multiple images in post processing.
You’ll be happy to know it’s pretty straightforward to do this yourself.
All you need to do is set your shot up according to the timeline below and then keep firing away. Don’t move your camera and don’t change the composition.
Hopefully you’ll end up with a series of identical compositions, with a number of them containing lightning strikes in them. Once that is achieved you can do the rest of the work in post processing. I use Lightroom and Photoshop.
Lightroom Adjustments
Nothing special here. I just make some standard adjustments in Adobe Lightroom, and then make sure to sync the adjustments over every image I’m going to use in my stack.
If you don’t already know how to use Lightroom, make sure to check out our beginner’s guide to it here.
Photoshop Stacking
Now, it’s time to take the work into Photoshop. Select all the images you want to use, right click and choose “Open as Layers in Photoshop.”
The first step is to change every images Blend Mode to “Lighten”, which basically does all the work for us. It makes the parts of each layer that are lighter than the below layers visible.
The only problem here is clouds. It often starts to blend the clouds in as well as the lightning, which results in a pretty shoddy looking image a lot of the time. The solution to this is to apply a Layer Mask, select the Brush tool, and paint over the parts of your layer that you want hidden. Do this on every layer, and after some trial and error you should be there!
Flatten your image by going to Layer > Flatten Image. Make any final adjustments and then save.
You can finish it off in Lightroom and make any fine tuned edits, and Voila!
Timeline of a Lightning Photography Shoot

Now you’ve got all the information needed, it’s time to put all that together and see how it actually works in practise. To help you do that, here’s my timeline of a typical lightning photography shoot:
- The storm approaches. Check weather apps and lightning maps and decide where to photograph.
- Arrive on location. Ideally you’ll already have some compositions in mind if it’s a well known area to you. If not it’s time to scout about for potential compositions.
- Safety check. Can you shoot from the car or a building? If not, make sure you’re not in a lightning hotspot.
- Set up the shot. Stabilize that shot using a tripod or the car window clamp and compose the image. Attach remote shutter release and put on rain cover.
- Take a test. Try and get as long a shutter speed as possible and take a test exposure to make sure you’re not overexposing. Adjust if needed.
- Start Shooting. Use your remote shutter and burst mode to continuously shoot frames until a lightning strike occurs in your frame.
- Keep Monitoring the Storm. If it changes direction you might need to find a new shot. If it gets too close you may want to get out of there!
Final Thoughts
Hopefully you should have all the skills you need to capture that breathtaking lightning image now, so all that’s left is to wait for the next storm and get out shooting!
Just remember – Don’t neglect the composition, and most importantly don’t neglect your safety!
Read More…
Ultimate Guide to Landscape Photography
Best Camera Bags for Photographers
Creating the Orton Effect in Photoshop
Best Lenses for Landscape Photography
 |
 |
 |
 |

About Alex W.
Alex is the owner and lead writer for Click and Learn Photography. An avid landscape, equine, and pet photographer living and working in the beautiful Lake District, UK, Alex has had his work featured in a number of high profile publications, including the Take a View Landscape Photographer of the Year, Outdoor Photographer of the Year, and Amateur Photographer Magazine.
Thoughts on "How to Photograph Lightning – Top Tips for Shooting the Storm"
|
|
|
|
Learn Photography
You can Get FREE Gifts. Furthermore, Free Items here. Disable Ad Blocker to receive them all.
Once done, hit anything below
|
|
|
|