Ultimate Guide to beach photography
by Alex W.
The latest in our Ultimate Guide series focuses on beach photography, delving into gear suggestions, safety and, of course, our top tips for improving your coastal photography.
The coastline has drawn humanity to its shores for as long as history stretches back.
It's a generous provider of food, transport and even protection, but nowadays it attracts people for entirely more leisure-based reasons.
Tourists flock to the edge of land to sunbathe, swim and sip cocktails on the sand. Photographers flock there to take advantage of the endless photographic potential of the ever-shifting coastline.
There is little else that can provide the same level of soul-cleansing as an deserted beach. The gentle lapping (or crashing) of the waves, the salt-tinged sea breeze and the endless expanse of ocean has a way of making you feel completely alone and free in the happiest sense.
But how do you translate those feelings into an image? Well, now that the scene has been set let's get started on our Ultimate Guide to beach photography.
Contents
- Beach Photography Gear
- Assessing the landscape
- 11 tips for beach photography
- Use the Golden Hours
- But don't leave at sunset…
- Find your point of interest
- Look for patterns
- Experiment with shutter speeds
- Keep an eye on your surroundings
- Don't neglect the details and remember to look down
- Return (if possible) at different times of the day
- Look for the human element
- Head out in all weather conditions
- Don't be afraid to get your feet wet
- Safety in beach photography
- More from Click and Learn Photography
Beach Photography Gear

Don't worry, this isn't the part where you discover you need a bunch of expensive photography gear to capture incredible beach images. Providing you have a camera (and a tripod ideally) you're well on your way, but there are a few things that can make life at the beach a little more comfortable photographically speaking.
The usual kit
Now, obviously you'll want a camera, and alongside that I'd recommend a few suitable lenses covering a range of focal lengths.
In fact, our article on the best lenses for landscape photography covers pretty much every type of lens you could need for beach photography. If you're still paralyzed by indecision, a wide-angle lens should be top of your list, and after that a 50mm prime lens and a telephoto lens should be all you ever need.
Alongside your camera and lenses, purchasing a tripod is highly recommended. A tripod can help to eliminate camera shake when shooting at slow shutter speeds in the golden hours or blue hour, open up the potential for long exposure photography and keep the composition identical when bracketing shots (especially useful when shooting directly into the sun).
Filters for beach photography
While by no means a requirement, having a selection of filters in your arsenal opens up a world of creative possibilities when shooting at the beach.
If you want to know more about filters, including the differences between a filter system kit and screw-on filters, you can check this article out.
If you just want to know which filters are best for beach photography, stay right here.
Circular polarizing filter
Circular polarizers are absolute game changers in all types of landscape photography.
They can be used to deepen the blues in a clear sky, increase saturation and reduce atmospheric haze for clearer shots. However, their main advantage in beach photography lies in what they do to water.
A CPL can cut through the harsh glare that appears when sunlight directly hits water, eliminating those burnt out highlights and generally improving the appearance of water, which is obviously in abundance at the beach.
There are a number of different brands worth checking out such as B+W, Kase and Hitech, but if you're looking for a more budget friendly option I've always found Hoya to be excellent.
-

Hoya 55mm Alpha Circular Polarizer Filter
- Great optical quality at an affordable price.
- Precision milled aluminum frame.
Rating:

Neutral density filters
If you're interested in pursuing long exposure photography, whether at the coast or not, you'll need a couple of neutral density filters.
These are simply dark pieces of glass that attach to the front of your lens, reducing the amount of light hitting your sensor and subsequently lengthening shutter speeds.
Once again, there are a range of brands on the market and some are better than others. In fact, the cheapest offerings are generally pretty terrible and introduce horrendous color cast to your images.
I won't bore you with all the details, but I'd recommend brands such as Hoya, Haida, Kase and B+W and also recommend both 6-stop and 10-stop filters to give you a lot of control over your shutter speed no matter what time of the day it is. Or you can get a variable one as shown below:
-
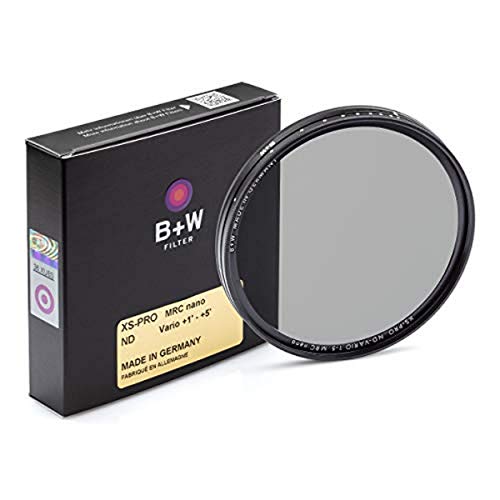
B+W 77mm XS-Pro Digital Vario ND with Multi-Resistant Nano...
- Neutral Density Variable Filter allows photographer to set the density between +1 and +5 stops. XS-Pro Vario ND mount is an extra-wide design and should avoid vignetting concerns with most 17mm lenses on a full body frame
- Multi-Resistant Coating (MRC) with Nano Technology with XS-Pro mount and brass ring construction, Front Accessory Thread / Bayonet: 82 mm
Rating:
Rain cover
The beach can be a volatile place to take your beloved camera. The weather has a habit of changing at the drop of a hat, the crashing waves splash every surface with water and the wind seemingly delights in covering you and everything nearby in salt and sand.
That's why I never head out on a beach photography session without my rain cover in tow.
They're cheap, portable and cover everything but the front element of your lens. Perfect for protecting your equipment as much as possible without hampering your photo taking ability.
-
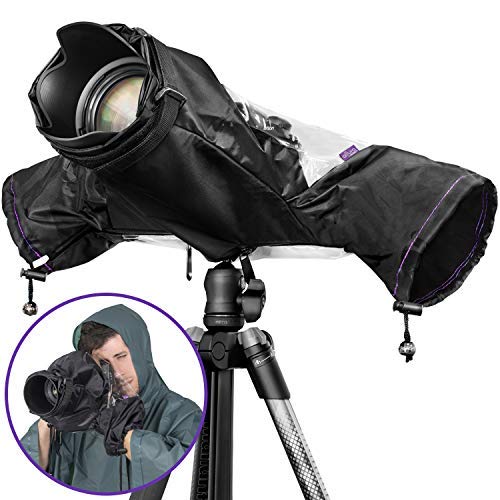
Altura Photo Professional Camera Rain Cover for Canon Nikon...
- Altura Photo professional camera rain cover protector for DSLR Cameras.
- Designed to protect and shield your small or professional camera gear and lens from rain, snow, salt spray, and any other unexpected weather conditions.
Rating:
Miscellaneous accessories
You're pretty much there, just a few more things that could make life for you and your camera a little easier.
- A remote shutter release can help you eliminate any camera shake that occurs when you press the shutter.
- A camera cleaning kit lets you cleanse your lens of that pesky salt spray between shots.
- A solid camera strap avoids any possibility of your camera ending up on a corrosive, sandy beach. Yes, this did happen to me once.
- A spirit bubble , if your camera doesn't have one, keeps those horizons straight. There's nothing worse than a crooked horizon in beach photography.
- A weatherproof camera bag keeps all your kit safe and dry in one of the most hostile environments for a camera.
You can find examples of all these in our article on the 11 best budget photography accessories.
Now, let's get to the fun stuff, shall we?
Assessing the landscape
I'm sure you'll all agree that 'beach photography' has a very broad scope. There are so many different types of beaches and an endless variety of weather conditions. That's not even mentioning the ever-changing nature of the coast thanks to the ebb and flow of the tide.
Assessing the situation, preferably before you even get there, is essential to a successful beach photography session.
If you're lucky enough to live near the beach (like me) you'll probably know it like the back of your hand already. But if you're visiting an unfamiliar coastline it's worth putting the research in and having at least a vague plan. You can find out more about planning a landscape shoot here.
What type of beach is it?
Not all beaches are created equal.
There are so many different kinds of beaches, from curving sandy paradises with sapphire blue seas to rugged cliffside coastlines with steely grey waters.
I like to split them up into X categories, and each one offers something different photographically. Play to their strengths.
- Sandy beaches - The type of beach everyone thinks of when you mention an idyllic coastline. These expanses of sand and calm waters are often suited to gentle sunrises and sunsets that draw focus to the serenity of the location. Keep compositions simple and use the golden hours.
- Pebble beaches - Long exposures often work well on these pebble-strewn stretches of coastline. You can either draw focus to features in the background using leading lines, or you can search for some particularly interesting rocks, strap a wide-angle lens on and use them as foreground interest.
- Clffside coastlines - The most dramatic of settings, cliffside beaches are often suited to stormy weather to accentuate their rugged nature. Black and white landscape photography is perfect here, and you can use a telephoto lens to hone in on the violent and crashing waves.
What are the weather conditions?
Weather conditions so often play a defining role in all forms of outdoor and nature photography, and it's no different in beach photography.
With vast expanses of water meeting land, conditions can often change in the blink of an eye at the coast and capturing those changing conditions can yield some dramatic and fantastic images.
But almost all conditions can produce stunning beach photography:
- Golden hours - Well suited to all types of beach photography, although works particularly well with sand dunes and the archetypal sandy coastlines.
- Stormy weather - Cliffside locations are perfect, but stormy, dramatic weather can work well with anything that showcases the rugged nature of the coast. Telephoto lenses can also be used to hone in on towering waves.
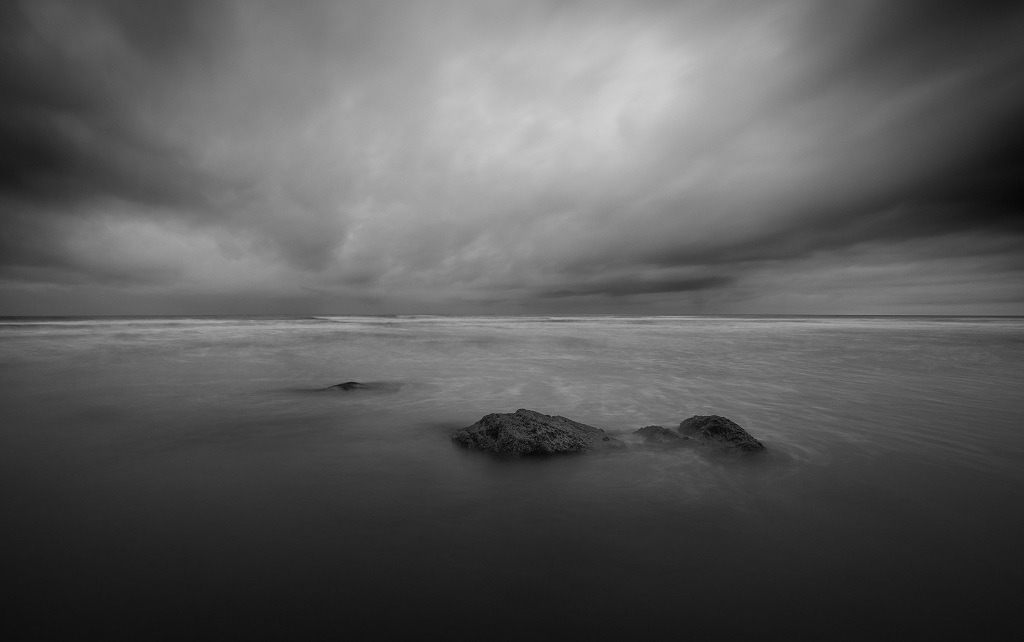
- Overcast weather - Perfect for long exposure beach photography utilizing minimalist compositions.
- Sunny weather - Undoubtedly the most difficult to work with, but it can work well in sand dune environments focusing on the vibrant greens of marram grass contrasting with the yellows of the sand and blues of the sky.
How could the tide effect your beach photography?
The rise and fall of the tide, depending on where you are in the world, has the ability to completely transform the coastline.
You might head to an unfamiliar beach at low tide and find a seemingly endless expanse of sand stretching out to the distant sea. You could then return six hours later to find a narrow strip of pebbles between your parking spot and the beach.
Obviously this can have a massive impact on the photographic potential. Those shots you saw on Instagram might be impossible to shoot if you head there at the wrong time, so always do your research.
Ensuring you know the tidal situation is also vital for staying safe when shooting at the beach.
11 tips for beach photography
Use the Golden Hours
A lot is made of the so-called Golden Hours in landscape photography, with many guides stating you should only shoot in the hour or so after sunrise and before sunset.
I don't subscribe to that at all and have championed shooting in all conditions numerous times.
That being said, neglecting the golden hours in beach photography isn't recommended. At most coastlines you'll get an unobstructed view of the rising or setting sun, and this can gift a photographer with truly breathtaking conditions.
Candyfloss sunrises, nuclear sunsets and gorgeous, soft light in all the right places - the Golden Hours at the beach are not to be missed.
This light can turn a good image into a great one, whether it's illuminating cliff-faces in soft sidelight or providing dramatic backlight on the horizon.
Combine this with changing weather conditions and you're onto a winner. The light alongside a clearing storm can be truly epic.
But don't leave at sunset…
A mistake I often see photographers at the beach make is that they start packing up all their gear as soon as the sun dips below the horizon.
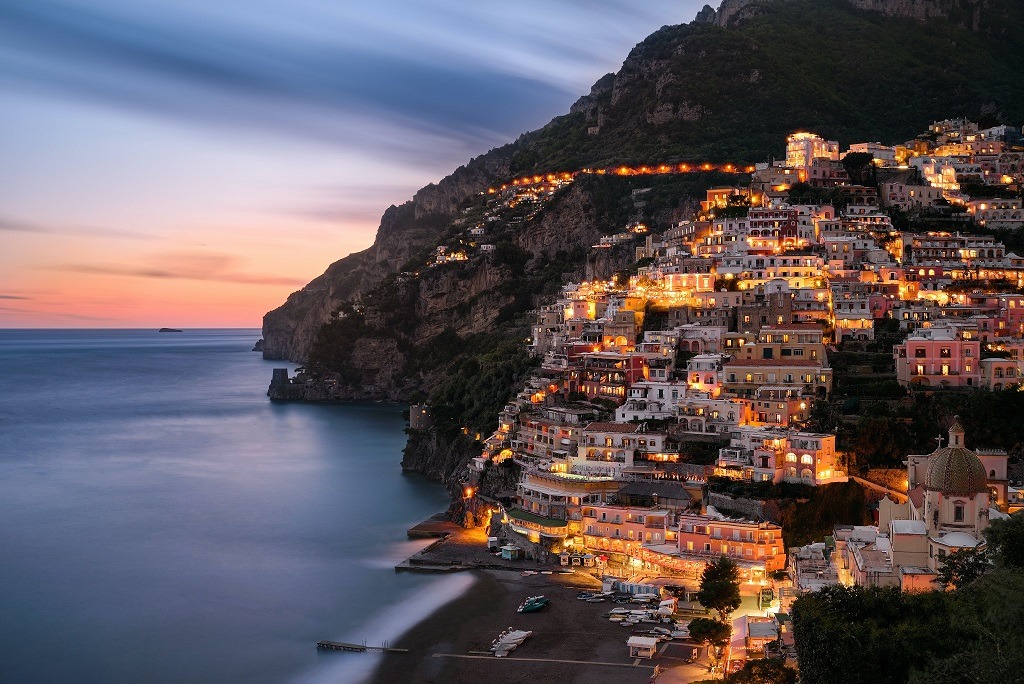
Not only can that mean missing out on some gorgeous colouring of the sky that can happen just after sunset, but they're on their way back home during the vastly underrated Blue Hour .
The Blue Hour occurs around 30 - 60 minutes after sunset (or before sunrise) and is the perfect accompaniment to crystal clear skies and calm waters.
Residual light from the recently departed sun turns the entire landscape, along with the sky, a deep blue and balances the brightness of the land and sky perfectly. Images from Blue Hour often evoke a calmness and serenity that perfectly captures the feeling of being at the beach.
Alternatively, if you're photographing a coastline with artificial light (such as this gorgeous Italian village), waiting until blue hour gives time for the lights to turn on while still providing enough reflected light to keep detail in the surrounding landscape.
Find your point of interest
You know those snaps of the beach that your friends post online when they're having a family day out? That's the sort of shot you want to avoid.
This goes for all forms of photography, but beach photography in particular often leads photographers down the path of ignoring the importance of a well considered composition.
It's even more widespread when a nice sunset is thrown into the mix. [Generic shot of beach at sunset] We've seen thousands of those before. Aim higher.
First things first, you need a point of interest. This can be an intriguing foreground element such as a piece of driftwood, an interesting rock, patterns in the sand or even the waves themselves. Or it can be something in the background, such as an off-shore island or a coastal castle.
In any case, all your compositional effort should go into drawing as much attention as possible to this point of interest and balancing it with the rest of the scene.
This can be done using compositional tools such as leading lines or the golden ratio, or you can find out more about how I hone my composition in this article.

Look for patterns
The human brain loves patterns, and we can take advantage of that in our photography by actively seeking aesthetically pleasing patterns out.
Fortunately for us coastal wanderers, the beach is full of intriguing patterns and repetitions.
Ripples in the sand, undulating sand dunes, orderly layered strips of pebbles and even well coordinated beach parasols are fantastic compositional elements to introduce patterns.
Try combining this with the rule of odd numbers or arranging them into triangles in your frame for even more impact.
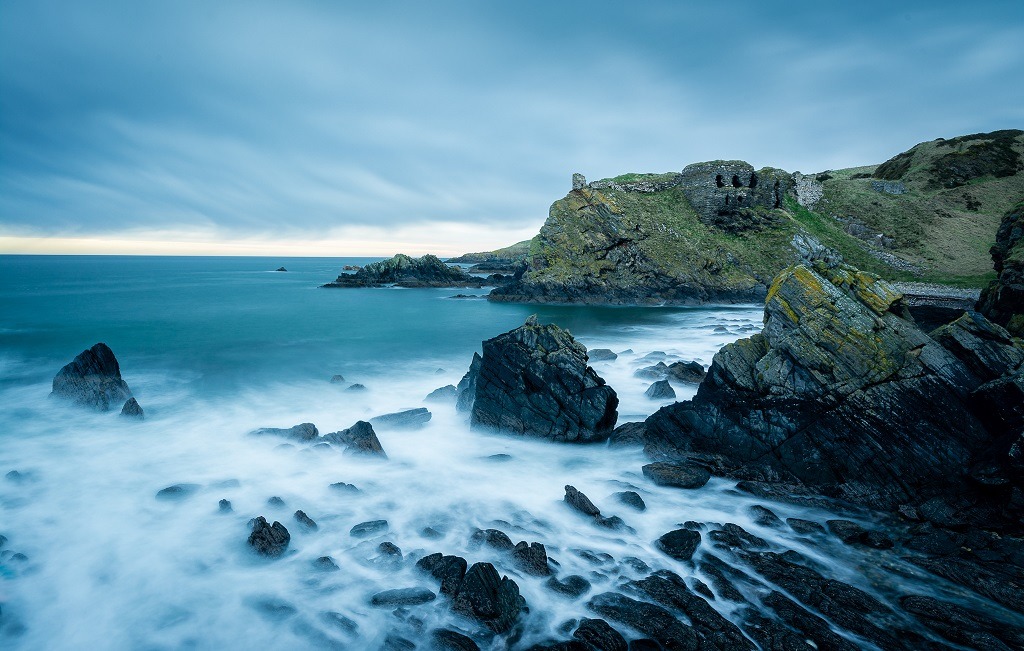
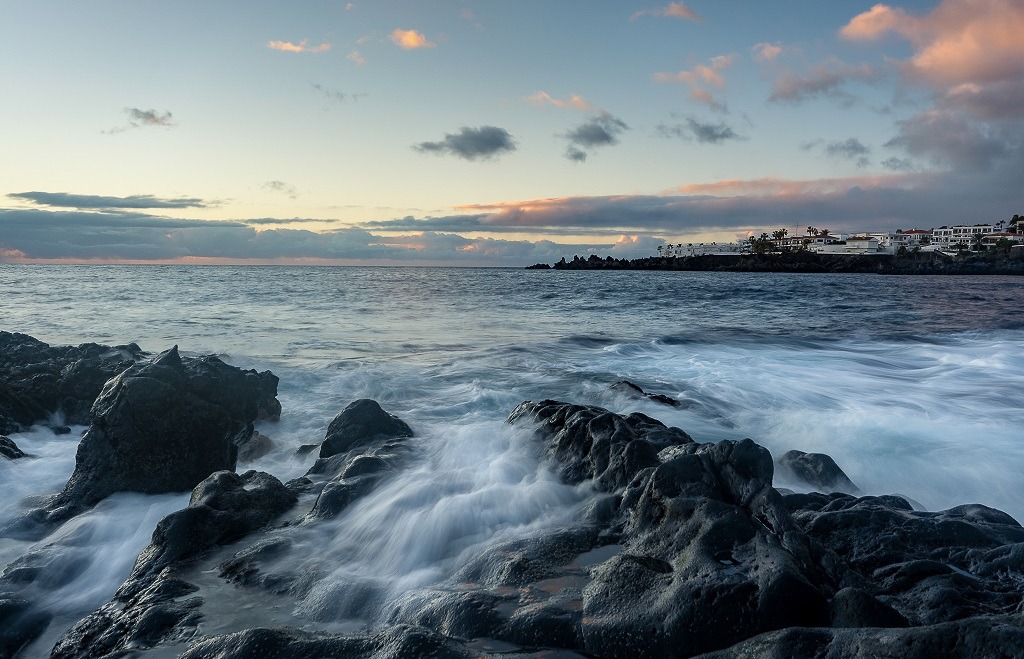
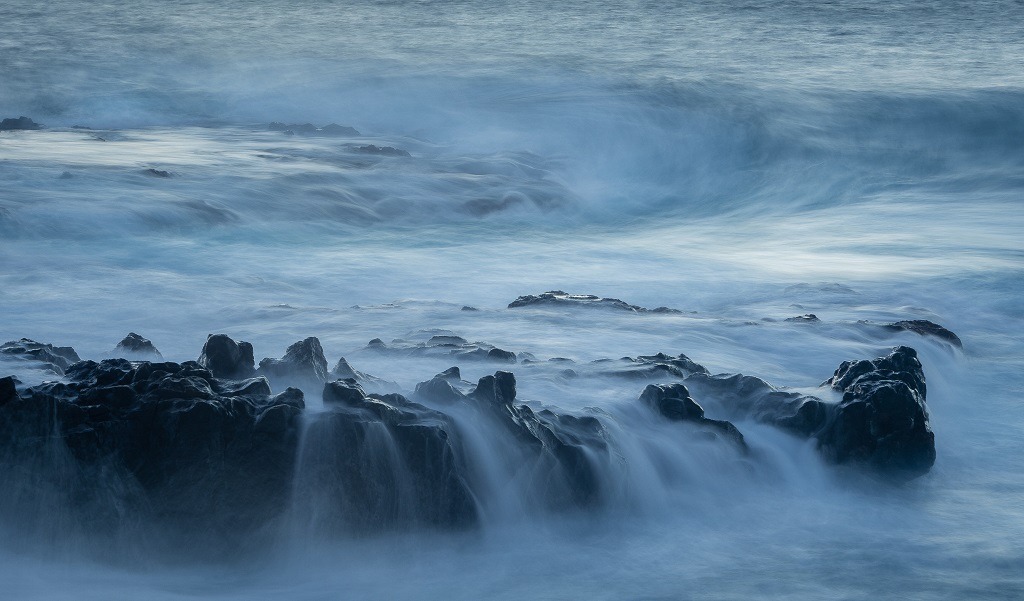
Experiment with shutter speeds
The beach, by its very nature, is awash (pun intended) with moving water, and nothing suits moving water better than shutter speed experimentation.
You can try using a fast shutter speed to really freeze the motion of that crashing wave, or for more gentle seascapes you can use neutral density filters to slow your shutter speed right down and incorporate some motion blurinto the scene.
The 'perfect' shutter speed really depends on the speed at which the water is moving and what you're intending with the shot, but I've found a range between 0.5 and 2 seconds to be ideal to capture the movement of the waves while retaining the detail.
It's best to time the release of your shutter carefully as well. Timing it with a receding wave can result in beautiful leading lines out to sea as the water trickles back down the beach.
Keep an eye on your surroundings
The beach may be a wonderful place, but not everything needs to be shown.
All sorts of rubbish and bits of detritus get washed up or left on the shoreline. While some of this can be used as compositional focal points, other stuff is best left out of your images.
Nobody wants a gorgeous, serene image of a sandy beach at sunset ruined by that washed up oil drum in the background. The same goes for all sorts of plastic waste and rubbish unless, of course, you're going for a gritty portrayal of modern life and the damaging impact of pollution.
Don't neglect the details and remember to look down
While some of the flotsam washed up on shorelines isn't exactly of an aesthetically pleasing quality, other coastal deposits offer a lot of photographic potential.
With new items washed up at the turn of every tide, it's a good idea to direct your gaze downwards at times to see what bounty the sea has to offer.
Things such as old rope, lobster cages, seaweed and shells are perfect, either as foreground interest for a more traditional landscape or as the main subject in a more intimate detail shot.
These detail shots help to tell the story of the coastline and can really connect you to the landscape. Not only that, but they offer very unique compositional challenges and are a great way to really push your skills as a nature photographer.
Return (if possible) at different times of the day
If you're lucky enough to live nearby, or be staying nearby for any length of time, make sure to check the beach out at different times of the day.
The changing light and weather conditions can open up new possibilities, but more importantly the changing tide can completely transform the landscape.
Once you've figured out the perfect time of day for lighting, check the tide tables to see when that ideal window coincides with the best tidal conditions and you're onto a winner.
For example, I know the perfect time of day to photograph my local beach is just before sunset and the perfect tidal range is somewhere between 5m and 7m, so when sunset coincides with this tidal range I make sure to head to the coast.
Remember to take notes of this too. My phone is full of notes detailing the best time of day and the best tide height for a variety of nearby beaches.
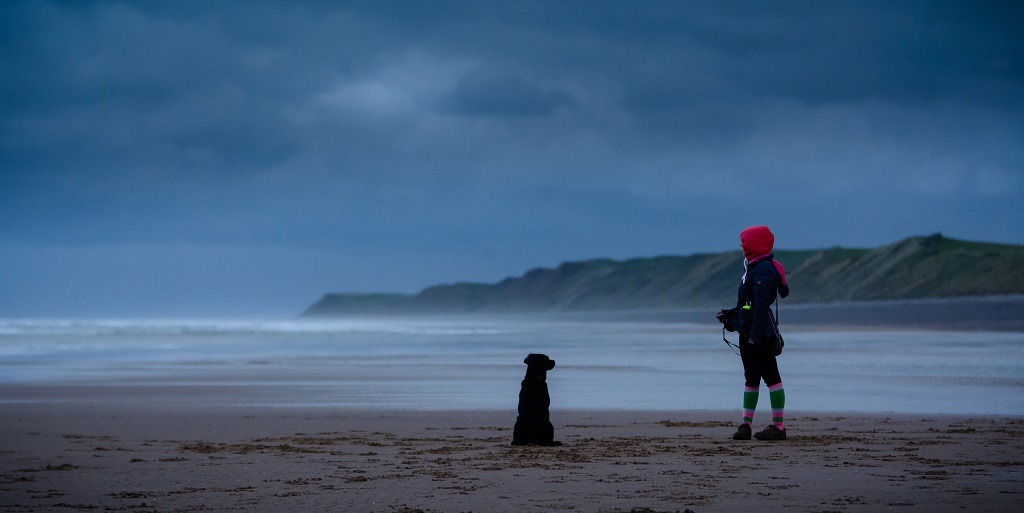
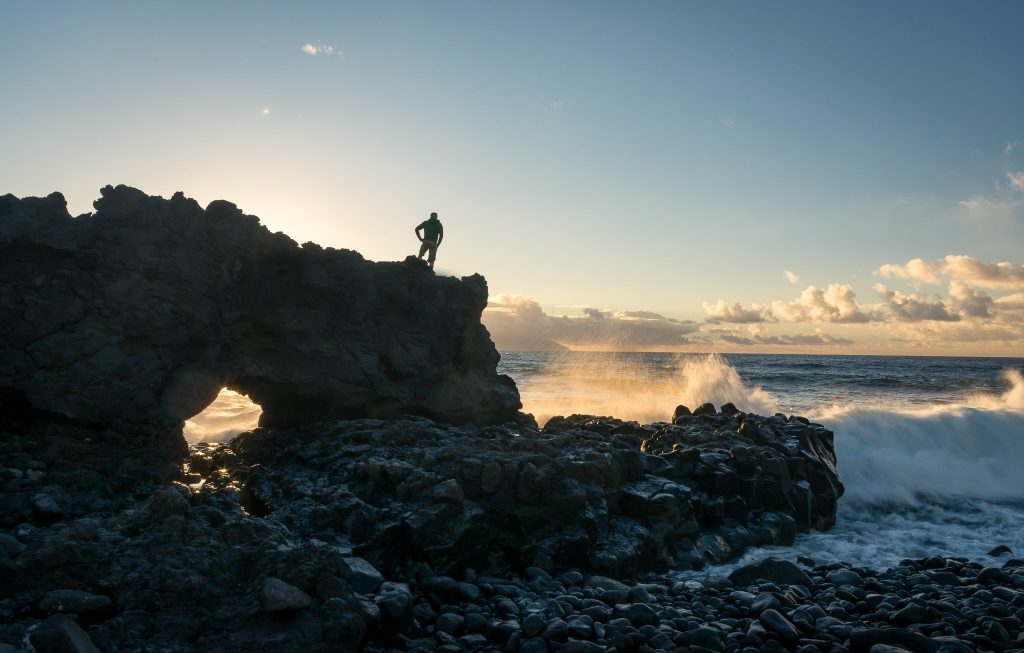
Look for the human element
I've already talked about that unique feeling we get when we're faced with an endless expanse of ocean. It's a culmination of abject terror, insignificance and also joy and freedom that's difficult to find anywhere else.
Capturing this feeling is key to effective beach photography, and what better way to capture it than by including a person who is feeling that exact emotion in the frame?
Alternatively, you can opt for a more informative image by including characters in your image that are just going about their daily business.
In either case, including the human element adds a point of relation to the photo. The viewer can imagine themselves in the scene, and therefore can more easily remember that unique coastal emotion.
Head out in all weather conditions
I've said it before and I'll say it again: Shooting in 'bad weather' is what can set you apart as a landscape photographer.
Many photographers focus far too much on only shooting in 'ideal' conditions, but pushing yourself out of this comfort zone not only improves you as a photographer, but it means there's a lot more opportunity to actually get out there with the camera.
Wind and rain are part and parcel of beach photography and shouldn't be neglected. You're not going to get those dramatic images of towering waves crashing into the harbour on a balmy summer's evening.
Just make sure to wrap up warm!
Don't be afraid to get your feet wet
Sacrifices sometimes need to be made for your art, and in beach photography those sacrifices can sometimes result in wet feet.
Capturing the receding waves perfectly sometimes requires you to get up close and personal with the sea, especially when using a wide-angle lens.
In these cases it's best to pack some waterproof footwear such as waders or wellies, that way you're not constantly trying to jump away from incoming waves and instead you can focus perfecting your image.
Of course, please don't try this on dangerous coastlines or during stormy weather. Wet feet is a sacrifice worth making, being washed out to sea isn't.
Safety in beach photography
Mother nature can be an unforgiving mistress, and nowhere is this more evident than at the beach.
With this in mind, it's incredibly important to exercise caution when photographing on the coast. Weather can change in an instant and I guarantee that the tide can move a lot faster than you expect.
Quicksand, sinking mud, falling rocks, deceptively powerful waves and being cut off by the tide are all very real dangers of beach photography, and no image is worth putting yourself in danger.
Take heed of all warning signs on the coast, check the tide times to make sure you don't get cut off and please don't take any unnecessary risks.
More from Click and Learn Photography:
- Ultimate Guide to Landscape Photography Pt 1
- F-Stop chart infographic
- How to become a better photographer
- Ultimate Guide to travel photography gear
 |
 |
 |
 |

About Alex W.
Alex is the owner and lead writer for Click and Learn Photography. An avid landscape, equine, and pet photographer living and working in the beautiful Lake District, UK, Alex has had his work featured in a number of high profile publications, including the Take a View Landscape Photographer of the Year, Outdoor Photographer of the Year, and Amateur Photographer Magazine.
Thoughts on "Ultimate Guide to beach photography"
|
|
|
|
Learn Photography
You can Get FREE Gifts. Furthermore, Free Items here. Disable Ad Blocker to receive them all.
Once done, hit anything below
|
|
|
|