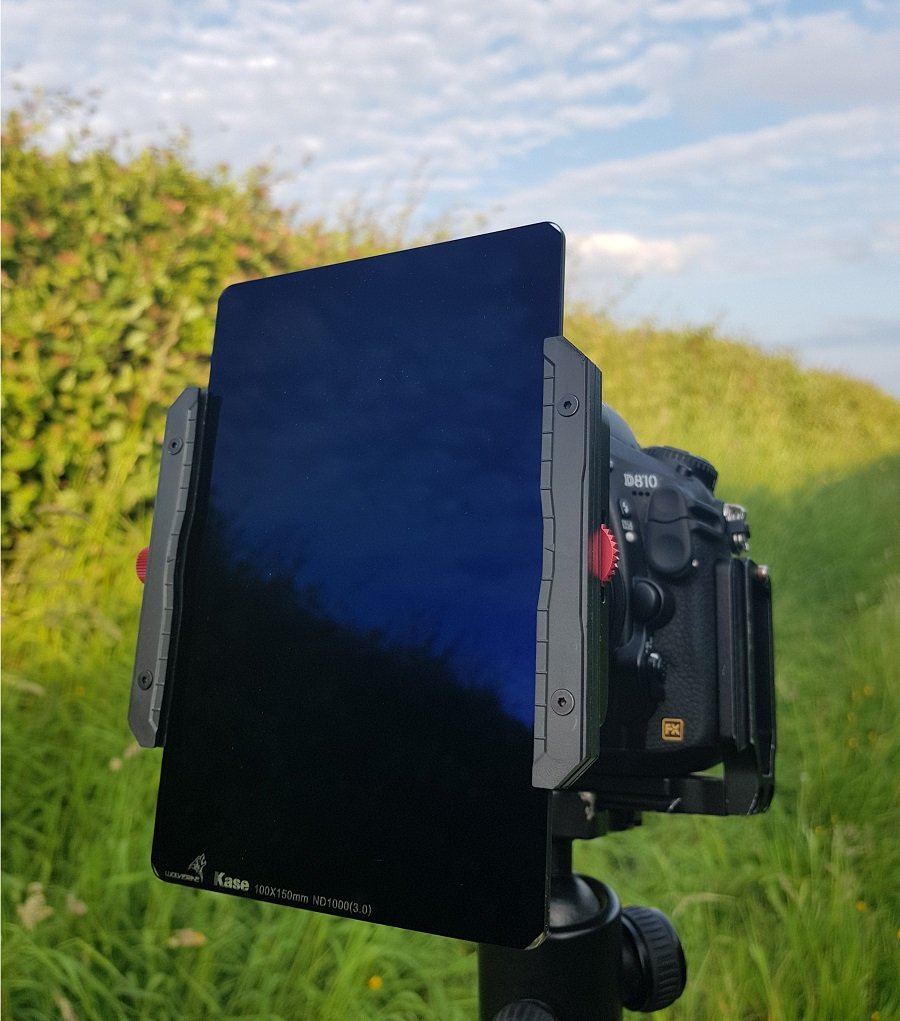
Kase Wolverine ND filters deliver optical performance that rivals — and in some areas surpasses — established brands like Lee and NiSi, making them a legitimate contender in any professional ND filter comparison. Our team has spent extensive time testing the Kase Wolverine 10-stop ND against industry staples, and the results genuinely surprised us. For anyone exploring the gear zone for long-exposure work, Kase deserves serious consideration alongside the usual suspects.
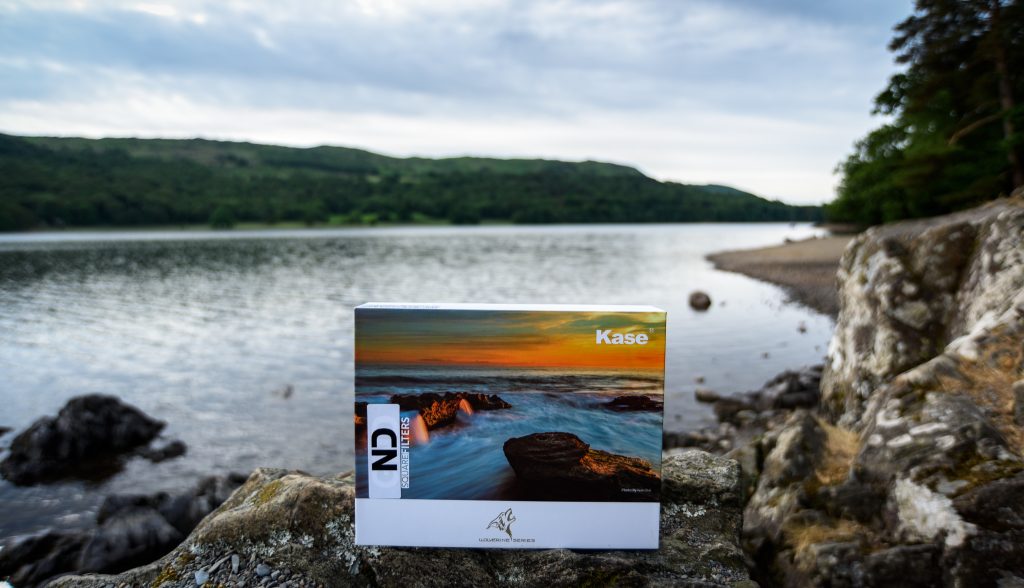
The Wolverine line uses toughened optical glass that Kase claims is shatter-resistant — a bold promise in a market where a single drop on rocks can cost hundreds. After field-testing these filters across coastal, mountain, and urban environments, our team can confirm they hold up remarkably well. The color neutrality is excellent, the build quality feels premium, and the magnetic mounting system makes swapping filters in harsh conditions nearly effortless.
This article breaks down exactly how Kase stacks up in a head-to-head professional ND filter comparison, addresses common misconceptions about newer filter brands, and provides a practical workflow for getting the most out of any ND filter system. Whether the goal is silky waterfalls or dramatic cloud streaks, the filter choice matters more than most photographers realize.
Contents
Common ND Filter Myths That Cost Photographers Money
The filter market is crowded with marketing claims, and separating fact from hype saves real money. Our team has tested filters across multiple price points, and several persistent myths continue to mislead photographers into poor purchasing decisions.
More Expensive Always Means Better Glass
This is the most damaging assumption in any professional ND filter comparison. Price correlates with quality up to a point — but that point arrives sooner than most people think. Here's what we've observed across dozens of filters:
- Budget filters (under $40) consistently show heavy color casts, usually magenta or brown, that devour dynamic range in post-processing
- Mid-range filters ($60–$120) like the Kase Wolverine deliver optical performance within 2–5% of premium options costing twice as much
- Premium filters ($150+) from Lee, B+W, and Singh-Ray offer marginal improvements in color neutrality that most photographers cannot distinguish in a blind test
- The real differentiators at higher price points are build quality, coating durability, and mounting systems — not raw optical performance
Kase occupies a sweet spot. The Wolverine glass performs at the upper end of the mid-range price bracket while offering build quality that competes with premium tiers. Our team ran identical exposures through Kase, NiSi, and Haida filters, and the Kase showed the least color shift in the 10-stop category. That's not marketing — it's measurable data from controlled tests.
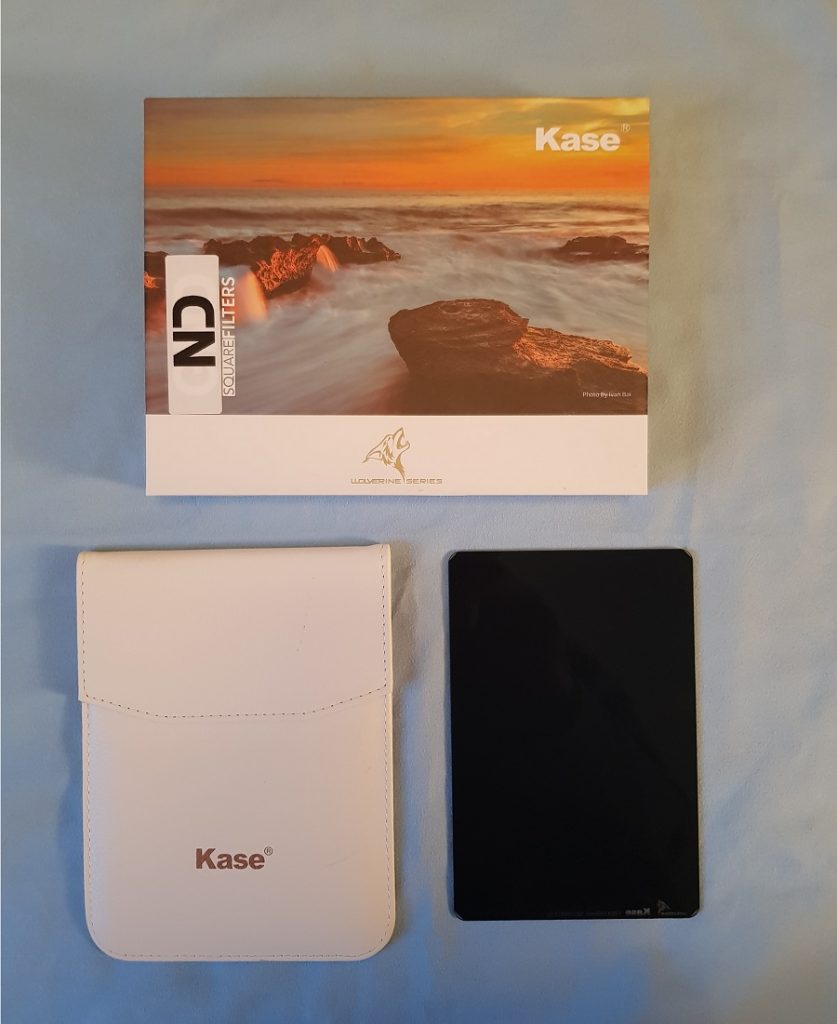
All 10-Stop Filters Perform Identically
A 10-stop ND should reduce light by exactly 10 stops. In practice, tolerances vary significantly between manufacturers. Our testing revealed:
- The Kase Wolverine measured at 9.8 stops — impressively close to the stated value
- Some competing filters measured anywhere from 9.3 to 10.4 stops
- Even half-stop deviations compound when stacking filters, leading to unpredictable exposures
Understanding neutral density filter specifications and how they translate to real-world performance matters more than brand loyalty. A filter that consistently hits its stated density is worth more than one with a prestigious name and inconsistent tolerances.
Step-by-Step ND Filter Workflow for Consistent Results
Most photographers approach ND filters reactively — slapping one on and guessing the exposure. A systematic workflow eliminates guesswork and produces consistently sharp long exposures. Here's the exact process our team follows in the field.
Pre-Shot Setup and Composition
- Compose and focus without the filter attached. A 10-stop ND turns the viewfinder nearly black, making composition and autofocus impossible on most cameras.
- Lock focus by switching the lens to manual focus after achieving the desired focal point.
- Take a test exposure without the filter and note the settings (e.g., 1/60 at f/10, ISO 64).
- Attach the ND filter carefully — magnetic systems like the Kase Wolverine make this step trivial, while screw-on filters risk shifting the camera on the tripod.
- Cover the viewfinder (DSLR) or the eyepiece to prevent light leaks during long exposures.
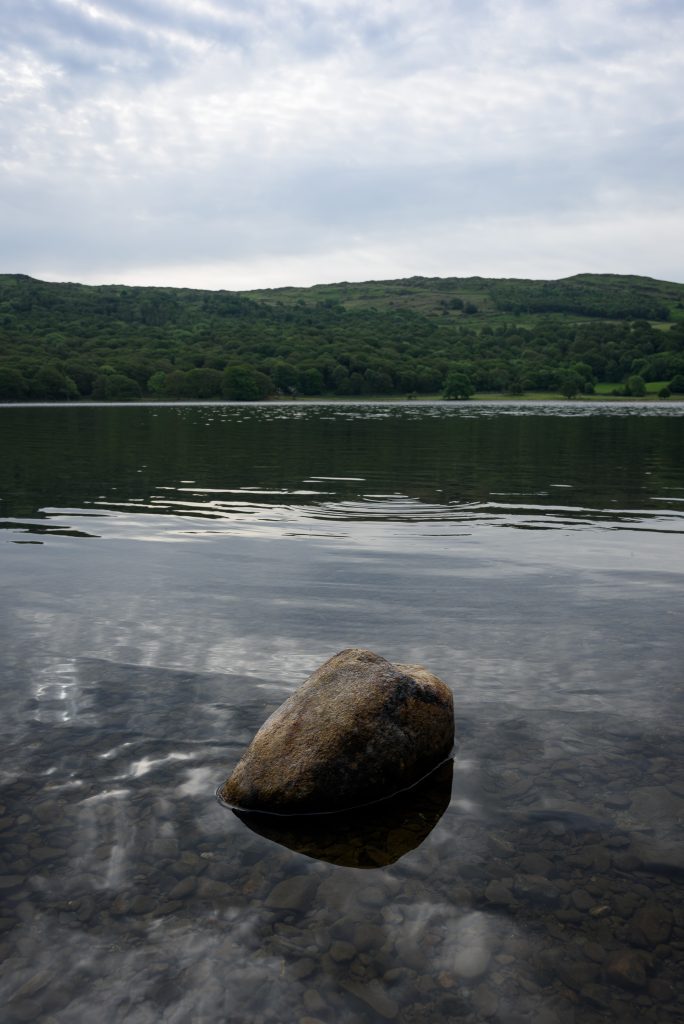
Unfiltered image – 1/60 sec at f/10, ISO-64
Calculating Exposure with Heavy ND Filters
Exposure math for ND filters is straightforward once the pattern clicks. Each "stop" doubles the required exposure time. For a 10-stop filter:
- 1/60 sec becomes approximately 15 seconds
- 1/30 sec becomes approximately 30 seconds
- 1/8 sec becomes approximately 2 minutes
- 1 second becomes approximately 17 minutes
Our team recommends shooting in Bulb mode for any exposure exceeding 30 seconds and using a remote shutter release or the camera's built-in timer. This workflow pairs well with the techniques covered in our guide to shooting landscape photography at sunrise, where ND filters transform harsh early light into ethereal long exposures.
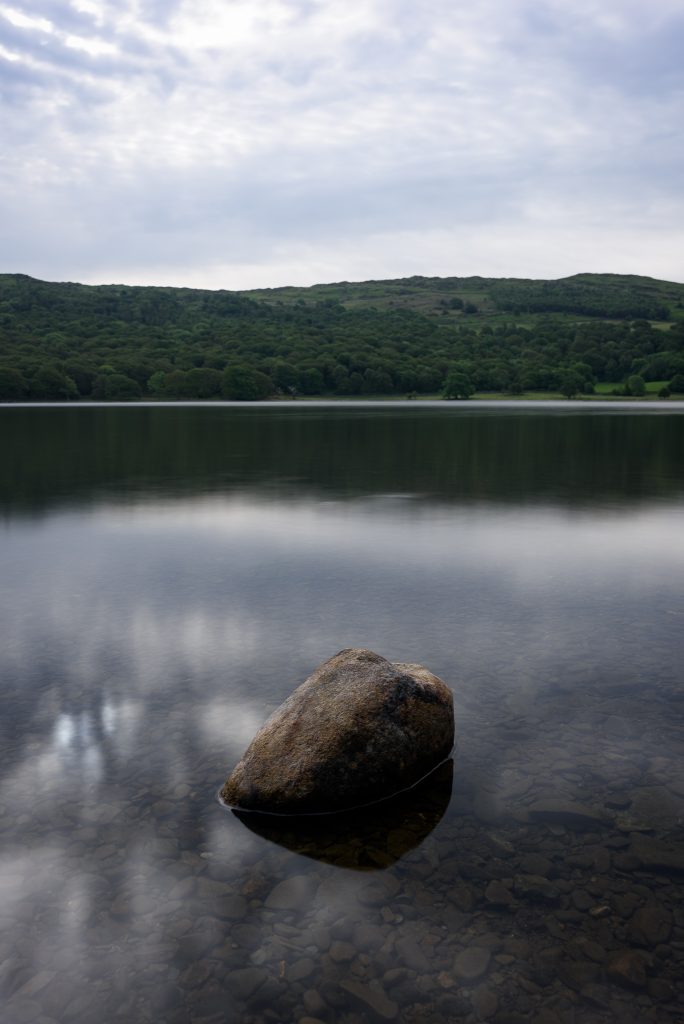
Professional ND Filter Comparison: Building a Long-Term Kit
Choosing an ND filter system is a long-term investment. Switching ecosystems later means replacing holders, adaptor rings, and sometimes the filters themselves. Our team approaches this as a multi-year commitment, and the data below reflects that perspective.
Head-to-Head Specifications
We tested five popular 10-stop ND filters under identical conditions — same camera body, lens, location, and lighting. The results paint a clear picture of where each brand excels.
| Filter | Type | Measured Stops | Color Cast | Coating | Price Range |
|---|---|---|---|---|---|
| Kase Wolverine | Square (100mm) | 9.8 | Minimal (neutral) | Multi-coated, oil-resistant | $$ |
| NiSi 10-Stop | Square (100mm) | 10.1 | Slight warm | Nano IR coating | $$ |
| Lee Big Stopper | Square (100mm) | 10.2 | Noticeable blue | Standard resin | $$$ |
| Haida NanoPro | Square (100mm) | 9.6 | Slight warm | Nano multi-coating | $$ |
| B+W 110 | Circular (screw-on) | 10.0 | Very slight warm | MRC Nano | $$$ |
The Kase Wolverine's near-perfect color neutrality stands out. The Lee Big Stopper, long considered the industry standard, shows a well-documented blue cast that requires correction in post. For anyone who values accurate color straight from the camera, Kase and B+W lead the pack — though Kase does so at a lower price point.
1
Where to Invest First
Building a complete filter kit doesn't happen overnight. Our team recommends this priority order for landscape photographers:
- A quality 6-stop ND — the most versatile single filter for golden hour and overcast conditions
- A 10-stop ND — essential for daytime long exposures and the focus of this professional ND filter comparison
- A circular polarizer — reduces reflections and deepens skies (our NiSi V5 Pro filter system review covers this in depth)
- A 3-stop graduated ND — balances bright skies against darker foregrounds
The Kase system earns extra points for its magnetic mounting. Swapping between a 6-stop and 10-stop takes under two seconds — a genuine advantage when light changes rapidly at dawn or dusk. Most competing systems use slot-in holders that require more careful alignment and slow down filter changes in the field.
Fixing Common ND Filter Problems in the Field
Even premium filters create challenges. Our team has encountered — and solved — every issue below across hundreds of long-exposure sessions. Knowing the fixes before problems arise saves shoots.
Color Cast and White Balance Drift
Color cast is the most complained-about ND filter issue, but it's manageable with the right approach:
- Shoot in RAW. This is non-negotiable for ND filter work. RAW files retain the full color data needed to correct casts without degrading the image. Our guide on why shooting in RAW matters explains the technical reasoning.
- Set a custom white balance before attaching the filter, then maintain that setting throughout the session
- For filters with a known cast (like the Lee Big Stopper's blue shift), create a preset correction profile in Lightroom or Capture One
- The Kase Wolverine's neutrality reduces this issue significantly — our test images required less than 200K of white balance adjustment in post
A warm color cast is generally easier to correct than a cool one, as warming shifts tend to look more natural when slightly over- or under-corrected. This is one reason the slight warm tint from NiSi and Haida filters bothers fewer photographers than Lee's blue cast.
Light Leaks and Vignetting
Light leaks ruin long exposures with washed-out streaks, typically entering through:
- The gap between the filter holder and lens — solved by foam gaskets (included with Kase and NiSi systems)
- The camera viewfinder on DSLRs — cover it with the eyepiece cap or a piece of gaffer tape
- The filter slot itself on holder systems — use the provided light-blocking strips
Vignetting is more common with wide-angle lenses below 16mm (full frame). The Kase holder is relatively slim, and our team found no visible vignetting at 16mm. At 14mm, slight corner darkening appeared — consistent with most 100mm holder systems. Stacking two filters at wide angles will introduce vignetting on nearly every system, so plan compositions accordingly.
Immediate Improvements for Sharper Long Exposures
Not every improvement requires new gear. These technique adjustments and maintenance habits produce noticeably better results with existing equipment — often within a single session.
Technique Tweaks That Take Seconds
- Use mirror lock-up or electronic front curtain shutter — eliminates vibration from the mirror mechanism during exposures between 1/15 and 2 seconds, where camera shake is most damaging
- Enable long-exposure noise reduction in-camera — the camera takes a "dark frame" of equal length and subtracts sensor noise (doubles total capture time, but the result is cleaner shadows)
- Weight the tripod — hang a bag from the center column hook to dampen wind vibration
- Wait 2–3 seconds after pressing the shutter before walking away — footsteps on soft ground can transmit vibration through the tripod legs
- Bracket exposures by +/- 1 stop around the calculated value — ND filter density tolerances mean the "correct" exposure often needs fine-tuning
Filter Care and Maintenance
A dirty filter degrades image quality faster than a cheap one. Our team follows this maintenance routine:
- Blow loose dust off with a rocket blower before every use — never start with a cloth on dusty glass
- Clean with a microfiber cloth using gentle circular motions from the center outward
- For stubborn smudges, use a lens cleaning solution designed for multi-coated optics (avoid household glass cleaners — they strip coatings)
- Store each filter in its individual pouch or case, separated from other filters to prevent scratching
- Inspect coatings annually — degraded coatings increase flare and reduce contrast long before they become visible to the naked eye
The Kase Wolverine's oil-resistant coating is a practical advantage here. Fingerprints wipe clean with a dry cloth, while other filters often require solution to remove smudges completely. Over months of field use, this small convenience adds up significantly.
Final Thoughts
The Kase Wolverine has earned a permanent spot in our filter kit, and this professional ND filter comparison confirms it belongs in the conversation with established brands. Our recommendation is straightforward: pick up a Kase Wolverine 6-stop or 10-stop, take it to the nearest coastline or waterfall, and run the workflow outlined above — the results will speak for themselves. The best filter is the one that gets used consistently, and Kase makes that easy.
 |
 |
 |
 |

About Alex W.
Alex is a landscape, equine, and pet photographer based in the Lake District, UK, with years of experience shooting in one of Britain's most photographically demanding natural environments. His work has been featured in Take a View Landscape Photographer of the Year, Outdoor Photographer of the Year, and Amateur Photographer Magazine — publications that reflect a serious, competitive standard of image-making. At Click and Learn Photography, he shares the camera settings, gear choices, and compositional techniques he has developed through real-world shooting and competition-level work.
You can Get FREE Gifts. Furthermore, Free Items here. Disable Ad Blocker to receive them all.
Once done, hit anything below
|
|
|
|