Over 80% of professional photographers say travel assignments changed the trajectory of their careers, according to a recent survey by the Professional Photographers of America. This travel photography interview and insights session with Alex Pflaum digs into what separates casual snapshots from portfolio-worthy travel images. Our team sat down with Alex — a landscape and travel photographer whose work spans six continents — to uncover the techniques, gear choices, and creative philosophy behind his most compelling shots. For more conversations like this one, check out our full Behind the Lens interview series.
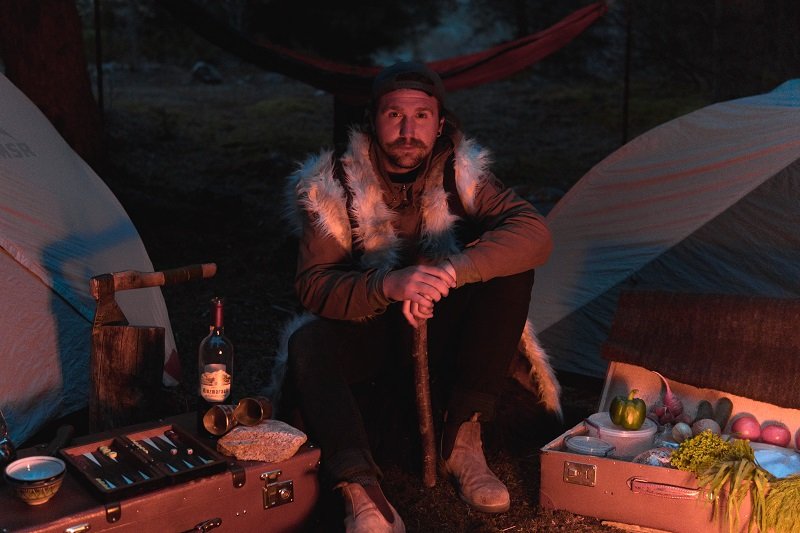
Alex's approach blends careful planning with spontaneous moments — a balance that anyone picking up a camera for travel can learn from. Throughout this piece, we break down his workflow, compare gear options, and share step-by-step methods that our team has validated in the field.
Whether someone is packing a bag for a first photo trip or has dozens of stamps in a passport, the lessons here apply. Let's get into it.
Contents
- Common Travel Photography Problems and How Alex Solves Them
- Mirrorless vs DSLR: A Travel Photographer's Gear Comparison
- Real Shots from the Field: Travel Photography Interview and Insights
- From First Trip to Pro Assignment: Skill Levels in Travel Photography
- Alex's Go-To Travel Photography Tips
- How to Plan a Travel Photography Shoot Step by Step
- Where Travel Photography Skills Apply Beyond Vacations
- Essential Gear in Alex Pflaum's Travel Kit
- Best Practices for Editing and Delivering Travel Photos
- Frequently Asked Questions
- Key Takeaways
Common Travel Photography Problems and How Alex Solves Them
Every travel photographer hits the same walls. Alex has spent years refining solutions to problems that trip up most people on location. Here's what our team hears most often — and how Alex handles each one.
Dealing with Harsh Midday Light
Midday sun kills contrast and blows highlights. Alex doesn't hide from it — he adapts:
- Seek out open shade — doorways, awnings, and narrow alleys create even light in the harshest conditions
- Use a circular polarizer (a filter that cuts glare and deepens skies) to tame reflections
- Embrace the shadows — high-contrast black-and-white conversions work beautifully with midday light
- Shoot into the sun intentionally for silhouettes and flare effects
- Switch to detail and macro work when the wide landscape shots aren't cooperating
Alex told our team: "Most people pack up between 11 AM and 3 PM. That's a mistake. Some of my best-selling images came from the worst light of the day." The key is adjusting expectations rather than fighting physics.
Handling Gear Failures on the Road
Gear breaks. Batteries die. Cards corrupt. Alex's rule is simple: redundancy over perfection.
- Carry two camera bodies — even if the backup is a compact
- Format cards in-camera before each shoot, not on a computer
- Pack a rain cover that weighs almost nothing but saves a $2,000 body
- Keep a smartphone as a legitimate backup — modern phone cameras deliver usable images in emergencies
Mirrorless vs DSLR: A Travel Photographer's Gear Comparison
One of the biggest debates in travel photography comes down to camera systems. Alex has shot with both extensively, and our team asked him to break it down honestly. For a deeper dive into this topic, check out our DSLR or Mirrorless comparison guide.
The Weight Factor
Weight matters more in travel photography than almost any other genre. Alex switched to mirrorless primarily for this reason:
- His full mirrorless kit weighs 30% less than the equivalent DSLR setup
- Lighter gear means longer hikes, less fatigue, and more willingness to bring the camera everywhere
- Compact bodies attract less attention in street photography situations
Performance Tradeoffs on Location
| Feature | DSLR | Mirrorless | Alex's Verdict |
|---|---|---|---|
| Body Weight (avg) | 800–1000g | 500–700g | Mirrorless wins |
| Battery Life | 800–1200 shots | 300–500 shots | DSLR wins — pack extras for mirrorless |
| Autofocus Speed | Excellent (phase detect) | Excellent (hybrid AF) | Tie — modern mirrorless caught up |
| Electronic Viewfinder | No (optical) | Yes | Mirrorless — WYSIWYG exposure preview |
| Weather Sealing | Pro bodies excellent | Varies widely | Research the specific model |
| Lens Selection | Massive legacy catalog | Growing fast + adapters | DSLR still ahead for niche lenses |
| Video Capability | Basic to moderate | Generally superior | Mirrorless for hybrid shooters |
Alex's bottom line: mirrorless is the clear winner for travel unless someone is deeply invested in a DSLR lens collection. Even then, an adapter bridges the gap.
Real Shots from the Field: Travel Photography Interview and Insights
Theory only goes so far. Our team asked Alex to walk through specific images and explain the decisions behind them. This travel photography interview and insights section shows his creative process in action.
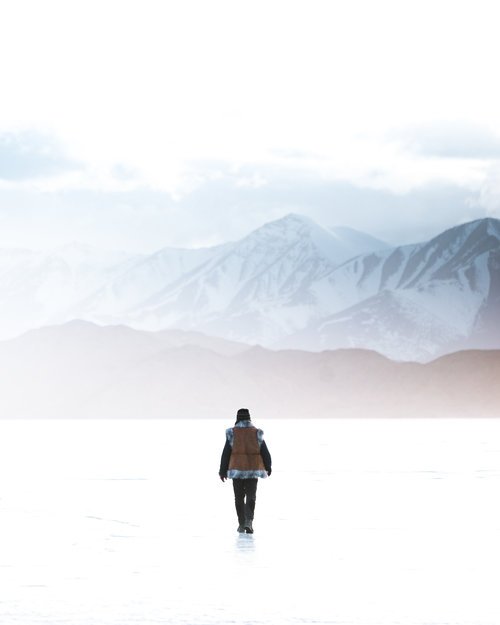
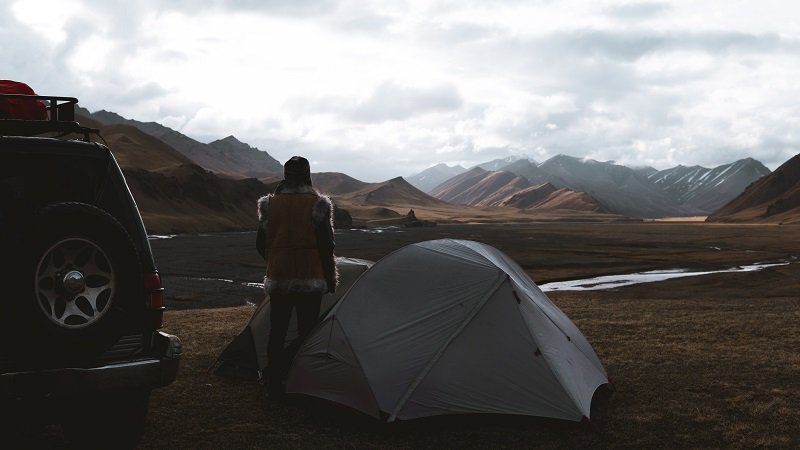
The Iceland Waterfall Series
Alex spent three weeks in Iceland shooting nothing but waterfalls and coastal landscapes. The results were stunning — but the process was anything but glamorous:
- He scouted each location using satellite imagery and travel photography forums before arriving
- Morning shoots started at 4 AM to catch the soft pre-dawn light
- Every waterfall got at least three compositions — wide, medium, and detail
- ND filters (neutral density — darkens the image to allow longer exposures) were essential for silky water effects
- He bracketed exposures (taking multiple shots at different brightness levels) at every location for safety
Street Moments in Southeast Asia
Alex's street work in Vietnam and Thailand takes a completely different approach. No tripod. No filters. Just a camera, a 35mm lens, and patience.
- He shoots from the hip to avoid disrupting the scene
- Market scenes at dawn offer the best combination of light, color, and activity
- A smile and a gesture go further than any language — always ask before photographing people up close
Our team found that these street photography principles align perfectly with what we covered in 5 Places to Start a Street Photography Journey.
Pro Insight: Alex never chimps (checks the LCD screen) during a street session. "Reviewing images breaks concentration. Shoot the entire scene, then review later. The moment is gone the second the camera comes down."
From First Trip to Pro Assignment: Skill Levels in Travel Photography
Alex was candid about the learning curve. Not every photographer needs to go professional, but understanding where someone falls on the skill spectrum helps focus practice time.
Beginner Habits Worth Breaking
- Over-packing gear — beginners bring everything and use almost none of it
- Shooting only at eye level — getting low or finding an elevated vantage point transforms ordinary scenes
- Centering every subject — the rule of thirds exists for a reason, though knowing when to break photography rules is equally important
- Ignoring backgrounds — a cluttered background ruins an otherwise strong foreground subject
- Relying on zoom instead of moving physically closer
Advanced Techniques That Elevate the Work
Once the basics are solid, Alex recommends focusing on:
- Leading lines and layering — using foreground, midground, and background to create depth
- Intentional color palettes — scouting locations based on complementary color opportunities
- Long-exposure creativity during daylight with ND filters
- Blending ambient and flash for portrait-in-environment shots
- Telling a story across a series rather than relying on single hero shots
Alex's Go-To Travel Photography Tips
We asked Alex for the advice he gives most often. These tips come from decades of experience and thousands of shoots across wildly different environments.
Composition in the Field
- Arrive early. Stay late. The best light and fewest tourists overlap perfectly at golden hour.
- Walk the entire scene before raising the camera. Most people shoot from the first spot they stop. Alex walks the full perimeter before committing to a composition.
- Use natural frames — archways, tree branches, windows — to draw the eye into the image. Our guide on using leading lines for better composition covers this principle in detail.
- Shoot verticals and horizontals of every strong composition. Different outlets need different orientations.
- Leave room for text overlay if the images might be used commercially — magazines and websites need that space.
Working with Local Subjects
Travel photography often involves people. Alex has a firm ethical framework:
- Always get consent — a nod or a smile counts, but when in doubt, ask
- Show the image on the LCD and offer to send a copy — it builds trust and often leads to better shots
- Learn five words in the local language: hello, thank-you, beautiful, photo, and please
- Never photograph children without a parent present and approving
- Respect "no" — walking away gracefully is part of being a professional
How to Plan a Travel Photography Shoot Step by Step
Alex doesn't wing it. Every trip follows a structured planning process that maximizes shooting time and minimizes wasted effort. Our team has adopted a similar framework, and the results speak for themselves.
Pre-Trip Research and Shot Lists
- Define the story. What is this trip about? A single theme (markets, architecture, wildlife) focuses the work and produces a stronger portfolio.
- Scout digitally. Use Google Earth, Instagram location tags, and photography forums to identify specific vantage points.
- Build a shot list. Alex writes down 20–30 specific images he wants. He expects to nail 10–15 and discover 5–10 surprises he didn't plan for.
- Check sunrise and sunset times. Apps like PhotoPills or The Photographer's Ephemeris show exactly where the sun hits at any time of day.
- Plan for weather. Overcast days are better for waterfalls and forests. Clear skies suit cityscapes and astrophotography. Rain creates reflection opportunities.
- Pack light. Lay out everything, then remove one-third. If a piece of gear doesn't serve the story, it stays home.
On-Location Workflow
Once Alex arrives, the routine kicks in:
- Day one is purely reconnaissance — no serious shooting, just walking and observing
- He shoots the priority list in the first few days in case weather or logistics change later
- Mid-trip, he reviews images on a laptop and adjusts the shot list based on gaps
- The final day is for re-shoots and those surprise compositions discovered during the trip
Reading about landscape photography planning and preparation provides a solid foundation for anyone building this habit.
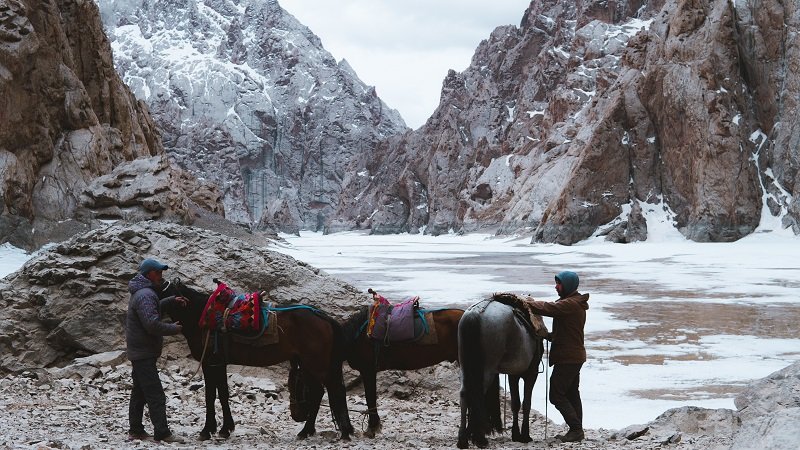
Where Travel Photography Skills Apply Beyond Vacations
Travel photography isn't just for personal trips. The skills Alex has built transfer directly into paying work and creative projects that have nothing to do with tourism.
Commercial and Editorial Work
- Tourism boards and hotel chains hire travel photographers for destination marketing campaigns
- Airlines and cruise lines need fresh content constantly — this is steady, well-paying work
- Magazine editorial spreads for publications like National Geographic Traveler and Condé Nast Traveller
- Stock photography libraries pay royalties on travel images for decades
- Brand partnerships — outdoor gear companies, luggage brands, and camera manufacturers all sponsor travel photographers
Personal Projects and Exhibitions
Alex emphasized that personal work is what keeps the creativity alive. Not everything needs a client attached.
- Gallery exhibitions built from multi-year projects on a single region or theme
- Self-published photo books — print-on-demand services have made this accessible to everyone
- Community workshops where experienced photographers teach in the field
- Collaborative projects with local artists, writers, or filmmakers
Tip: Alex sets aside one trip per year with zero commercial pressure — no client, no deadline, no shot list. "That's where the real creative breakthroughs happen. The commercial work funds it, but the personal work feeds it."
Essential Gear in Alex Pflaum's Travel Kit
Gear lists are personal, and Alex is the first to say that the best camera is the one someone actually carries. That said, his kit has been refined through hard-won experience. Here's what makes the cut.
Camera Bodies and Lenses
- Primary body: A full-frame mirrorless camera — compact, weather-sealed, and excellent in low light
- Backup body: A crop-sensor mirrorless that doubles as a wildlife reach extender
- Wide-angle zoom (16–35mm): The workhorse for landscapes, architecture, and environmental portraits
- Standard zoom (24–70mm): The most versatile lens in the bag — covers 60% of travel situations
- Prime 35mm f/1.8: Alex's street photography lens — fast, light, and inconspicuous
- Telephoto zoom (70–200mm): Only packed when wildlife or compressed landscapes are the primary goal
Some photographers swear by a single-lens approach. Our interview with Matt Holland explored that philosophy in depth.
Filters, Tripods, and Accessories
- Circular polarizer — Alex calls this the one filter that can't be replicated in post-processing
- 6-stop and 10-stop ND filters for long exposures in daylight
- A carbon fiber travel tripod (under 1.5 kg) — stability without the weight penalty
- Spare batteries — at least three for mirrorless systems
- A microfiber cloth and lens pen — dust and salt spray are constant enemies on the road
- A 1TB portable SSD for daily backups — Alex lost an entire card on a trip to Patagonia early in his career and never made that mistake again
Best Practices for Editing and Delivering Travel Photos
Capturing the image is half the job. Alex's editing workflow is methodical, efficient, and designed to handle the volume that travel photography produces. Our team has tested similar workflows and can confirm — a structured approach prevents burnout when facing thousands of images from a single trip.
Lightroom Culling and Editing Workflow
- Import and backup. Every card gets imported to two locations simultaneously — the main drive and an external SSD.
- First pass: flag. Alex goes through every image once, flagging picks and rejects. No editing. Speed is the goal — about two seconds per image.
- Second pass: rate. Flagged picks get a 1–5 star rating. Only 4- and 5-star images move forward.
- Batch edit. Apply a base profile to all selects, then adjust individual images. This cuts editing time by roughly 40%.
- Final polish. Hero images get dedicated time — local adjustments, gradient filters, and fine color grading.
- Export. Full-resolution TIFFs for print. Optimized JPEGs for web and social media. Consistent naming convention for easy retrieval.
Alex processes roughly 500 final images from a two-week trip out of 5,000–8,000 raw captures. That 10% keeper rate is typical among professionals.
Delivery and Portfolio Presentation
- Client work gets delivered through a password-protected online gallery with download permissions
- Portfolio images are curated ruthlessly — Alex shows no more than 30 images from any single trip
- Social media gets its own crop and export settings — what works at 4000px doesn't always work at 1080px
- Print portfolios use a consistent paper stock and presentation book — first impressions matter in meetings with editors and art directors
The editing process is where Alex's travel photography interview and insights really hit home. Technical skill in the field means nothing without a disciplined post-production pipeline.
Frequently Asked Questions
What camera settings does Alex Pflaum recommend for travel photography?
Alex shoots in aperture priority mode for most travel work, setting the aperture based on the scene (f/8–f/11 for landscapes, f/2.8–f/4 for street) and letting the camera handle shutter speed. He keeps auto-ISO on with a minimum shutter speed of 1/125s to avoid motion blur when shooting handheld. For tripod work at golden hour or waterfalls, he switches to manual mode for full control over long exposures.
How does Alex approach travel photography in countries with strict photography laws?
Research comes first. Alex checks local regulations before every trip — some countries restrict photography of government buildings, military installations, or even certain public spaces. He carries a printed copy of his press credentials and always asks permission at religious or culturally sensitive sites. When in doubt, he puts the camera away. No image is worth a legal problem or disrespecting local customs.
What is the single most important piece of advice from this travel photography interview and insights session?
Alex was clear on this: "Show up early and stay late." The majority of travel photographers visit popular locations during peak hours and leave with the same images everyone else has. Arriving before sunrise and staying past sunset — when most tourists leave — produces dramatically better light, fewer distractions, and more authentic moments.
How many lenses should someone pack for a travel photography trip?
Alex recommends two to three lenses maximum: a wide-angle zoom, a standard zoom, and one fast prime. This combination covers landscapes, street scenes, portraits, and details without overloading a bag. Anyone who packs more than three lenses is likely carrying weight that won't get used. A single versatile zoom (like a 24–105mm) is a perfectly valid one-lens solution for those who want to travel ultra-light.
Key Takeaways
- Travel photography success comes from disciplined planning — digital scouting, shot lists, and packing light consistently produce stronger results than winging it on location.
- Mirrorless camera systems have become the clear choice for travel work due to weight savings and modern autofocus performance, though DSLR shooters with existing lens collections can adapt effectively.
- A structured editing workflow (flag, rate, batch edit, polish) prevents post-trip overwhelm and ensures the strongest images from every trip get the attention they deserve.
- The most valuable travel photography interview and insights from Alex Pflaum boil down to one principle: show up early, stay late, and prioritize the story over individual hero shots.
 |
 |
 |
 |

About Alex W.
Alex is a landscape, equine, and pet photographer based in the Lake District, UK, with years of experience shooting in one of Britain's most photographically demanding natural environments. His work has been featured in Take a View Landscape Photographer of the Year, Outdoor Photographer of the Year, and Amateur Photographer Magazine — publications that reflect a serious, competitive standard of image-making. At Click and Learn Photography, he shares the camera settings, gear choices, and compositional techniques he has developed through real-world shooting and competition-level work.
You can Get FREE Gifts. Furthermore, Free Items here. Disable Ad Blocker to receive them all.
Once done, hit anything below
|
|
|
|