5 Hacks to Make Macro Photography Budget Friendly
by Alex W.
Macro photography opens up a whole new world of photographic opportunities, but many shy away from exploring this world because of the price of a dedicated macro lens. We’re here to tell you that it is possible to dive into macro photography on a budget.
There isn’t just one way of lowering the cost of entry to macro photography either. There are 5.
But first…
What is Macro Photography?
Technically speaking, the term macro photography is used to refer to an image which has life size magnification. This is often referred to as 1:1 magnification, and is what most dedicated macro lenses offer.
What this means is that the subject you’re photographing will be projected onto your image sensor at the same size as real life. For example, if you photograph a 1cm long ant at 1:1 magnification on a 35mm full frame sensor (learn more about sensor size here), the ant’s projection onto the sensor will be 1cm long too.
That’s a pretty strict definition though, and is only really used in the technical sense. For the purposes of this article, we’re classing anything half life size (1:2 magnification) and above as macro photography.
And if you want to learn more, here’s a great article on macro photography tips.
Budget Macro Photography Hacks
1 – Close-up Filters / Diopters
-

Hoya 46mm Close-up Multi-Coated Filter Set with +1, +2 & +4...
- Kit contains +1,+2, +4 Filters - Most Cost-Effective Way to Shoot Close
- Reduces Minimum Focal Length of Lens
Rating:

If you want the absolute simplest way into the unseen world around you, buying a close-up filter (sometimes called diopters) could be a way to test the waters.
These are just a set of filters that screw onto the front end of your lens and reduce your lens’ minimum focus distance. It’s basically like a magnifying glass for your lens.
Close-up filters are a cheap and simple way into the world of macro photography, but there are limitations.

As with all of these hacks, your lens will become useless for anything but macro photography while attached. The close-up filters reduce both minimum and maximum focus distance, meaning you can only focus on subjects very close to the camera.
Additionally, these filters often reduce image quality significantly. The curved glass can introduce unwanted artefacts such as ghosting and aberrations.
In my opinion, the following entries on this list of budget macro photography hacks are better options.
Read More: 5 Filters That Could Change Your Photography
2. Extension Tubes
-

Xit XTETC Auto Focus Macro Extension Tube Set for Canon SLR...
- Includes 3 Tubes
- Auto-Focus
Rating:
I first got interested in macro photography after buying a set of extension tubes for my Nikon D3100 kit lens. Here’s the kicker – I still have that same set of extension tubes today, despite having an expensive macro lens sitting in my bag as well.
Extension tubes do what they say on the tin really. They go in between your camera and your lens, increasing the distance between your rear lens element and the camera sensor. The result is a vastly reduced minimum focusing distance.
The exact magnification you can get from extension tubes depends on a number of factors: lens focal length, original lens magnification, and length of extension tube. There’s a handy calculator to figure it out here.
Extension tubes don’t have any optical elements in them either, which means image quality won’t be affected when using them. All you need to do is mount the extension tubes to your camera and then mount your lens to the opposite end.
Bear in mind that some extension tubes don’t have electrical contacts on them. This means that your lens won’t be able to communicate with your camera, so you’ll lose all autofocus and metering capabilities, as well as the ability to change your aperture through your camera.
By the way, are you wondering why I still have my extension tubes?
Well, it’s because they can be used with dedicated macro lenses. That means I attach my set of extension tubes (68mm), mount my 90mm macro lens, and the result is 1.76:1 magnification. Almost twice life size.
There’s a reason that a set of extension tubes are included on my list of favorite budget photography accessories.
3. Reversed Lens Hack
-

Fotodiox 58mm Macro Reverse Adapter for Mounting Lenses with...
- Mounts any lens with a 58mm filter thread for macro use
- Reverse mounting offers an affordable macro solution
Rating:
This is a cool and very inexpensive way to get started in macro photography. All it requires is a camera with an interchangeable lens and a cheap adaptor.
The adaptor mounts to your camera body on one side and screws into the filter thread on the front end of your lens on the other. By some magic of physics, this results in enhanced magnification.
It’s similar to turning a pair of binoculars the wrong way round. Your lens, used normally, is designed to take the big wide world and project it onto a relatively tiny camera sensor. By reversing your lens, it starts to do the opposite.
Reversing your lens has some advantages over extension tubes, such as no lost light and being both lighter and more portable.
However, there is a compromise – There is no way for your camera and lens to communicate, so there’s no AF, metering, or aperture control. In fact, unless you have an old lens with an aperture ring on it, you’ll have to resort to another hack if you want to control the aperture:
- With the lens mounted the correct way, set your desired aperture through the camera.
- Hold down the depth-of-field preview button.
- While still holding it, remove the lens from your camera. The aperture should remain where you left it.
4. Lens Coupling
-

Fotodiox 52mm -52mm, 52-52mm Macro Close-up Reverse Ring,...
- All Metal Design
- Precise Thread
Rating:
This is similar to reversing your lens, but instead of mounting a single lens backwards onto your camera you actually mount a lens backwards onto another lens.
So, you begin with a lens attached to your camera, and using one of the simple and cheap-as-chips adaptors above you mount a second lens, reversed, to the front.
If your two lenses have different filter thread sizes, you’ll need to add step-up or step-down adaptors to the equation as well.
The problem of being unable to change the aperture of the reversed lens remain with this setup, but thanks to the properly fitted lens behind it you will still have use of the TTL metering system.
In addition, you can get some incredible magnification by using a two lens setup. For example, if I mount my 90mm macro lens onto the camera and reverse a 24mm lens I come away with a 3.75:1 magnification ratio!
5. Bellows
-

Fotodiox Macro Bellows Compatible with Canon EOS EF/EF-s...
- Best for extreme Macro photography, with MAX magnify ratio up to 8:1 (3:1 with 50mm Lens)
- Bellows extend from 40mm to 150mm with locking thumb screw.
Rating:
Bellows might look like they’ve come straight from the 1940s, but in reality they’re like extension tubes on steroids.
They work on the same principle as extension tubes, increasing the distance between the lens’ rear element and the camera sensor to decrease minimum focus distance.
However, their accordion style design means you can control the precise amount of extension you use. Not only that, but bellows have a much longer reach than a set of extension tubes.
The bellows above, for example, extend up to 150mm. This would transform my Rokinon 24mm f/1.4 wide angle lens into something capable of achieving over 6:1 magnification.
However, while the advantages of bellows over extension tubes increase, so to do the limitations. Using bellows at maximum extension results in a lot of lost light, so exposure times will increase significantly.
Final Thoughts
There you have it – Five cheap and relatively simple ways to dip your toes into the wonderful, unseen world of macro photography.
As you would expect from a bunch of hacks, all of these methods do come with their limitations. However, four of the five budget hacks result in absolutely no loss of image quality, and they’re all a lot cheaper than buying a macro lens.
Not only that, but things like lens coupling and bellows offer the opportunity for some serious magnification. You can start to push the realms of visibility when you combine wide-angle prime lenses with a set of bellows.
Additionally, you can even combine these hacks to go even further. Think of what you could do with a fully extended bellows and a reversed lens!
That being said, a dedicated macro lens certainly has its uses. For starters, it’s much more convenient due to their being a full range of focus. You can use them at the closest focusing distance for 1:1 macro photography or the maximum focusing distance for regular photography.
-
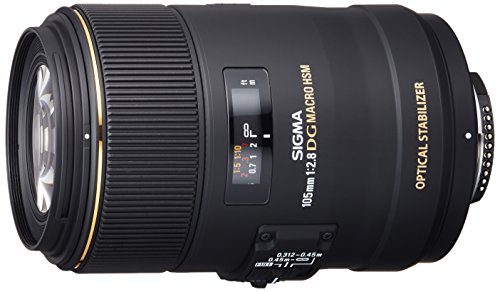
Sigma 258306 105mm F2.8 EX DG OS HSM Macro Lens for Nikon...
- Designed for use with full frame digital SLR cameras. May also be used with smaller APS-c size sensors with a corresponding effective increase in focal length to about 150mm with most cameras
- Focuses down to 1:1 magnification ratio at its closest working distance of 12.3 inches
Rating:
In addition, macro lenses are usually very good optically. They have to be to define detail in such small subjects!
I’d recommend using these budget macro photography hacks to dip your toes in the water, and if you decide that macro photography is for you then invest in a good quality, dedicated macro lens.
Read More…
DSLR or Mirrorless – Which System Works for You?
Ultimate Guide to Buying a Tripod
Back Button Focus – What Is It and Why Should I Use It?
 |
 |
 |
 |

About Alex W.
Alex is the owner and lead writer for Click and Learn Photography. An avid landscape, equine, and pet photographer living and working in the beautiful Lake District, UK, Alex has had his work featured in a number of high profile publications, including the Take a View Landscape Photographer of the Year, Outdoor Photographer of the Year, and Amateur Photographer Magazine.
Thoughts on "5 Hacks to Make Macro Photography Budget Friendly"
|
|
|
|
You can Get FREE Gifts. Furthermore, Free Items here. Disable Ad Blocker to receive them all.
Once done, hit anything below
|
|
|
|