Learning how to photograph dogs comes down to one thing: working with unpredictable subjects on their terms, not yours. Unlike landscape or portrait photography, dog photography demands fast reflexes, patience, and a willingness to get down on the ground. Whether you're shooting your own pet or building a photography portfolio from scratch, these techniques will sharpen your results immediately.
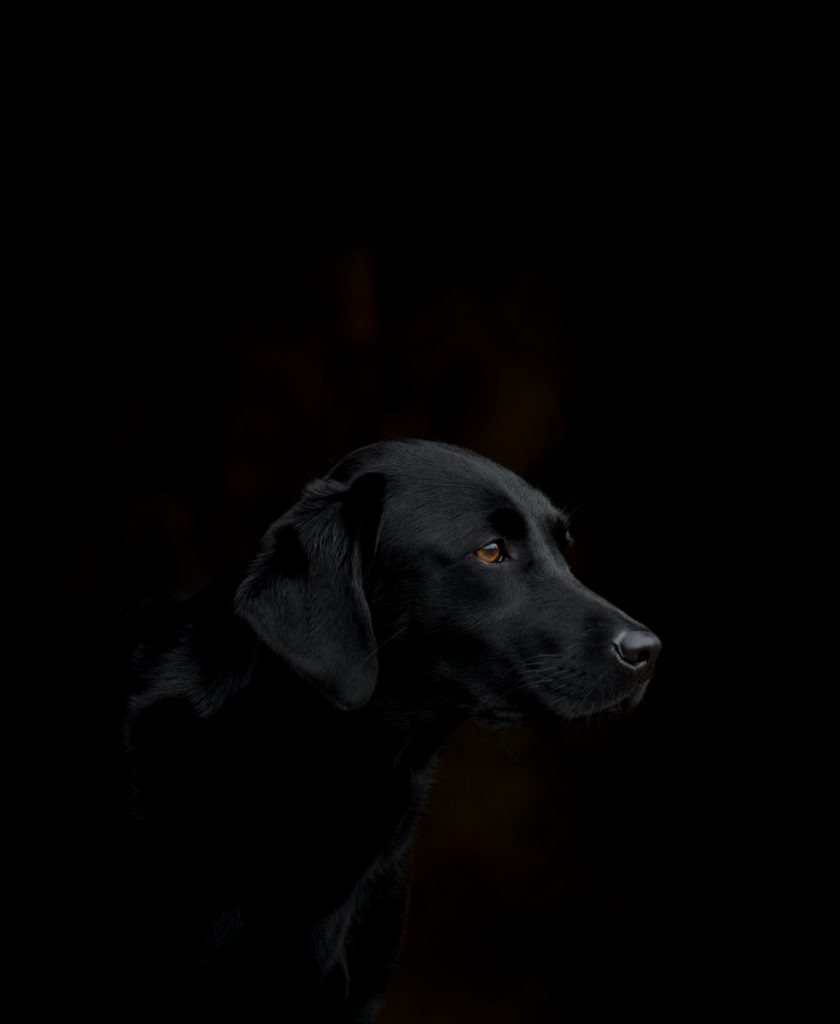
Dog photography sits at the intersection of wildlife and portrait work. You need the technical speed of an action shooter with the compositional eye of a portrait photographer. The good news is that dogs are endlessly expressive — every tilt of the head, every mid-sprint leap gives you material that resonates with viewers on an emotional level.
This guide covers everything from camera settings and lens choices to positioning, lighting, and the mistakes that trip up even experienced photographers. By the end, you'll have a repeatable process for capturing sharp, compelling dog portraits and action shots every time you pick up your camera.
Contents
A Step-by-Step Approach to Photograph Dogs
Knowing how to photograph dogs well starts before you press the shutter. Preparation separates a frustrating session from a productive one.
Gear and Initial Setup
You don't need exotic equipment. A camera with decent autofocus and a fast lens gets you most of the way there. Here's what works:
- A 70-200mm f/2.8 gives you reach and background separation — essential for isolating a dog from a busy park. Check out our roundup of the best lenses for wildlife photography for more options in this range.
- A 35mm or 50mm prime works beautifully for close-up portraits when the dog is calm and cooperative.
- Bring treats and a squeaky toy. These are as important as your lens.
- Set your card to shoot RAW — you'll want the latitude for exposure correction later.
Pre-set your camera before the dog arrives. Dogs don't wait while you fumble through menus. Start in aperture priority at f/2.8–f/4 with auto ISO capped at 3200, then switch to manual once you've read the light.
Session Workflow
Let the dog explore the location for five minutes first. Shoot candidly during this period — some of the best frames come from unguarded moments. Then move into directed work: have the owner position the dog, use a treat to hold attention, and fire in bursts. End with action shots while the dog still has energy.
Quick Settings That Make an Immediate Difference
These adjustments take seconds but dramatically improve your keeper rate when you photograph dogs in any environment.
Shutter Speed for Moving Dogs
| Scenario | Minimum Shutter Speed | Recommended Aperture | Notes |
|---|---|---|---|
| Sitting / posing | 1/250s | f/2.8 – f/4 | Dogs still micro-move; don't drop below 1/250 |
| Walking / trotting | 1/500s | f/4 – f/5.6 | Increase depth of field slightly for movement |
| Running / jumping | 1/1000s | f/4 – f/5.6 | Freeze all four paws off the ground |
| Catching a ball mid-air | 1/2000s | f/4 | Peak action requires peak speed |
| Intentional motion blur | 1/30 – 1/60s | f/8 – f/11 | Pan with the dog for a blurred background effect |
If you're interested in using blur creatively, our guide on motion blur techniques covers panning in detail.
Focus Mode Selection
Switch to continuous autofocus (AF-C on Nikon, AI Servo on Canon). Single-point AF works for stationary dogs, but the moment they move, you need zone or dynamic-area AF to track them. Enable eye detection if your camera supports it — modern mirrorless bodies detect animal eyes reliably now.
For back button focus users, this is where that technique shines. You can hold focus on the dog's eye while recomposing freely. If you haven't tried it yet, read up on half-press shutter focus and when to use it.
Understanding Canine Body Language and Behavior
Technical settings alone won't save a dog photography session. You need to read the animal in front of you. The science of canine behavior is well-documented, and even basic knowledge transforms your timing.
Reading a Dog's Energy Level
Dogs cycle through energy states quickly. A dog that's sprinting one minute will be panting and still the next. Use this rhythm deliberately:
- High energy — shoot action. Burst mode, continuous AF, fast shutter. Don't try to pose them.
- Medium energy — ideal for semi-directed portraits. The dog is alert but controllable.
- Low energy — close-up detail shots. Nose textures, paw pads, ear fur. These quiet moments add variety to a set.
Building Trust Before Shooting
Never rush a dog into posing. Let them sniff your gear. Avoid direct eye contact initially — dogs read sustained eye contact as confrontation. Crouch down to their level rather than looming above them. Once they approach you voluntarily, you've earned the cooperation that produces natural expressions.
The best dog photos happen after the dog forgets the camera exists. Give them ten minutes of play before you start expecting usable frames.
Best Scenarios for Dog Photography
Where and how you shoot a dog matters as much as your settings. Here are the setups that consistently produce strong results.
Outdoor Portraits
Open shade is your best friend. Position the dog under a tree canopy or on the shaded side of a building where the light is soft and even. Avoid dappled light — those bright spots falling through leaves create distracting hot spots on fur. Use the rule of thirds to place the dog's eyes on an intersection point. This simple compositional move elevates a snapshot into a photograph.
For backgrounds, look for uniform textures: tall grass, a hedge wall, or a distant treeline. Busy backgrounds compete with your subject. Open up your aperture to f/2.8 or f/4 to throw the background out of focus.
Action and Play Shots
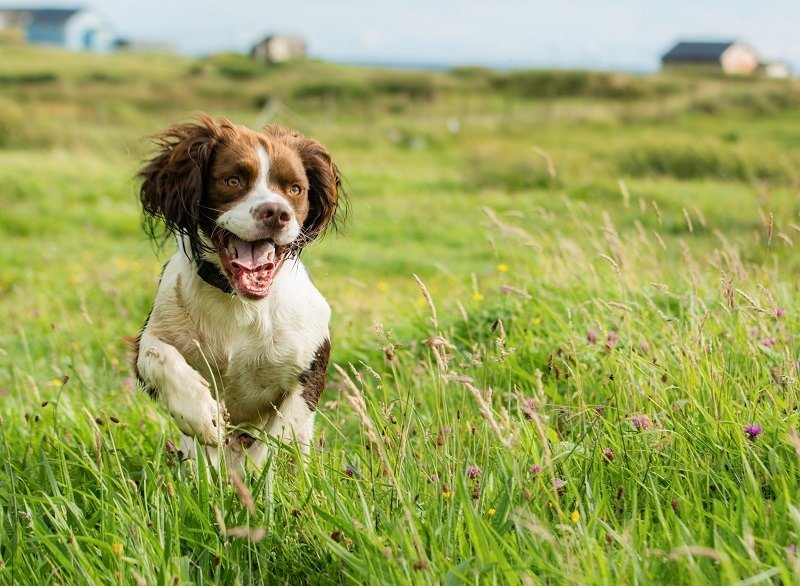
Action shots require you to anticipate, not react. Position yourself where the dog is running toward you — not across your frame. A dog charging at the camera with ears flapping and tongue out is vastly more engaging than a side-on blur.
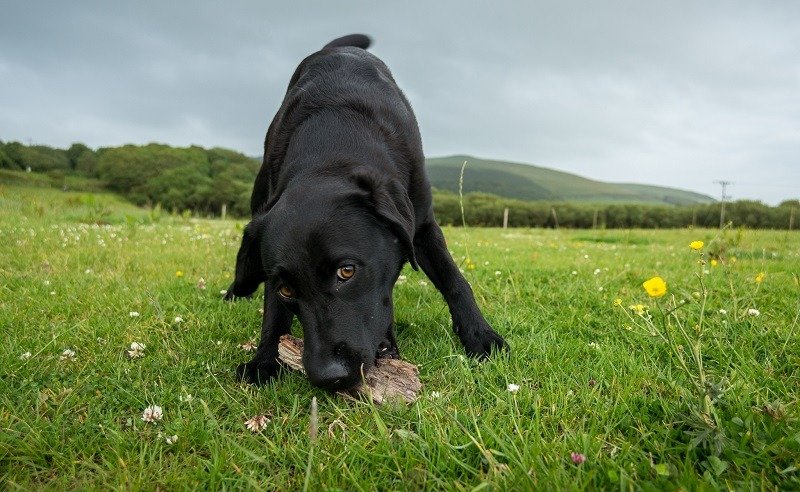
Use a wide-angle lens close up for dramatic perspective — it exaggerates the dog's nose and creates a playful, larger-than-life look. Just be prepared to dodge an excited dog barreling straight into your lens.
When to Shoot and When to Wait
Timing separates good dog photographers from great ones. Not every moment is worth capturing, and pushing through a bad session produces nothing usable.
Ideal Lighting and Timing
The golden hour works as well for dogs as it does for landscape photography on location. That warm, low-angle light adds depth to fur texture and creates a natural rim light around the dog's outline. Midday sun is harsh on any subject, but it's especially unflattering on dogs — it creates deep shadows under the brow that obscure the eyes entirely.
Schedule outdoor sessions for the first or last ninety minutes of daylight. If you're stuck shooting at noon, move to shade and use a reflector to bounce fill light into the dog's face.
Knowing When to Stop
Watch for these signs that the session should end:
- The dog lies down repeatedly and won't engage with treats
- Excessive yawning or lip licking — these are stress signals, not boredom
- The dog turns away from the camera consistently
- You've been shooting for more than 30 minutes with an active dog
Pushing past these signals produces photos with flat expressions and tense body language. End early, review what you've got, and schedule another session if needed. You'll find more tips on patience and deliberate practice in our guide on becoming a better photographer.
Common Dog Photography Mistakes to Avoid
Even experienced photographers fall into these traps when they photograph dogs. Recognizing them saves you from recurring frustration.
Technical Errors
- Shooting from standing height. This is the single biggest mistake. Get on your knees or lie flat. Eye-level perspective creates intimacy and connection. Standing shots look down on the dog and flatten the image.
- Using on-camera flash. Direct flash startles most dogs and produces harsh, unflattering light with red-eye (or green-eye in dogs). Use natural light or off-camera flash bounced from behind.
- Focusing on the nose instead of the eyes. A sharp nose with soft eyes reads as a missed shot. Lock focus on the nearest eye every time.
- Shutter speed too slow. Even a "still" dog breathes, twitches, and shifts weight. Never drop below 1/250s for any dog photography.
Compositional Traps
Centering the dog in every frame gets monotonous quickly. Vary your composition — place the dog to one side with negative space in the direction they're looking. This gives the image breathing room and a sense of narrative. Leave space ahead of a moving dog so the viewer's eye has somewhere to travel.
Another common mistake is cutting off paws or tails at the frame edge. If you're going to crop tight, commit to a head-and-shoulders portrait. Awkward amputations at the ankles look like accidents, not creative choices. Our quickfire tips for beginners cover more framing fundamentals that apply directly here.
Frequently Asked Questions
What is the best camera for dog photography?
Any camera with reliable continuous autofocus and decent burst rate works well. Modern mirrorless cameras with animal eye detection give you a significant advantage for tracking focus. You don't need the most expensive body — a solid mid-range mirrorless with a fast lens outperforms a flagship with a slow zoom.
What lens should I use to photograph dogs?
A 70-200mm f/2.8 is the most versatile choice. It gives you reach for candid shots, beautiful background blur, and enough compression to flatter the dog's features. For indoor or close-up work, a 50mm f/1.8 is affordable and effective.
How do I get a dog to look at the camera?
Hold a treat or squeaky toy right next to your lens. Make an unusual sound — a short whistle or a squeaky noise — just before you press the shutter. Use the sound sparingly. Dogs habituate quickly and will stop responding if you overdo it.
What settings should I use for dog photography?
Start with aperture priority, f/2.8 to f/4, with auto ISO capped at 3200 and a minimum shutter speed of 1/500s. Switch to full manual once you're comfortable reading the light. Use continuous autofocus with eye detection enabled.
How do I photograph a black dog without losing detail?
Overexpose by +1 to +1.7 stops from what your meter reads. Black fur absorbs light and fools meters into underexposing. Shoot in open shade where the light wraps evenly, and use a reflector to bounce light into the fur's texture. Shoot RAW so you can recover highlights if needed.
Is natural light or flash better for dog photography?
Natural light is almost always better. Flash startles many dogs and produces unnatural catchlights. If you must use artificial light indoors, bounce it off a ceiling or wall. Never fire direct on-camera flash at a dog's face.
How do I photograph dogs in motion without blur?
Set your shutter speed to at least 1/1000s for running dogs and 1/2000s for jumping or catching. Use continuous autofocus with zone or dynamic-area tracking. Shoot in burst mode and anticipate where the dog will be rather than chasing it with your lens.
Can I photograph dogs with a smartphone?
Yes, but with limitations. Smartphones struggle with fast-moving subjects and shallow depth of field. Shoot in bright natural light, use burst mode, and get close to the dog. For serious pet photography work, a dedicated camera with interchangeable lenses gives you far more control over focus, exposure, and background separation.
The secret to great dog photography isn't a faster camera or a sharper lens — it's getting on the ground, reading the dog's energy, and being patient enough to let the real moments happen.
 |
 |
 |
 |

About Alex W.
Alex is a landscape, equine, and pet photographer based in the Lake District, UK, with years of experience shooting in one of Britain's most photographically demanding natural environments. His work has been featured in Take a View Landscape Photographer of the Year, Outdoor Photographer of the Year, and Amateur Photographer Magazine — publications that reflect a serious, competitive standard of image-making. At Click and Learn Photography, he shares the camera settings, gear choices, and compositional techniques he has developed through real-world shooting and competition-level work.
You can Get FREE Gifts. Furthermore, Free Items here. Disable Ad Blocker to receive them all.
Once done, hit anything below
|
|
|
|