Cityscape Photography – 11 Tips to Take Your Cityscape Shooting up a Level
by Alex W.
I was standing on a rooftop parking garage in Chicago, shivering at 5 AM, when the first light cracked across the skyline and turned every glass panel into molten gold. That single frame — rushed, slightly crooked, shot on a kit lens — became the image that hooked me on shooting cities for good. If you're looking for practical cityscape photography tips that actually move the needle on your results, you're in the right place. Whether you're a photography beginner or someone who's been shooting landscapes for a while and wants to tackle urban environments, these strategies will sharpen your approach from planning through post-processing.
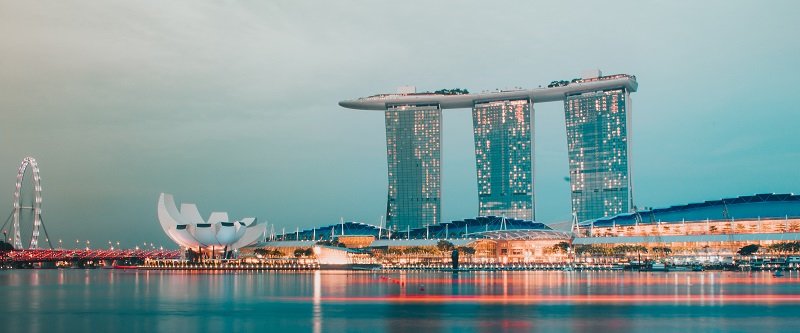
Cities are living, breathing subjects. They shift with the light, the weather, and the time of day in ways that rural landscapes simply don't. That constant change is both the challenge and the reward. In this guide, you'll learn how to read urban light, choose the right moments, avoid the most common pitfalls, and build a consistent cityscape portfolio over time.
Contents
- What Makes Cityscape Photography Unique
- Essential Gear and Keeping It Ready
- When to Shoot and When to Wait
- Cityscape Photography Tips for Stronger Compositions
- Mistakes That Hold Your Cityscape Work Back
- Cityscape Photography Myths Worth Ignoring
- Pros and Trade-offs of Shooting Cityscapes
- Building a Long-term Cityscape Portfolio
- Next Steps
What Makes Cityscape Photography Unique
Cityscape photography sits at the intersection of landscape, architecture, and street photography. You're working with subjects designed by humans — buildings, bridges, roads — but the light, atmosphere, and timing follow the same natural rhythms that govern any outdoor genre. That duality is what makes it so compelling and so demanding.
Urban vs. Natural Light
The biggest difference between cityscapes and rural landscapes is mixed lighting. In the countryside, the sun is your primary light source. In a city, you're juggling:
- Natural sunlight bouncing off glass and steel
- Artificial street lights, neon signs, and building illumination
- Vehicle headlights and tail lights creating streaks
- Interior light spilling through thousands of windows
This mix is what gives cityscapes their energy. Understanding how to balance these sources — particularly during the transition from daylight to darkness — separates competent cityscape shooters from exceptional ones. If you need a refresher on how aperture, shutter speed, and ISO interact in these mixed conditions, check out our guide on the exposure triangle explained.
The Role of Architecture
Buildings give you geometry that nature rarely offers. Parallel lines, repeating patterns, dramatic vertical scale — these are compositional tools baked right into the scene. Your job is to find the angle that turns functional architecture into visual drama. According to Wikipedia's overview of urban photography, the genre has roots in the earliest days of the medium, when long exposures naturally suited static cityscapes over moving human subjects.
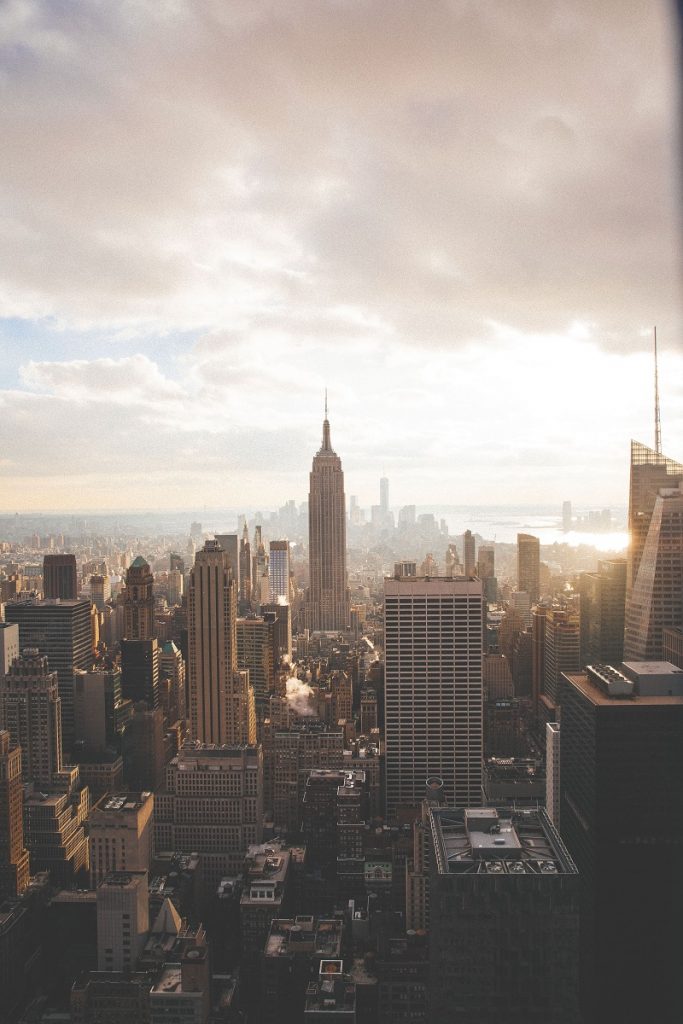
Capturing the setting sun's light on the side of towering buildings is a great way to add depth and texture to your cityscape images
Essential Gear and Keeping It Ready
Camera and Lens Selection
You don't need the most expensive kit to shoot strong cityscapes, but some gear choices make a significant difference:
- Wide-angle lens (14-24mm) — your workhorse for sweeping skyline shots and tight streets where you can't back up
- Mid-range zoom (24-70mm) — versatile for isolating architectural details and compressing perspective
- Telephoto (70-200mm) — useful for pulling distant landmarks closer and creating layered compositions
- Sturdy tripod — non-negotiable for long exposures, blue hour, and night work
- Remote shutter release or 2-second timer — eliminates camera shake during slow shutter speeds
- ND filters — essential for daytime long exposures of water or traffic
| Lens Type | Best Use in Cityscapes | Typical Focal Length | Tripod Needed? |
|---|---|---|---|
| Ultra-wide | Skyline panoramas, interior architecture, converging verticals | 14-20mm | Recommended |
| Wide-angle | Street-level cityscapes, bridges, foreground interest | 20-35mm | Recommended |
| Standard zoom | Versatile framing, detail isolation, rooftop shots | 24-70mm | Situational |
| Telephoto | Compressed layers, distant landmarks, skyline stacking | 70-200mm | Yes |
| Tilt-shift | Correcting converging verticals, miniature effect | 17mm / 24mm | Yes |
Protecting Your Equipment in the Field
Urban environments are harder on gear than you might expect. City shoots often mean:
- Dust and grit from construction sites and traffic
- Rain, puddles, and salt spray near waterfronts
- Accidental bumps from pedestrians on crowded sidewalks
- Rapid temperature changes moving between heated interiors and cold exteriors
Keep a microfiber cloth accessible at all times — front element smudges from humidity are constant. Use a UV or clear protective filter on your most-used lens. When shooting near water, drape a plastic bag over the camera body between shots. After every urban session, blow out your lens mount and sensor area with a rocket blower. Salt air and fine grit cause more damage over time than a single dramatic drop.
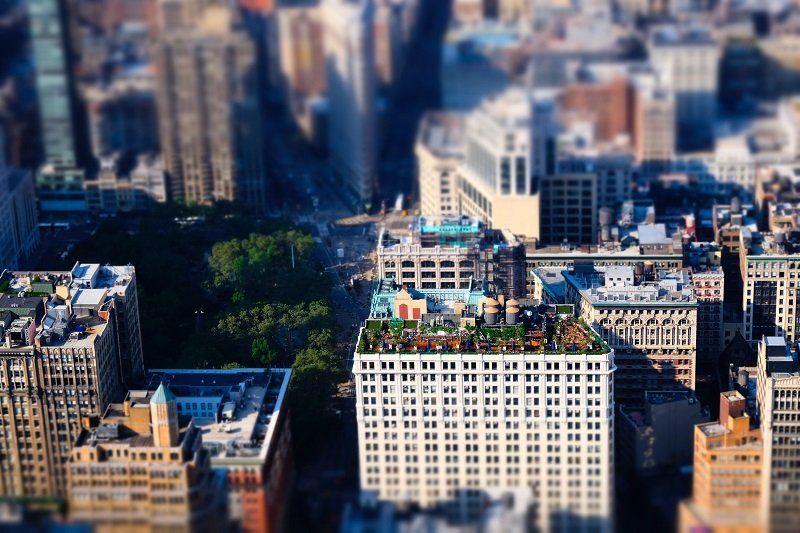
A high vantage point offers a unique perspective on the city, and adding a tilt-shift lens to the equation results in an even more distinctive image.
When to Shoot and When to Wait
Golden Hour, Blue Hour, and Beyond
Timing is everything in cityscape photography. The same skyline can look flat and forgettable at noon and breathtaking 30 minutes after sunset. Here's the breakdown:
- Blue hour (20-40 minutes after sunset) — the sky turns deep blue while city lights are already on. This is the single most productive window for cityscapes. The ambient light balances perfectly with artificial illumination.
- Golden hour (the hour before sunset) — warm, directional light rakes across building facades and creates dramatic shadows. Best for shots where architecture is the hero.
- Pre-dawn — similar quality to golden hour but with emptier streets and calmer water. You trade convenience for cleaner compositions.
- Full darkness — high contrast between lit buildings and black sky. Requires longer exposures and careful highlight management.
- Midday — harsh, overhead light flattens most scenes. Save it for abstract shots, shadow play, or indoor architecture.
Blue hour is the cityscape photographer's secret weapon. Arrive 30 minutes before sunset, set up, and keep shooting until the sky goes fully dark — you'll capture the entire transition and find your best frame somewhere in that sequence.
Weather as a Creative Tool
Don't pack up when the forecast turns grey. Some of the most striking cityscape images come from "bad" weather:
- Fog — isolates tall buildings, creates layered depth, adds mystery
- Rain — produces reflections on streets and sidewalks that double your compositional elements
- Storm clouds — dramatic skies that give cityscapes emotional weight
- Snow — transforms familiar skylines into something entirely new
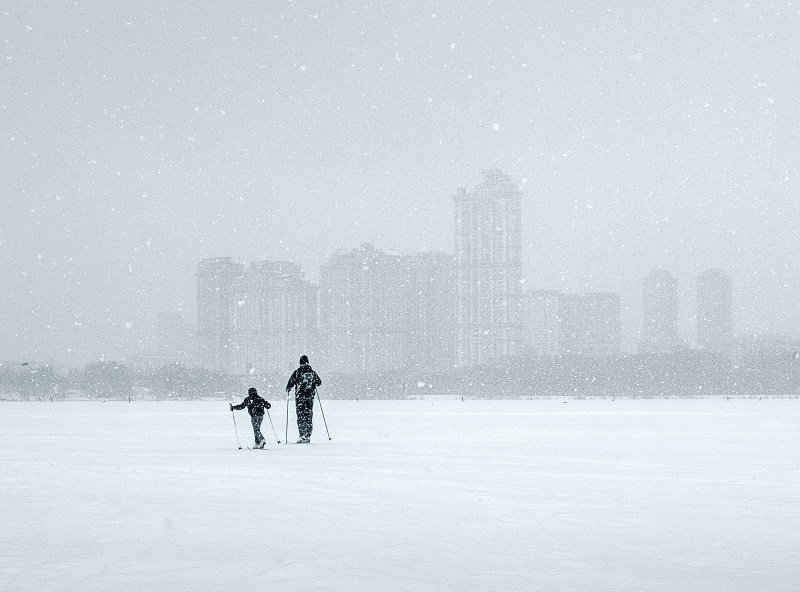
Try to consider the city from all different angles and in all different conditions to vary your portfolio and keep things fresh.
The only weather that truly works against you is a flat, featureless overcast sky with no drama. Even then, you can crop the sky out or focus on street-level details instead. The point is: don't let conditions dictate whether you shoot. Let them dictate what you shoot.
Cityscape Photography Tips for Stronger Compositions
Leading Lines and Reflections
Cities are packed with natural leading lines — roads, bridges, railways, building edges, even crosswalk stripes. Use them to pull the viewer's eye toward your focal point. The most effective compositions place a leading line starting from the lower third of the frame and pointing toward the main subject.
Reflections are equally powerful. Look for:
- Rivers, harbors, and canals — the classic mirror shot
- Rain-slicked streets and puddles — available after any downpour
- Glass building facades — they reflect other structures, creating visual layers
- Fountains and pools — often located near photogenic civic buildings
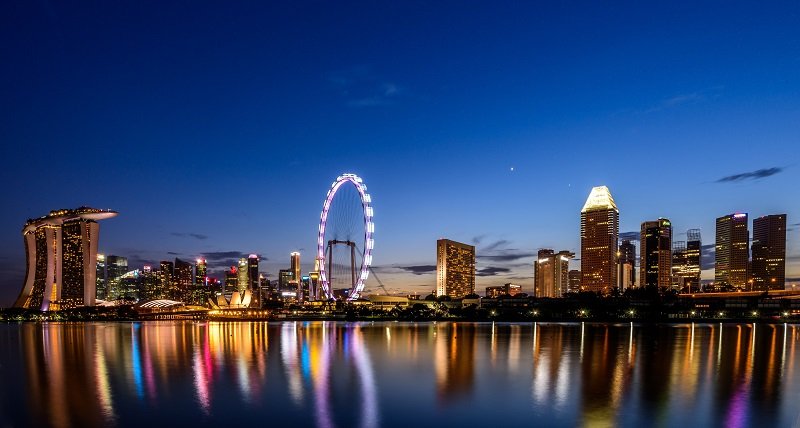
Combining natural light, artificial light, and reflections in water is a path to a gorgeous final image.
Abstract Angles and Elevated Perspectives
One of the most underused cityscape photography tips is simply changing your elevation. Most people shoot from street level — which means most cityscape photos look the same. Break away from that default:
- Look straight up between tall buildings for dramatic converging verticals
- Find rooftop bars, parking garages, or observation decks for elevated panoramas
- Shoot from bridges for a mid-level perspective that captures both skyline and foreground
- Get low — shoot from ground level to include puddle reflections or foreground texture
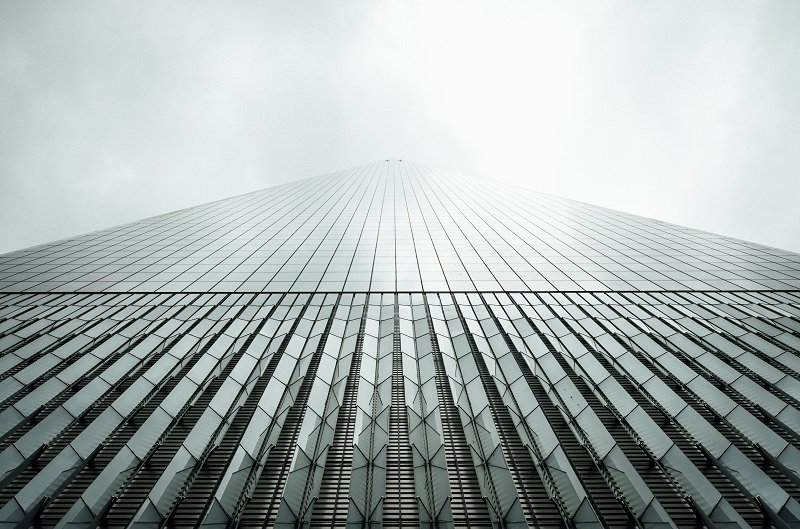
Capturing more abstract images of the city around you is very rewarding, so make use of all the architect's hard work by looking up at the buildings.
Don't overlook the human element either. A single silhouetted figure or a crowd of blurred pedestrians can add scale and narrative to a cityscape that pure architecture alone cannot provide.
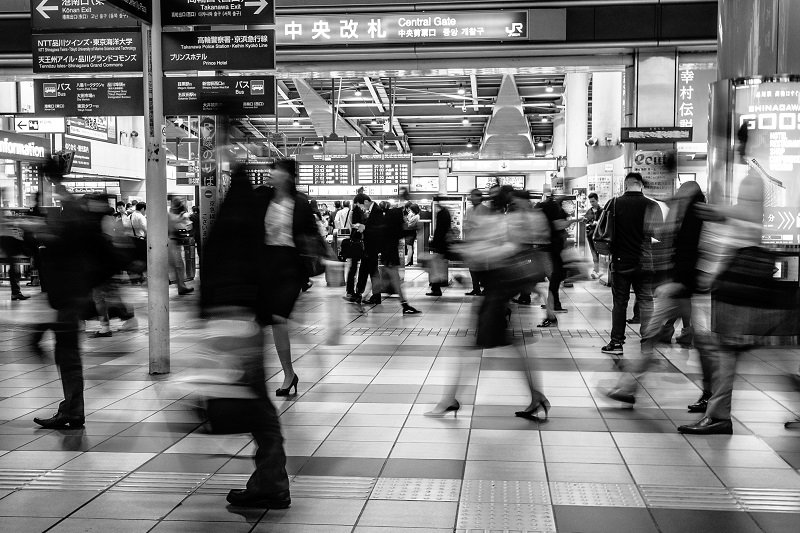
Slow down your shutter speed and capture the hustle and bustle of city life by blurring the movement of pedestrians.
Mistakes That Hold Your Cityscape Work Back
Technical Errors
These are the most common technical mistakes that weaken cityscape images:
- Crooked horizons — the number one killer. Cities are full of vertical and horizontal lines that make even a slight tilt painfully obvious. Use your camera's grid overlay or a hot-shoe level.
- Blown highlights — city lights at night easily clip to pure white. Use your histogram, not the LCD preview. Bracket your exposures if the dynamic range exceeds a single frame.
- Shooting wide open — f/1.8 or f/2.8 doesn't give you the depth of field cityscapes demand. Most scenes work best between f/8 and f/11.
- Ignoring white balance — auto white balance struggles with mixed lighting. Set a custom Kelvin value or shoot RAW and adjust later.
- Raising ISO unnecessarily — if you're on a tripod, there's no reason to shoot above ISO 100-400. Use longer shutter speeds instead.
Creative Ruts
Technical competence alone won't save a boring composition. Watch out for these creative traps:
- Always shooting the "postcard view" — the most famous vantage point of any skyline has been photographed millions of times. Find your own angle.
- Centering everything — the rule of thirds exists for a reason. Place your skyline on the lower or upper third, not dead center.
- Ignoring foreground — a cityscape without foreground interest is a record shot. Look for bridges, railings, flowers, or water to anchor the bottom of your frame.
- Only shooting horizontally — vertical cityscapes work beautifully, especially when tall buildings dominate the scene.
If you want more ideas on when to follow composition guidelines and when to intentionally break them, take a look at our article on photography rules and when to break them.
Cityscape Photography Myths Worth Ignoring
Gear Myths
"You need a full-frame camera for serious cityscape work." No. Crop sensor cameras produce excellent cityscapes. The smaller sensor actually gives you extra reach with telephoto compression, which is useful for isolating distant landmarks. What matters is a camera with good dynamic range, reliable autofocus, and RAW capability.
"You must use a wide-angle lens." Wide-angle is useful, but some of the most compelling cityscape images are shot at 70mm, 100mm, or longer. Telephoto compression stacks buildings into dense, layered compositions that wide angles simply cannot achieve.
Technique Myths
"Long exposure is the only way to shoot cityscapes at night." Long exposure is one tool. You can also shoot handheld at higher ISOs for a grittier, more spontaneous look. Modern sensors handle ISO 3200-6400 cleanly enough for sharp handheld night shots — especially if you're going for a street photography feel within your cityscape.
"HDR is essential for city photography." HDR can recover shadow and highlight detail, but heavy-handed HDR processing is the fastest way to make a cityscape look artificial. A single well-exposed RAW file with careful processing usually produces better results than a multi-bracket HDR merge. If you do bracket, blend manually rather than relying on automated HDR tone mapping.
"You need permission to photograph buildings." In most countries, buildings visible from public spaces are fair game for photography, including commercial use. There are exceptions — some countries have "freedom of panorama" restrictions — but in general, if you're standing on a public sidewalk, you can shoot whatever is visible.
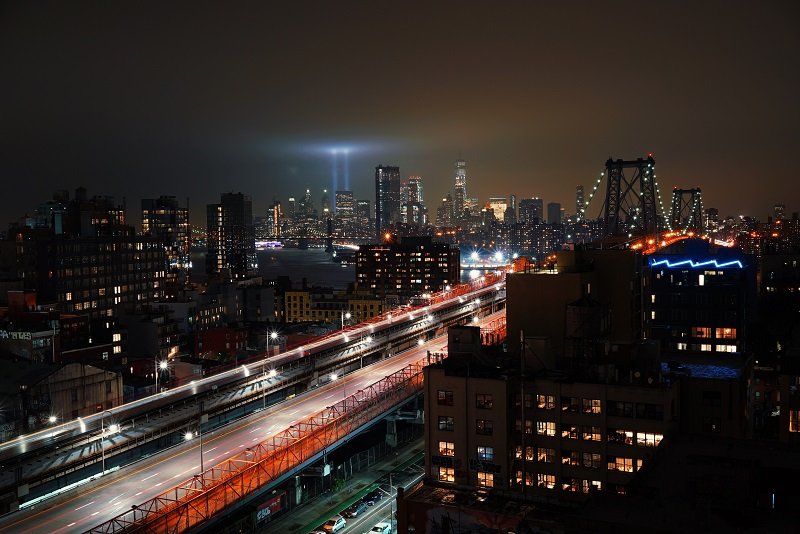
The Tribute in Light in New York City is a poignant reminder of one of the most devastating days in modern history.
Pros and Trade-offs of Shooting Cityscapes
Every genre has its strengths and compromises. Here's an honest look at what cityscape photography offers and what it demands:
Advantages:
- Accessible — every city is a potential subject, and you don't need to travel to remote locations
- Year-round shooting — cities don't have an off-season the way wildflower meadows or autumn foliage do
- Infinite variety — the same skyline produces different images at different times, seasons, and weather conditions
- Strong commercial demand — real estate, tourism, editorial, and stock markets all need quality cityscape imagery
- Low barrier to entry — you can start with any camera and a single lens
Trade-offs:
- Crowded locations — popular vantage points attract other photographers, tourists, and security guards
- Light pollution — limits astrophotography-style long exposures and makes star trails impossible in most urban areas
- Tripod restrictions — some observation decks, bridges, and public spaces prohibit tripods
- Safety concerns — shooting alone at night in unfamiliar urban areas requires awareness and planning
- Post-processing complexity — mixed lighting means more time correcting white balance and color casts
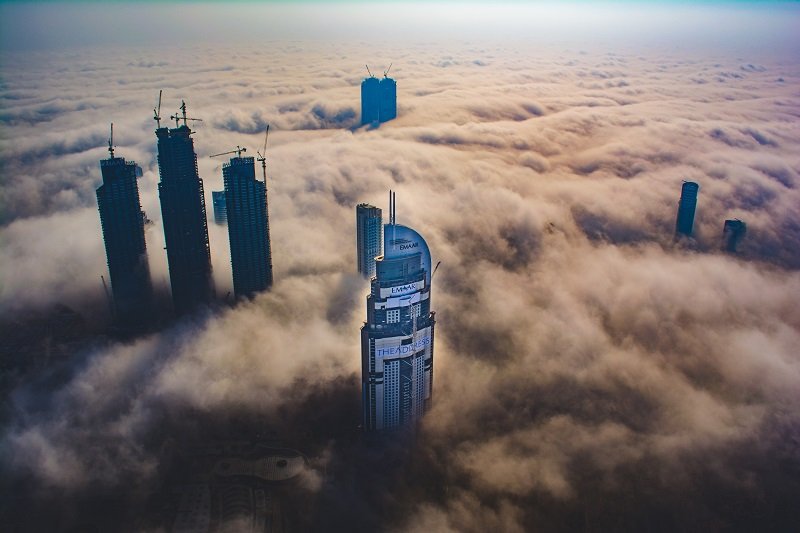
Capturing the skyscrapers emerging from the Dubai fog is a goal of many cityscape photographers worldwide.
Building a Long-term Cityscape Portfolio
Return Shoots and Seasonal Coverage
The biggest long-term cityscape photography tip is simple: go back. One visit to a location is a starting point, not a finished product. The photographers whose cityscape work stands out are the ones who return to the same spots across different seasons, weather conditions, and times of day.
Build a shot list for your home city. Identify five to ten locations and commit to shooting each one in:
- All four seasons
- Fog, rain, and clear skies
- Golden hour, blue hour, and full darkness
- Weekday (empty streets) vs. weekend (crowds and activity)
Over time, this approach produces a body of work that shows range and depth — far more impressive to editors, clients, and galleries than a scattered collection of one-off shots from a dozen different cities.
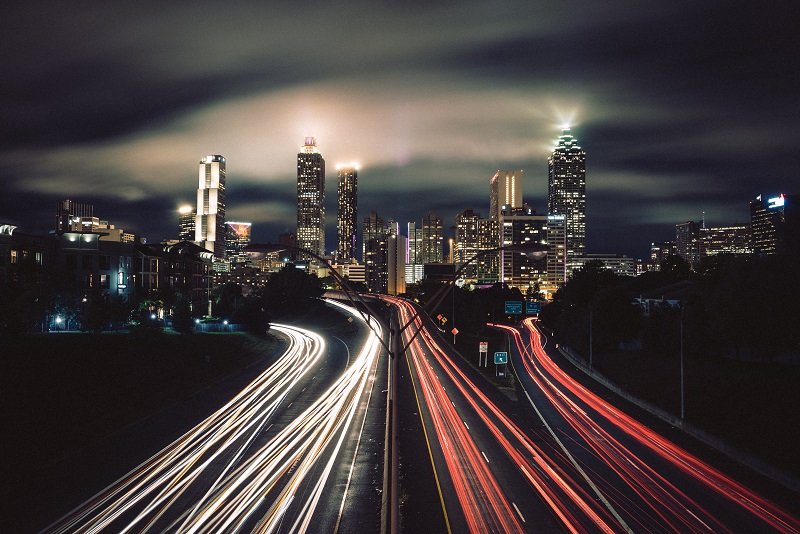
Light trails from moving cars can be a real attention grabber for the viewer, and will guide their eye towards the gorgeous cityscape beyond.
Curating and Sharing Your Work
A strong portfolio isn't about quantity. Apply these curation principles:
- For every shoot, select no more than three to five final images. Ruthless editing is what separates a portfolio from a photo dump.
- Group images into coherent series — same city across seasons, or different cities shot with a consistent visual style.
- Process consistently. Pick a color palette and tonal approach and stick with it across an entire series. Mixing warm, desaturated edits with punchy, saturated ones in the same set looks disjointed.
- Show variety within consistency. Include wide establishing shots, mid-range architectural details, and tight abstracts — all processed with the same visual language.
If you're looking for additional cityscape inspiration and location-specific techniques, our guide to cityscape photography tips from Seoul covers how to apply these principles in one of Asia's most photogenic cities.
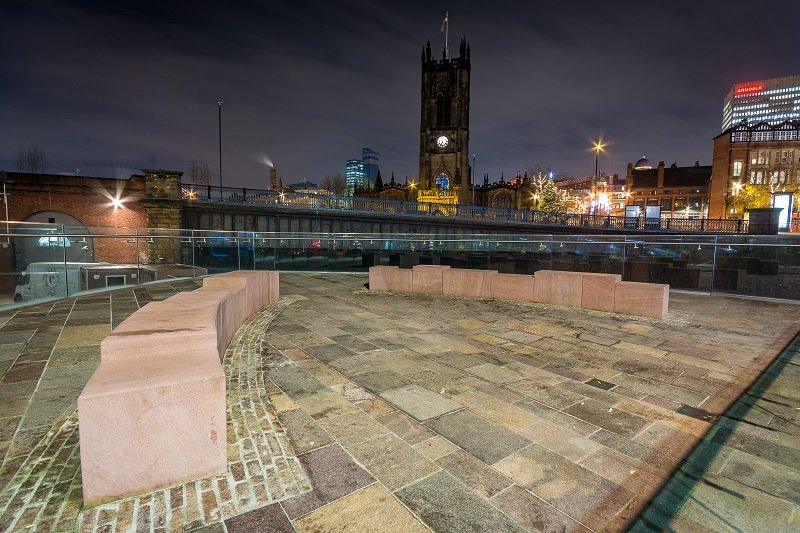
Use a small aperture to transform the light from street lights into dramatic sunstars.
Next Steps
- Scout three locations in your nearest city this week. Visit during daylight to find compositions, note where the sun sets relative to the skyline, and identify safe spots to set up a tripod. Use Google Maps satellite view to pre-plan if you can't visit in person.
- Shoot one blue hour session within the next seven days. Arrive 30 minutes before sunset with a tripod, your widest lens, and a fully charged battery. Shoot continuously through the transition from golden light to full darkness. Review the results and identify the frame where ambient and artificial light balance best.
- Process three images from your session with a consistent editing style. Pick one color temperature, one contrast profile, and one cropping approach. Apply it to all three and compare them side by side. This builds the visual consistency your portfolio needs.
- Return to your best location under different conditions. If you shot in clear skies, go back on a foggy or rainy evening. Photograph the same composition and compare. This trains your eye to see how weather transforms a scene.
- Share your strongest single image for feedback. Post it in a photography community, send it to a mentor, or enter it in a local competition. External feedback accelerates growth faster than self-critique alone.
 |
 |
 |
 |

About Alex W.
Alex is a landscape, equine, and pet photographer based in the Lake District, UK, with years of experience shooting in one of Britain's most photographically demanding natural environments. His work has been featured in Take a View Landscape Photographer of the Year, Outdoor Photographer of the Year, and Amateur Photographer Magazine — publications that reflect a serious, competitive standard of image-making. At Click and Learn Photography, he shares the camera settings, gear choices, and compositional techniques he has developed through real-world shooting and competition-level work.
You can Get FREE Gifts. Furthermore, Free Items here. Disable Ad Blocker to receive them all.
Once done, hit anything below
|
|
|
|