The Photographer’s Glossary – A Guide to Common Photography Terms
by Alex W.
Ever picked up your camera manual and felt like you were reading a foreign language? You're not alone — and the good news is that learning common photography terms for beginners is far simpler than it looks. Once you decode the jargon, every tutorial, gear review, and workshop suddenly makes sense. This glossary breaks down the terms you'll encounter most often, organized by how you'll actually use them behind the camera. If you're just getting started, check out our photography beginners resources for more foundational guides.
Whether you're reading lens specs, adjusting settings in manual mode, or trying to follow along with a YouTube tutorial, photography vocabulary is the bridge between confusion and confidence. This guide covers everything from aperture to white balance — with practical context so you remember what each term actually does.
Contents
- How Exposure Settings Work: The Core Terms
- Best Practices for Understanding Light Terminology
- Lens and Gear Terms on a Budget
- Composition Terms: From Beginner to Advanced
- When Shots Go Wrong: Troubleshooting Terminology
- Putting Common Photography Terms Into Practice
- Frequently Asked Questions
- Final Thoughts
How Exposure Settings Work: The Core Terms
Every photograph starts with exposure — the amount of light that reaches your camera's sensor. Understanding these common photography terms for beginners gives you direct control over how bright, sharp, and detailed your images turn out. These three settings form what photographers call the exposure triangle, and mastering them is non-negotiable.
Aperture, Shutter Speed, and ISO
- Aperture (f-stop) — The size of the opening in your lens. A low number like f/1.8 means a wide opening (more light, shallow depth of field). A high number like f/16 means a narrow opening (less light, more of the scene in focus).
- Shutter Speed — How long your sensor is exposed to light. A fast shutter speed (1/1000s) freezes motion. A slow speed (1/30s or longer) lets in more light but risks motion blur.
- ISO — Your sensor's sensitivity to light. Low ISO (100-400) produces clean images. High ISO (3200+) brightens dark scenes but introduces grain, or noise.
These three work together like a balancing act. Widen your aperture and you can lower your ISO. Slow your shutter and you can use a narrower aperture. Every exposure decision is a trade-off between these variables.
Exposure Compensation and Metering
Your camera's built-in light meter tries to calculate proper exposure automatically, but it gets fooled by tricky scenes — snowy landscapes, backlit portraits, dark concert venues. That's where exposure compensation comes in. It's a simple dial (usually marked with +/- EV) that tells your camera to deliberately over- or underexpose from its metered reading.
Metering modes control how your camera reads the light:
- Evaluative/Matrix — Reads the entire frame. Best for evenly lit scenes.
- Center-weighted — Prioritizes the middle of the frame.
- Spot — Reads only a tiny area (usually 2-5% of the frame). Perfect for high-contrast situations.
Pro tip: When shooting in snow or against bright skies, dial in +1 to +2 EV of exposure compensation. Your camera's meter will try to make white scenes grey without that correction.
Best Practices for Understanding Light Terminology
Light is the raw material of photography, and the vocabulary around it helps you describe — and control — what's happening in your frame. Knowing these terms transforms you from someone who reacts to light into someone who works with it deliberately.
White Balance and Color Temperature
White balance ensures that white objects appear truly white in your photos, regardless of the light source. Every type of light has a color temperature, measured in Kelvin (K). Candlelight sits around 2000K (warm/orange), daylight around 5500K (neutral), and shade around 7500K (cool/blue).
Your camera's auto white balance (AWB) handles most situations well, but it struggles with mixed lighting. Presets like Tungsten, Fluorescent, Daylight, and Cloudy give you manual control. If you shoot in RAW instead of JPEG, you can adjust white balance in post-processing without any quality loss.
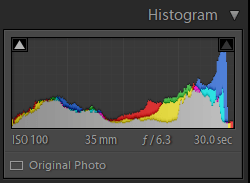
Dynamic Range and Histogram
Dynamic range is your camera's ability to capture detail in both the brightest highlights and darkest shadows of a scene simultaneously. A high dynamic range means you can recover more detail in post-processing. This is why landscape photographers often shoot during golden hour at sunrise — the softer light fits within their sensor's dynamic range more easily.
The histogram is a graph on your camera's LCD that shows the distribution of tones in your image. The left side represents shadows, the right side highlights. If the graph is bunched up against either edge, you're losing detail — that's called clipping.
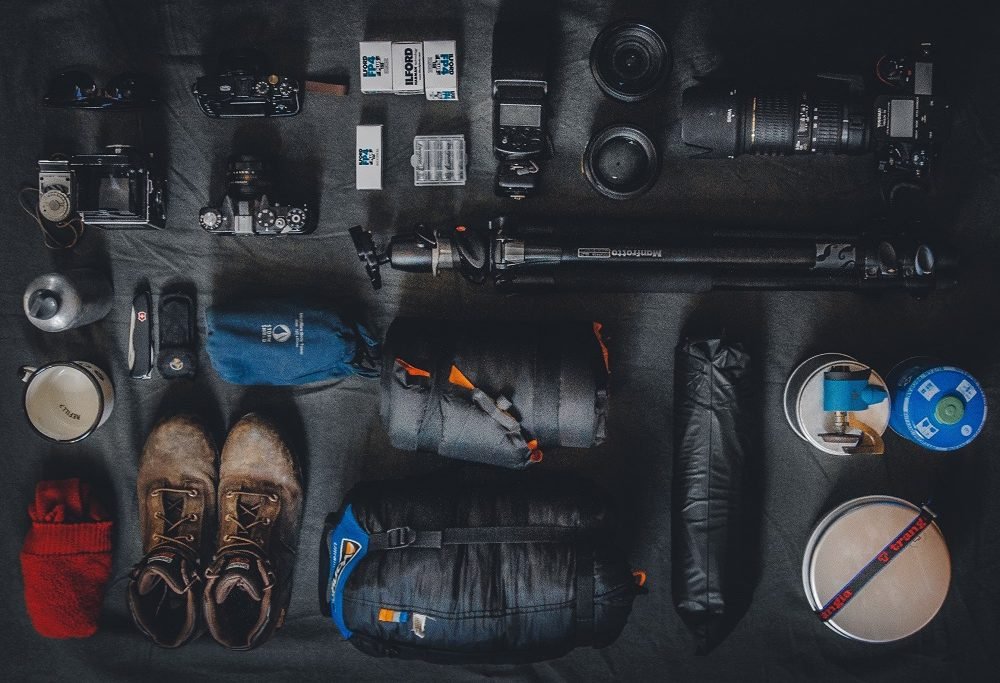
Lens and Gear Terms on a Budget
Photography gear has its own dialect, and lens terminology is especially dense. You don't need expensive equipment to take great photos, but you do need to understand what the numbers on your lens barrel actually mean when you're making purchasing decisions.
Focal Length and Crop Factor
Focal length, measured in millimeters, determines your lens's angle of view. Here's a quick reference for common photography terms for beginners related to focal lengths:
| Focal Length | Category | Typical Use | Budget Option |
|---|---|---|---|
| 10-24mm | Ultra-wide | Architecture, landscapes, astrophotography | Kit wide-angle zoom |
| 24-35mm | Wide-angle | Street photography, environmental portraits | 35mm f/1.8 prime (~$200) |
| 50mm | Standard/Normal | Portraits, everyday shooting | 50mm f/1.8 ("nifty fifty" ~$125) |
| 85-135mm | Short telephoto | Portraits, events, details | 85mm f/1.8 (~$300) |
| 200-600mm | Telephoto | Wildlife, sports, moon shots | 70-300mm kit telephoto |
Crop factor is critical if you're using an APS-C or Micro Four Thirds camera rather than full-frame. A 50mm lens on an APS-C body with a 1.5x crop factor gives you an effective field of view equivalent to 75mm on full-frame. This matters when comparing lenses across different camera systems like DSLRs and mirrorless bodies.
Prime vs Zoom and Specialty Lenses
A prime lens has a fixed focal length (like 50mm). It doesn't zoom, but it typically delivers sharper images, wider maximum apertures, and lighter weight. A zoom lens covers a range (like 24-70mm), offering versatility at the cost of some optical quality and size.
Specialty lenses you'll encounter:
- Macro — Designed for extreme close-ups at 1:1 magnification or higher
- Tilt-shift — Controls the plane of focus; used in architecture and creative miniature effects
- Fisheye — Ultra-wide with heavy barrel distortion (intentional)

Composition Terms: From Beginner to Advanced
Composition is how you arrange visual elements within your frame. You can have perfect exposure and razor-sharp focus, but weak composition kills a photo. These terms give you the language to analyze what works in images you admire — and apply those principles to your own shooting. For a deeper dive, see our complete guide to photography composition.
Rule of Thirds and Leading Lines
The rule of thirds divides your frame into a 3×3 grid. Placing your subject along these lines or at their intersections creates more dynamic, visually engaging images than dead-center placement. Most cameras can overlay this grid on the LCD or viewfinder.
Leading lines are elements in your scene — roads, fences, rivers, shadows — that guide the viewer's eye toward your subject. They create depth and direct attention exactly where you want it.

Negative Space, Framing, and Depth
As you progress, you'll start using more nuanced composition techniques:
- Negative space — Empty areas around your subject that give it room to breathe and draw attention
- Framing — Using doorways, arches, branches, or other elements to create a frame-within-a-frame
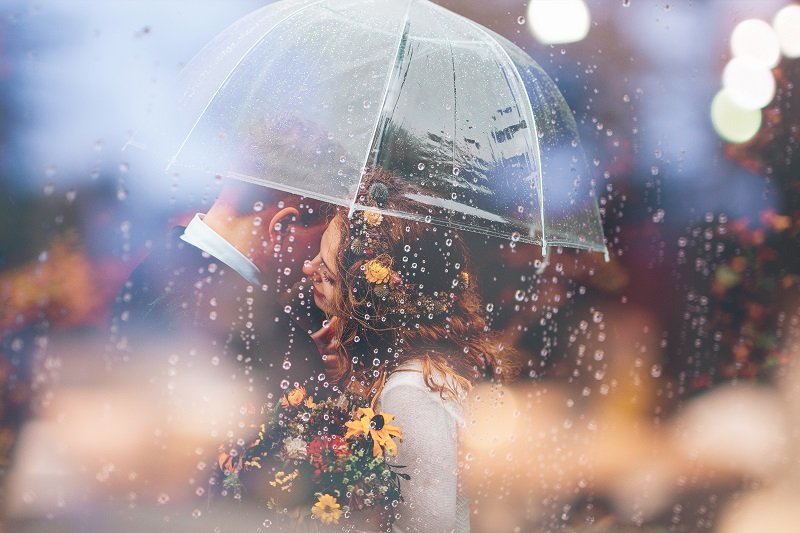
- Depth of field (DOF) — How much of your scene is in sharp focus. Shallow DOF (f/1.8) isolates your subject; deep DOF (f/11+) keeps everything sharp
- Bokeh — The aesthetic quality of out-of-focus areas, especially light highlights. Determined by lens construction and aperture shape
Warning: Don't get so caught up in composition "rules" that you stop experimenting. The rule of thirds works, but centered compositions and deliberate symmetry create equally powerful images in the right context.

When Shots Go Wrong: Troubleshooting Terminology
Knowing the name of a problem is the first step to fixing it. These common photography terms for beginners describe issues you'll run into repeatedly — and once you can name them, you can solve them quickly.
Noise, Motion Blur, and Chromatic Aberration
- Noise/Grain — Speckled, grainy texture caused by high ISO settings. Luminance noise (grey speckles) is less distracting than color noise (random colored pixels). Modern cameras handle ISO 3200-6400 well; older bodies struggle past 1600.
- Motion blur — Unwanted blur from camera shake or subject movement. The general rule: your shutter speed should be at least 1/focal length (e.g., 1/200s for a 200mm lens) to avoid camera-shake blur.
- Chromatic aberration (CA) — Purple or green fringing along high-contrast edges. Common in cheaper lenses, especially at wide apertures. Easily corrected in Lightroom or other editing software with one click.
- Lens flare — Bright streaks or haze caused by direct light hitting the front element. A lens hood helps prevent it, though some photographers use it creatively.
Fixing Focus and Exposure Problems
Focus issues come in several flavors:
- Back-focus / front-focus — Your camera consistently focuses behind or in front of your intended subject. DSLRs are more prone to this than mirrorless systems. Most mid-range bodies let you calibrate via AF micro-adjustment.
- Hunting — The lens racks back and forth without locking focus. This happens in low light, low-contrast scenes, or when your AF point lands on a flat, textureless area.
- Clipping — When highlights blow out to pure white or shadows crush to pure black, losing all detail. Check your histogram to catch this before chimping (repeatedly checking the LCD).
Exposure problems usually come from trusting your camera's meter in challenging conditions. Backlit subjects, reflective surfaces, and mixed lighting all fool automatic metering. Switching to spot metering or using exposure lock (AE-L) on your subject solves most of these situations.
Pro insight: If your images consistently look slightly dark, check your LCD brightness setting. A bright screen in the field makes properly exposed images look overexposed, leading you to underexpose compensating for a problem that doesn't exist.
Putting Common Photography Terms Into Practice
Knowing definitions is one thing — applying them in the field is where the real learning happens. Different photography genres emphasize different terms, and understanding which concepts matter most for your style of shooting accelerates your growth significantly.
Genre-Specific Applications
Your priority terms shift depending on what you shoot:
Landscape photography demands fluency in dynamic range, hyperfocal distance, and graduated filters. When you're shooting during golden hour with a solid planning approach, terms like color temperature and exposure bracketing become your daily vocabulary. Hyperfocal distance — the focus point that maximizes your depth of field from foreground to infinity — is particularly essential. According to Wikipedia's explanation of hyperfocal distance, it depends on focal length, aperture, and the acceptable circle of confusion for your sensor size.
Street photography puts you in fast-paced situations where zone focusing, shutter priority, and burst mode dominate. If you're heading out for the first time, review our guide to the best places to start your street photography journey.
Portrait photography revolves around bokeh, catchlights (the reflection of light in a subject's eyes), and focal compression — the way telephoto lenses flatten perspective and flatter facial features.
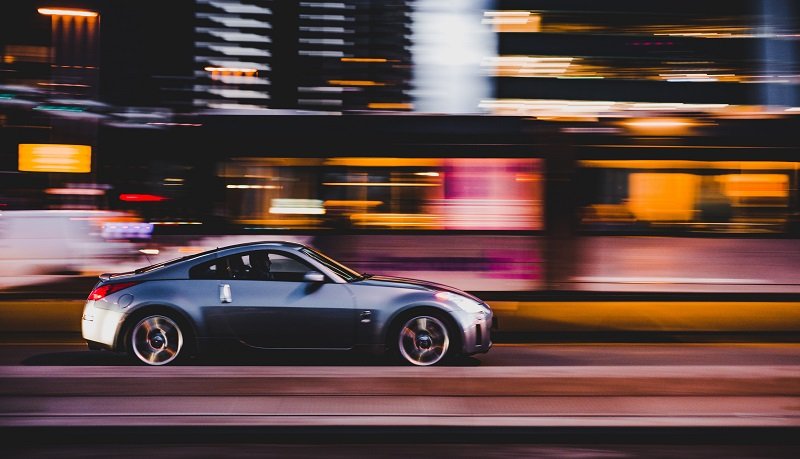
Panning is a technique where you track a moving subject with a slow shutter speed, keeping the subject relatively sharp while the background streaks into motion blur. It's one of those terms that makes zero sense until you see it — and then you immediately want to try it.
Building Your Vocabulary Over Time
You don't need to memorize every term before picking up your camera. The best approach is layered learning:
- Start with exposure — aperture, shutter speed, and ISO. These affect every single photo you take.
- Add composition — rule of thirds, leading lines, depth of field. These turn technically correct photos into compelling ones.
- Learn your camera's specific terms — AF modes, metering modes, drive modes. Read your manual with the camera in hand.
- Expand into post-processing vocabulary — curves, levels, masking, dodging and burning. These matter once you start editing.
- Pick up genre-specific terms — as you discover what kind of photography excites you, the specialized vocabulary will follow naturally.
Shoot in manual mode as early as possible. You'll learn terms three times faster when you're forced to make every setting decision yourself rather than letting the camera choose for you. Pair that with reviewing your images from practice sessions and you'll internalize the vocabulary through repetition.
Frequently Asked Questions
What are the most important common photography terms for beginners to learn first?
Start with the exposure triangle: aperture, shutter speed, and ISO. These three settings control every aspect of your image's brightness and directly influence depth of field, motion blur, and image noise. Once you're comfortable adjusting these in manual mode, move on to composition terms like rule of thirds and leading lines.
What does "shooting in RAW" mean?
RAW is an uncompressed file format that preserves all the data your camera sensor captures. Unlike JPEG, which processes and compresses the image in-camera, RAW files give you far more flexibility when editing — especially for adjusting white balance, recovering blown highlights, and pulling detail from shadows.
What is the difference between optical zoom and digital zoom?
Optical zoom uses the physical movement of lens elements to magnify your subject, maintaining full image quality. Digital zoom crops into the center of your image and enlarges it digitally, which degrades resolution. Always use optical zoom when available and avoid digital zoom entirely.
What does "stops" mean in photography?
A stop is a unit of measurement for light. One stop doubles or halves the amount of light reaching your sensor. This applies across all three exposure settings: opening your aperture by one stop (e.g., f/5.6 to f/4) doubles the light, as does halving your shutter speed (1/250s to 1/125s) or doubling your ISO (400 to 800).
Why do my indoor photos look yellow or orange?
That color cast comes from incorrect white balance. Indoor tungsten bulbs emit warm-toned light around 2700-3000K. Set your white balance to the Tungsten/Incandescent preset, or shoot in RAW and correct the color temperature during editing. Mixed lighting (daylight from windows plus overhead bulbs) is even trickier — RAW gives you the most correction latitude.
What is bokeh and how do you achieve it?
Bokeh refers to the quality and appearance of out-of-focus areas in a photograph, particularly how point-light sources render as soft circles or shapes. You achieve pronounced bokeh by using a wide aperture (f/1.4–f/2.8), getting close to your subject, and ensuring significant distance between your subject and the background.
What is the difference between AF-S and AF-C focus modes?
AF-S (single-servo autofocus) locks focus once and holds it — ideal for stationary subjects like landscapes and posed portraits. AF-C (continuous-servo autofocus) continuously tracks and adjusts focus on moving subjects, making it essential for sports, wildlife, and any situation where your subject is in motion.
Final Thoughts
You now have a solid foundation of photography terminology that covers everything from exposure mechanics to composition principles to troubleshooting common problems. The next step is simple: grab your camera, switch to manual mode, and start applying these terms one at a time. Pick three terms from this glossary, focus on them during your next shoot, and review your results with the vocabulary in mind — that hands-on repetition is what turns definitions into instinct.
 |
 |
 |
 |

About Alex W.
Alex is a landscape, equine, and pet photographer based in the Lake District, UK, with years of experience shooting in one of Britain's most photographically demanding natural environments. His work has been featured in Take a View Landscape Photographer of the Year, Outdoor Photographer of the Year, and Amateur Photographer Magazine — publications that reflect a serious, competitive standard of image-making. At Click and Learn Photography, he shares the camera settings, gear choices, and compositional techniques he has developed through real-world shooting and competition-level work.
You can Get FREE Gifts. Furthermore, Free Items here. Disable Ad Blocker to receive them all.
Once done, hit anything below
|
|
|
|