You learn the basics of photography by mastering three camera settings — aperture, shutter speed, and ISO — and then practicing with intention. That single sentence covers what takes most beginners months to figure out on their own. Whether you picked up your first camera yesterday or you have been shooting on auto mode for a while, this guide strips away the jargon and gives you a clear path forward. Head over to our photography beginners hub for even more starter resources, but everything you need to build a rock-solid foundation is right here.
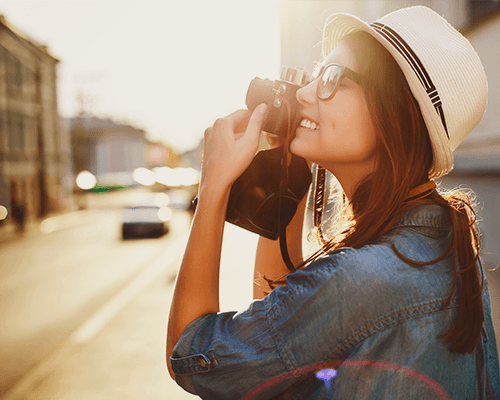
The truth is, expensive gear does not make great photos — understanding light and composition does. Once you grasp how your camera interprets a scene, you start making deliberate creative choices instead of hoping for the best. This guide walks you through the essential concepts, debunks common myths, and highlights the mistakes that keep most beginners stuck on autopilot.
If you want a visual refresher alongside this article, our list of the best YouTube channels for photography editing is worth bookmarking too.
Contents
Quick Wins to Get You Shooting with Confidence
You do not need to master every feature on your camera before you start taking better photos. A handful of core concepts will improve your images immediately. Here are the quick wins that deliver the biggest results with the least effort.
The Exposure Triangle in Plain English
Every photograph comes down to three settings working together:
- Aperture (f-stop) — Controls how much light enters the lens and how blurry the background looks. A low number like f/2.8 lets in lots of light and blurs the background. A high number like f/11 keeps everything sharp.
- Shutter speed — Determines how long the sensor is exposed to light. A fast speed like 1/500s freezes motion. A slow speed like 1/30s introduces motion blur, which can be creative or problematic depending on your intent.
- ISO — Sets the sensor's sensitivity to light. Low ISO (100–400) gives clean images. High ISO (1600+) brightens dark scenes but introduces grain (noise).
Change one setting and you need to compensate with the others. That relationship is the entire foundation of exposure. The exposure triangle concept has driven photography since the film era, and it still applies to every digital camera made today.
Composition Shortcuts That Work Every Time
Composition is how you arrange elements within the frame. You do not need art school training — just these reliable techniques:
- Rule of Thirds — Place your subject along the grid lines or at their intersections. Our Rule of Thirds breakdown covers this in depth.
- Leading lines — Roads, fences, rivers, and pathways draw the viewer's eye toward your subject.
- Fill the frame — Get closer. Most beginner shots have too much dead space around the subject.
- Simplify the background — Move your feet or change your angle to remove distracting elements.
- Foreground interest — Adding something in the foreground creates depth, especially in landscape shots.
Pro tip: Turn on your camera's grid overlay. It costs nothing and instantly trains your eye to compose along the rule of thirds.
Pros and Cons of Different Learning Paths
There is no single right way to learn the basics of photography. Your budget, schedule, and learning style all play a role. Here is an honest look at each approach.
Self-Taught vs. Structured Courses
- YouTube and free tutorials — Unlimited content, zero cost, learn at your pace. The downside: no feedback loop, easy to develop bad habits, and quality varies wildly between creators.
- Online courses (paid) — Structured curriculum with assignments and sometimes community forums. Great if you need accountability. Can be expensive for what amounts to pre-recorded video.
- In-person workshops — Hands-on instruction, real-time feedback, and networking. The most effective for fast improvement but also the priciest option.
- Books and ebooks — Deep, well-organized knowledge you can reference repeatedly. Our landscape photography ebook is a solid example of a structured written resource.
- Practice and experimentation — Ultimately the non-negotiable ingredient. No amount of theory replaces putting in the reps.
The fastest learners combine methods. Watch a tutorial, then immediately go shoot. Review your results, identify what went wrong, and repeat.
Camera Types and Where to Start
You do not need the most expensive body on the market. For a detailed breakdown, check our guide on different types of cameras explained. Here is the short version:
- Smartphone — Already in your pocket, excellent for learning composition and light. Limited manual controls on some models.
- Mirrorless — Lighter than DSLRs, electronic viewfinder shows real-time exposure preview. The current industry standard for new buyers.
- DSLR — Mature ecosystem with affordable used lenses. Heavier, but still fully capable.
- Compact / point-and-shoot — Portable and simple. Limited lens options but great for travel and casual shooting.
Start with whatever you have. Upgrade only when you can clearly identify what your current gear cannot do that you need it to.
Camera Settings at a Glance
When you learn the basics of photography, settings can feel overwhelming. This reference table breaks down the most common scenarios so you know exactly where to start dialing.
Understanding Your Mode Dial
| Scenario | Mode | Aperture | Shutter Speed | ISO | Notes |
|---|---|---|---|---|---|
| Portraits | Aperture Priority (A/Av) | f/1.8 – f/4 | Auto | 100 – 400 | Wide aperture blurs background |
| Landscapes | Aperture Priority (A/Av) | f/8 – f/16 | Auto | 100 | Use a tripod at slow speeds |
| Sports / Action | Shutter Priority (S/Tv) | Auto | 1/500s+ | Auto (cap at 3200) | Freeze motion first, worry about noise second |
| Night / Low Light | Manual (M) | Widest available | 1/50s or longer | 1600 – 6400 | Tripod essential for sharp results |
| Street | Aperture Priority (A/Av) | f/5.6 – f/8 | Auto | Auto | Zone focus for speed |
| Macro / Close-up | Manual (M) | f/8 – f/16 | 1/125s+ | 200 – 800 | Narrow aperture for depth of field |
Aperture Priority mode is the single best starting point for beginners. It lets you control depth of field while the camera handles shutter speed. You get creative control without the cognitive load of full manual. For more on low-light scenarios specifically, read our guide on night photography settings.
White Balance and Color Temperature
White balance tells your camera what "white" looks like under the current lighting. Get it wrong and your photos take on an unnatural color cast — too orange indoors, too blue in shade.
- Auto White Balance (AWB) — Reliable about 80% of the time. Start here.
- Daylight preset — Use outdoors in direct sunlight.
- Cloudy preset — Adds warmth, great for overcast days. Pair this with our cloudy day tips for the best results.
- Tungsten preset — Cools down the warm orange cast from indoor bulbs.
- Custom / Kelvin — Full control. Set a specific color temperature number if you know the lighting conditions.
If you shoot in RAW format (and you should), white balance is fully adjustable in post-processing with no quality loss. That said, getting it close in-camera saves editing time and gives you a more accurate preview on the back screen.
Photography Myths You Need to Stop Believing
Misinformation slows down your progress more than any technical limitation. Here are the myths that trip up the most beginners.
The Gear Myth
"You need a full-frame camera and expensive lenses to take good photos." This is flatly wrong. A photographer who understands light, composition, and timing will outshoot a gear hoarder every single time. Some of the most iconic images in history were captured on equipment that today's entry-level cameras vastly outperform.
What gear does matter for:
- Extreme low-light performance (astrophotography, concert venues)
- Fast autofocus for wildlife or sports
- Specific focal lengths for niche genres
For everything else — portraits, landscapes, street, travel — your kit lens and an entry-level body are more than enough to produce portfolio-worthy work. Invest in learning before you invest in equipment.
The Natural Talent Myth
"Some people just have an eye for it." Composition is a learnable skill. Color theory is a learnable skill. Timing is developed through thousands of shutter actuations. The photographers you admire did not wake up talented — they practiced relentlessly.
What actually separates strong photographers from average ones:
- Volume of deliberate practice — Shooting with intent, not just pointing and clicking
- Studying other photographers' work — Analyzing what makes an image work, not just scrolling past it
- Seeking honest critique — Feedback accelerates growth faster than solo practice
- Editing skills — Post-processing is half the craft; our Lightroom export settings guide covers the output side of the editing workflow
Mistakes That Hold Beginners Back
Knowing what to avoid is just as valuable as knowing what to do. These are the errors that show up repeatedly when new photographers share their work for critique.
Technical Errors
- Shooting only in Auto mode — Auto mode makes every decision for you, which means you never learn why your photos look the way they do. Switch to Aperture Priority and start making one choice per shot.
- Ignoring the histogram — The histogram is a graph on your camera's screen showing the distribution of light and dark tones. If the graph is bunched to the left, your image is underexposed. Bunched to the right, it is overexposed. Check it after every shot.
- Shooting JPEG instead of RAW — JPEG compresses your image and throws away data. RAW preserves everything, giving you far more flexibility in editing. Storage is cheap. Shoot RAW.
- Not stabilizing the camera — Camera shake is the number one cause of soft images for beginners. Use a tripod, brace against a wall, or increase your shutter speed. Half-press the shutter to lock focus before fully pressing — our guide to shutter focus explains why this habit matters.
- Neglecting to clean the lens — A smudged front element degrades sharpness and contrast. Carry a microfiber cloth.
Creative Pitfalls
- Centering everything — Placing your subject dead center works sometimes (symmetry, reflections), but defaulting to it makes images feel static. Use the rule of thirds as your baseline.
- Not getting close enough — Wide establishing shots have their place, but most beginners shoot everything from the same distance. Move your feet. Fill the frame with your subject.
- Ignoring the background — A distracting background ruins an otherwise good photo. Before you press the shutter, scan the edges of your frame for clutter.
- Over-editing — Cranking saturation, clarity, and HDR sliders to the maximum does not improve an image. Aim for edits that enhance reality rather than distort it.
- Never reviewing your own work — Take time after each session to review what you shot. Identify the three best and three worst frames. Ask yourself why. This review habit builds your critical eye faster than anything else.
Frequently Asked Questions
What is the best camera for a complete beginner?
Any entry-level mirrorless or DSLR from Canon, Nikon, Sony, or Fujifilm will serve you well. The body matters less than the lens. Start with the kit lens included in most bundles and upgrade the glass once you know what focal lengths you actually use.
How long does it take to learn the basics of photography?
With focused practice, you can understand exposure, composition, and basic editing within four to six weeks. Mastering them enough to shoot consistently strong images takes six months to a year of regular shooting.
Should I shoot in manual mode right away?
No. Start with Aperture Priority (A or Av on your mode dial). It gives you creative control over depth of field while the camera handles the rest. Move to full manual once you are comfortable predicting how your settings affect the image.
Is it worth learning photography on a smartphone?
Absolutely. Smartphones teach you composition, timing, and light — the three skills that matter most. The technical camera controls can be learned later when you move to a dedicated camera body.
What is the single most important setting to learn first?
Aperture. It controls both exposure and depth of field, giving you the most visible creative impact per adjustment. Once you understand aperture, shutter speed and ISO fall into place naturally.
Do I need to learn photo editing?
Yes. Editing is not about "fixing" photos — it is about finishing them. Even minimal adjustments to exposure, contrast, and white balance in Lightroom or a free tool like Darktable bring your images closer to what your eyes actually saw.
How do I find my photography style?
Shoot a lot and shoot varied subjects. Over time, you will notice patterns in what you are drawn to — certain lighting, subjects, color palettes, or moods. Your style emerges from volume, not from forcing a specific look on day one.
Key Takeaways
- Master the exposure triangle (aperture, shutter speed, ISO) and you control how every photo looks — start with Aperture Priority mode to ease into manual control.
- Composition skills like the rule of thirds, leading lines, and filling the frame improve your images more than any gear upgrade.
- Shoot in RAW, review your work critically after every session, and combine learning resources with deliberate practice for the fastest growth.
- Expensive gear is not a prerequisite — understanding light, practicing consistently, and learning basic editing are what separate strong photographers from beginners.
 |
 |
 |
 |

About Alex W.
Alex is a landscape, equine, and pet photographer based in the Lake District, UK, with years of experience shooting in one of Britain's most photographically demanding natural environments. His work has been featured in Take a View Landscape Photographer of the Year, Outdoor Photographer of the Year, and Amateur Photographer Magazine — publications that reflect a serious, competitive standard of image-making. At Click and Learn Photography, he shares the camera settings, gear choices, and compositional techniques he has developed through real-world shooting and competition-level work.
You can Get FREE Gifts. Furthermore, Free Items here. Disable Ad Blocker to receive them all.
Once done, hit anything below
|
|
|
|