Switching to manual mode makes you a better photographer — full stop. When you control aperture, shutter speed, and ISO yourself, you stop guessing and start creating with intention. The manual mode photography benefits go far beyond bragging rights. You gain consistency, creative control, and a deeper understanding of how light actually works. If you're still relying on auto mode for everything, you're letting your camera make artistic decisions that should be yours. Whether you're just starting to learn the basics of photography or you've been shooting for a while, manual mode is the single best investment you can make in your craft.

Auto mode works by averaging. Your camera reads the scene and picks settings that produce a "correct" exposure — but correct and compelling are two different things. A silhouette at sunset, a high-key portrait, a moody low-light street scene: these all require deliberate choices that auto mode will actively fight against. Manual mode puts you back in the driver's seat.
The learning curve is real, but it's shorter than most people think. Once you understand the relationship between your core camera settings, muscle memory takes over fast. Let's break down exactly why manual mode matters and how to make the transition without losing your mind.
Contents
From Auto to Manual: What Actually Changes
The jump from auto to manual mode isn't about memorizing numbers. It's about understanding why your camera picks certain settings — and then deciding whether you agree. Beginners often think manual mode photography benefits only apply to advanced shooters, but the opposite is true. Starting early means you build the right habits from day one.
The Exposure Triangle in Practice
Every exposure comes down to three variables: aperture, shutter speed, and ISO. In auto mode, your camera juggles all three simultaneously. In manual mode, you choose each one based on what matters most for your shot. Want a blurry background? Open up the aperture. Need to freeze action? Increase the shutter speed. The trade-offs become second nature after a few sessions. If you're new to these concepts, the photography beginners section has plenty of resources to get you started.
Where Auto Mode Falls Short
Auto mode is easily fooled by backlighting, snow, dark backgrounds, and mixed lighting. It doesn't know you want that dramatic shadow. It just sees underexposure and "fixes" it. The exposure compensation dial helps, but at that point you're already overriding auto — so why not take full control?
If you find yourself constantly adjusting exposure compensation in auto mode, you're already doing manual mode's job with fewer tools. Just make the switch.
Essential Gear and Settings for Manual Shooting
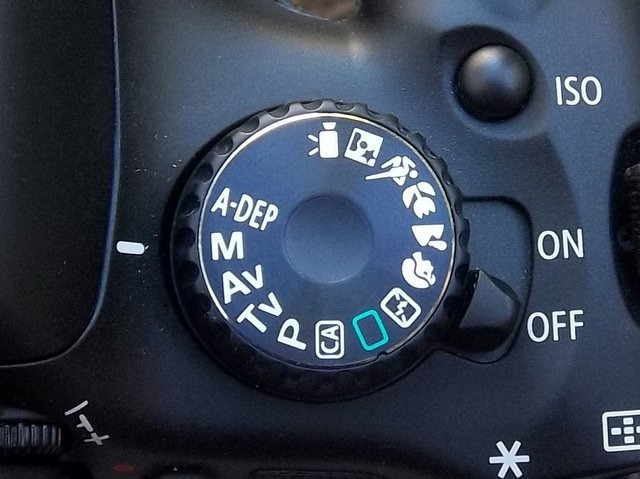
You don't need expensive gear to shoot manual. Any camera with a manual mode dial — DSLR, mirrorless, even some advanced compacts — will do. What matters more is knowing your camera's layout well enough that adjusting settings becomes instinctive.
Camera Setup That Helps
Turn on your histogram display — it's the single most useful tool for manual exposure. Enable back button focus so you can separate focus from exposure. Shoot RAW instead of JPEG to give yourself more latitude in post-processing. These three changes alone will make manual mode significantly easier to work with.
Why Your Lens Choice Matters More
A fast prime lens (f/1.8 or wider) gives you more options in manual mode, especially in low light. Kit lenses work fine for learning, but you'll quickly notice how a wider maximum aperture opens up creative possibilities. Check out our guide to the best Fujifilm lenses if you're looking to upgrade, or explore different camera types to find your ideal setup.
Manual Mode in Real Shooting Scenarios
Theory only gets you so far. Here's where manual mode photography benefits become obvious — in real-world situations where auto mode consistently produces mediocre results.
Landscapes and Travel
Landscape photography demands consistency across frames, especially if you're stitching panoramas or bracketing for HDR. Manual mode locks your settings so every frame matches. When you're shooting travel photography, you'll often face tricky lighting — bustling markets, narrow alleys, golden hour temples — where auto mode hunts and guesses between shots. Manual gives you frame-to-frame consistency that auto simply cannot.
Low Light and Night Photography
Night photography is where auto mode completely breaks down. Long exposures, star trails, cityscapes — these all require settings that your camera would never choose automatically. You need shutter speeds measured in seconds, specific ISO values to manage noise, and apertures chosen for sharpness rather than exposure convenience. Our night photography settings guide walks through this in detail.
Night photography isn't just easier in manual mode — it's essentially impossible without it. This is where the skill truly pays for itself.
Building Long-Term Photography Skills
Manual mode is a skill multiplier. Every other photography technique you learn becomes easier when you already understand exposure control.
Deliberate Practice That Sticks
Spend 30 minutes shooting the same subject with different manual settings and you'll learn more than a month of auto mode shooting. Try this: pick a stationary subject and shoot it at every full stop of aperture your lens allows. Compare the results. You'll see depth of field, diffraction, and sweet-spot sharpness in action — concepts that remain abstract until you experience them firsthand.
Developing Your Creative Vision
When you control exposure, you start seeing light differently. You notice how window light falls across a face, how golden hour changes minute by minute, how street lamps create pools of warmth against cool shadows. This awareness is what separates photographers who take pictures from photographers who make them. Pair this with solid composition techniques like the rule of thirds and your images will improve dramatically.
Fixing Common Manual Mode Mistakes
Most manual mode frustrations come from a handful of predictable mistakes. Here's a quick reference for the most common issues and their fixes.
Exposure Problems and Quick Fixes
| Problem | Likely Cause | Fix |
|---|---|---|
| Images too dark indoors | ISO too low or aperture too narrow | Open aperture to widest; raise ISO to 800–1600 |
| Washed-out skies | Metering off the foreground | Spot meter on the sky or use exposure bracketing |
| Grainy images | ISO pushed too high | Use a tripod or wider aperture instead of raising ISO |
| Inconsistent exposure in a series | Accidentally left auto ISO on | Set ISO manually — check all three values are locked |
| Subject too bright against dark background | Camera averaging the whole scene | Switch to spot metering on the subject |
Focus and Sharpness Troubleshooting
Blurry shots in manual mode are rarely a focus problem — they're usually a shutter speed problem. The general rule: your shutter speed should be at least 1/(focal length) for handheld shooting. At 50mm, that means 1/50s minimum. At 200mm, you need 1/200s. If you're still getting soft images, a solid tripod eliminates camera shake entirely.
Before blaming your lens for soft images, check your shutter speed. Nine times out of ten, that's the real culprit.
Manual Mode Myths That Hold You Back
There's a lot of bad advice floating around about manual mode. Let's clear up the biggest misconceptions that keep photographers stuck in auto.
It's Not Just for Professionals
The idea that manual mode is "advanced" is completely backwards. It's actually the most educational mode. Aperture priority and shutter priority are shortcuts — useful shortcuts, yes — but they hide what's happening under the hood. Beginners benefit the most from manual mode because every shot teaches you something. Pros often use semi-auto modes because they've already internalized the lessons manual mode teaches.
It Doesn't Have to Be Slower
People assume manual mode means constantly fiddling with dials and missing the moment. In practice, light conditions change slowly. You set your exposure once and only adjust when the light shifts. At a wedding reception, your settings might stay the same for an hour straight. Outdoors on a clear day, you might adjust twice in an afternoon. The camera's light meter is still active in manual mode — you're not guessing, you're just making the final call yourself.
Frequently Asked Questions
Is manual mode better than aperture priority?
Neither is universally better. Manual mode gives you complete control and consistency across frames. Aperture priority is faster when light changes rapidly. Learn manual first so you understand what aperture priority is doing for you — then use whichever fits the situation.
How long does it take to learn manual mode?
Most photographers feel comfortable within two to four weeks of regular practice. The exposure triangle clicks quickly once you start seeing the relationship between settings in your own images. Dedicate a few shoots to manual-only and you'll build confidence fast.
Should I use manual mode for action and sports photography?
Yes, but with auto ISO as a safety net. Set your shutter speed high enough to freeze motion (1/500s minimum) and your aperture for the depth of field you want. Let ISO float to compensate. This gives you the creative control of manual with the speed of auto exposure.
What is the best manual mode setting for portraits?
Start with a wide aperture (f/1.8–f/2.8) for background blur, shutter speed around 1/125s to avoid motion blur, and adjust ISO to nail the exposure. Meter off your subject's face for the most accurate skin tones.
Do professional photographers always shoot in manual mode?
No. Many pros use aperture priority or shutter priority depending on the situation. The difference is they understand manual mode deeply, so they know exactly what the semi-auto modes are doing and when to override them.
Can I shoot manual mode on a smartphone?
Many smartphones offer a pro or manual mode in their camera apps. You can typically control ISO, shutter speed, white balance, and focus. It's a great way to practice the concepts before investing in a dedicated camera.
What is the hardest part about shooting in manual mode?
Quickly adjusting to changing light conditions. Walking from shade into direct sunlight means adjusting two or three settings on the fly. Practice in consistent lighting first, then gradually challenge yourself with more dynamic environments.
Why do my manual mode photos look different from what I see on the LCD?
Your LCD brightness might be set too high, making images look brighter than they actually are. Calibrate your screen brightness or rely on the histogram instead. The histogram never lies — it shows you the actual tonal distribution regardless of screen settings.
The camera is a tool. Manual mode is how you learn to use it. Once you do, every other mode becomes a shortcut you actually understand.
 |
 |
 |
 |

About Alex W.
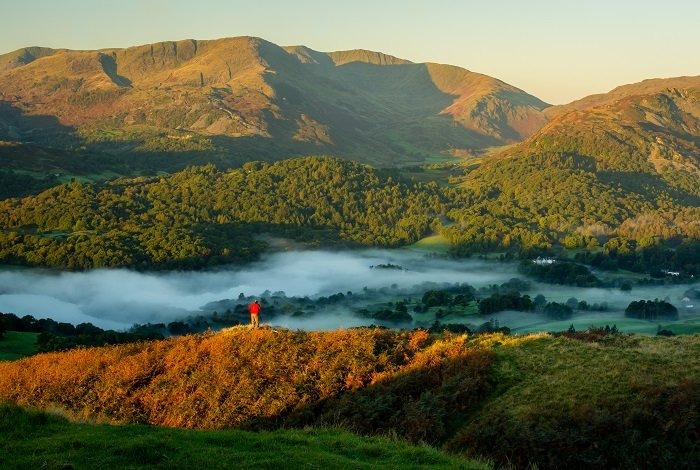
Alex is a landscape, equine, and pet photographer based in the Lake District, UK, with years of experience shooting in one of Britain's most photographically demanding natural environments. His work has been featured in Take a View Landscape Photographer of the Year, Outdoor Photographer of the Year, and Amateur Photographer Magazine — publications that reflect a serious, competitive standard of image-making. At Click and Learn Photography, he shares the camera settings, gear choices, and compositional techniques he has developed through real-world shooting and competition-level work.
You can Get FREE Gifts. Furthermore, Free Items here. Disable Ad Blocker to receive them all.
Once done, hit anything below
|
|
|
|