What if the best photography conditions aren't found under a blazing sun, but beneath a blanket of grey? Our team has spent years shooting in overcast weather, and we've discovered that photography tips for cloudy days can transform what most people consider "bad light" into some of the most flattering, dramatic, and versatile shooting conditions available. Clouds act as a massive natural softbox, diffusing harsh sunlight and eliminating the deep shadows that plague midday portraits. Anyone exploring photography as a beginner should know that overcast skies are secretly a photographer's best friend — and these six strategies will prove it.
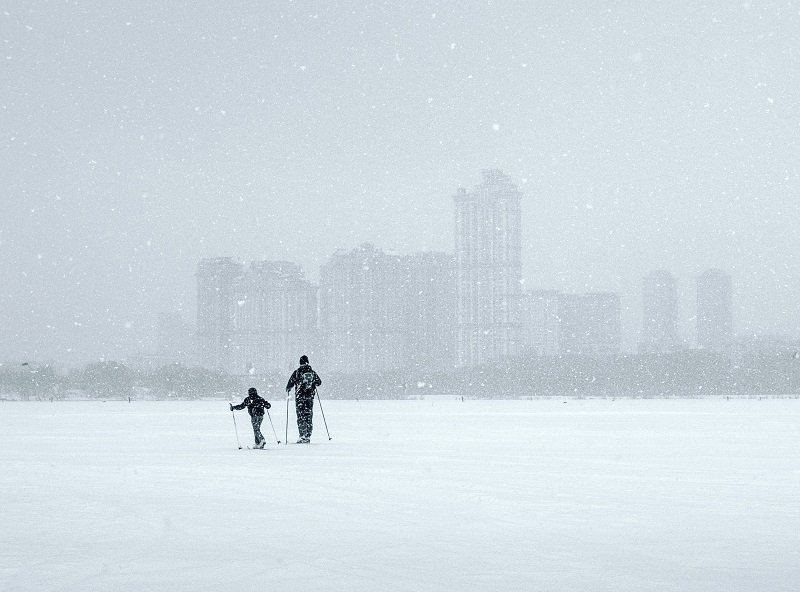
Cloudy days remove the time pressure that comes with golden hour. There's no frantic race against a setting sun — the light stays consistent for hours. Our experience shows that this stability lets photographers slow down, refine compositions, and experiment without worrying about rapidly shifting shadows. The trick is knowing how to adjust camera settings, choose the right subjects, and lean into what overcast light does best.
Below, we break down the techniques, gear considerations, and creative approaches that make cloudy-day shooting genuinely rewarding.
Contents
Camera Settings That Work in Overcast Light
Overcast skies reduce the overall amount of light hitting the sensor, but the quality of that light is remarkably even. Our team approaches cloudy-day photography tips for cloudy days by first addressing the exposure triangle — because getting this right in-camera saves significant post-processing time.
ISO and Aperture Adjustments
The reduced light means bumping up ISO becomes necessary. Modern cameras handle noise impressively well, so there's no reason to fear pushing to ISO 800 or even 1600. Here's what we typically recommend:
- ISO 400–800 for general handheld shooting in light overcast
- ISO 800–1600 for heavy cloud cover or late afternoon grey skies
- Aperture priority mode (Av/A) works brilliantly — it lets the camera handle shutter speed while the photographer controls depth of field
- Wide apertures (f/2.8–f/4) are ideal for portraits; narrower apertures (f/8–f/11) suit landscapes
Anyone worried about noise should shoot in RAW. The additional data gives editing software far more to work with when reducing grain. Our team consistently finds that a slightly noisy RAW file cleaned up in Lightroom looks better than a noise-free JPEG with blown highlights. For a deeper dive into export workflows, our guide on Lightroom export settings for web and print covers the full pipeline.
White Balance for Grey Skies
Auto white balance often adds a cool, bluish cast under clouds. Switching to the "Cloudy" preset (around 6000–6500K) warms the image naturally and produces more pleasing skin tones. For landscapes, some photographers prefer the cooler look — it depends on the mood.
| White Balance Setting | Colour Temperature (K) | Best Use on Cloudy Days |
|---|---|---|
| Auto (AWB) | Varies | Quick snapshots where speed matters |
| Daylight | 5200K | Slightly cool results; good for moody landscapes |
| Cloudy | 6000K | Portraits and general use — adds natural warmth |
| Shade | 7000K | Very warm; works for golden-hour emulation |
| Custom/Manual | User-set | Maximum control when colour accuracy is critical |
Shooting RAW makes this decision non-destructive — white balance can be adjusted freely in post. But getting it close in-camera means previews on the LCD look accurate, which helps with on-the-spot creative decisions.
Subjects That Shine on Cloudy Days
Not every subject benefits equally from overcast light. Knowing what to point the camera at makes the difference between flat, uninspiring images and genuinely striking photographs.
Portraits Without Harsh Shadows
Cloudy skies eliminate racoon eyes, hard chin shadows, and squinting. Diffused overcast light wraps around faces evenly, producing soft, flattering results that would require expensive studio modifiers to replicate indoors. Portrait photographers at our studio actively prefer light cloud cover to direct sun.
The key is positioning. Even on overcast days, light has direction — it's simply subtler. Having subjects face the brightest part of the sky creates a gentle, natural catchlight in the eyes. A reflector held low can bounce light upward to fill any remaining shadows under the brow.
Pet photographers benefit from this same principle. Anyone who's tried photographing a dark-coated dog in direct sunlight knows the struggle with blown highlights and lost detail. Our quickfire tips for dog photography cover this scenario in detail.
Nature and Macro Photography
Overcast conditions are a macro photographer's dream. The even lighting eliminates harsh specular reflections on wet leaves, petals, and insects. Colours appear more saturated because there are no bright hotspots washing them out. According to the Wikipedia entry on diffuse sky radiation, cloud cover scatters sunlight across the entire sky dome, effectively creating omnidirectional illumination — exactly what close-up work demands.
- Flowers and foliage show richer, truer colours
- Water droplets on surfaces gain soft, even reflections
- Insects and small creatures are easier to expose correctly
- Woodland scenes lose distracting dappled light patches
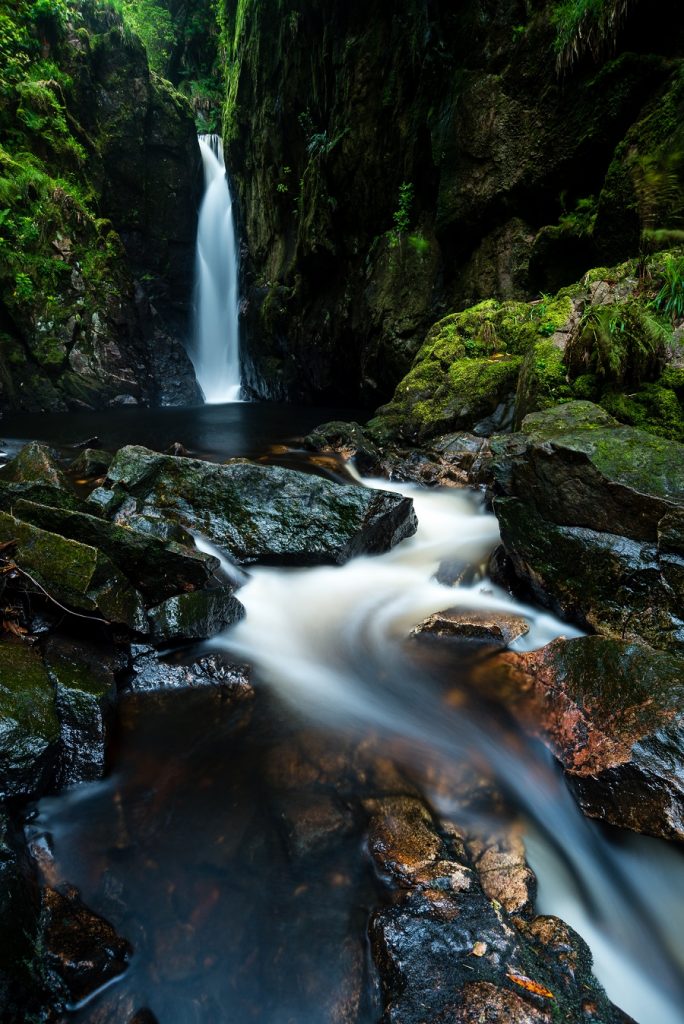
The lower light also opens creative doors for motion blur techniques. Slower shutter speeds become achievable without an ND filter, allowing silky water effects or intentional camera movement in broad daylight.
Composition Techniques for Flat Light
Flat light can flatten an image if composition doesn't compensate. The absence of dramatic shadows means photographers need to create visual interest through other means — and this is where strong composition skills separate average shots from exceptional ones.
Using Leading Lines and Contrast
Without shadows to add depth, leading lines become essential for guiding the viewer's eye through the frame. Roads, fences, rivers, and architectural edges all work. The goal is to replace the three-dimensionality that shadows provide with geometric depth cues.
Tonal contrast also matters more than usual. Pairing dark foreground elements against a lighter sky — or bright subjects against darker backgrounds — creates the separation that sunlight would normally provide. Our team finds that:
- Dark tree silhouettes against grey skies create instant drama
- Brightly coloured subjects (red doors, yellow raincoats) pop against muted backgrounds
- Reflections in puddles double the visual interest of any scene
The rule of thirds becomes even more important when light isn't doing the heavy lifting. Placing key elements at intersection points forces a stronger composition that holds attention regardless of lighting conditions.
Minimising Dull Skies
A blank white sky adds nothing to most photographs. Our standard approach is to tilt the camera downward and give the sky minimal real estate — or exclude it entirely. This works particularly well for:
- Street photography, where buildings and people fill the frame
- Forest and woodland scenes shot at canopy level
- Close-up architectural details
- Any subject where the ground or middle distance tells the story
When the sky must be included — in wide landscape shots, for instance — waiting for a break in the clouds can add texture and drama. A single patch of light breaking through heavy cloud creates a natural spotlight effect that's impossible to replicate artificially. Landscape photographers who follow the top landscape photographers on social media will see this technique used constantly.
Gear That Makes a Difference
The right equipment doesn't just help on cloudy days — it removes barriers entirely. Most people already own everything needed; it's a matter of knowing what to reach for.
Lenses and Filters
Fast lenses with wide maximum apertures (f/1.4–f/2.8) are the single most useful investment for overcast shooting. They gather more light, enable faster shutter speeds, and create background separation that flat light otherwise lacks. A 50mm f/1.8 — often called the "nifty fifty" — costs under £200 and transforms cloudy-day portraits.
Filters play a different role than on sunny days:
- A circular polariser cuts through haze and boosts colour saturation in foliage — it works even without blue sky
- ND filters enable long exposures for creative motion blur (waterfalls, moving clouds, traffic trails)
- UV filters offer no optical benefit but protect the front element from rain and moisture
- Graduated ND filters can darken a bright, featureless sky to balance exposure with the foreground
Tripod Use and Stability
Lower light means slower shutter speeds, and slower shutter speeds mean camera shake becomes a real threat. A sturdy tripod eliminates this problem completely. Our team considers a tripod essential gear for any planned overcast shoot — not optional. The best photography tripods offer stability without excessive weight, which matters when hiking to a location.
For handheld shooting, image stabilisation (IS/VR/IBIS) helps significantly. Most modern mirrorless cameras offer in-body stabilisation that provides 5–7 stops of compensation. Combined with a stabilised lens, handheld shots at 1/15s or slower become consistently sharp.
Post-Processing for Overcast Images
Even perfectly exposed cloudy-day images benefit from targeted editing. The raw files contain excellent tonal information — they just need a push in the right direction to reveal their full potential.
Boosting Contrast and Colour
Overcast images tend to look flat straight out of camera. A modest contrast boost (+15 to +30 in Lightroom) restores punch without introducing harsh transitions. The tone curve is even more powerful — a gentle S-curve deepens shadows and lifts highlights in a way that looks natural rather than processed.
For colour, vibrance is generally safer than saturation. Vibrance selectively boosts muted tones while leaving already-saturated colours alone, which prevents skin tones from turning orange in portraits. A small bump to clarity (+10 to +20) adds midtone contrast that brings out textures in landscapes, architecture, and close-ups.
Key adjustments our team applies to most overcast RAW files:
- Contrast: +15 to +30
- Highlights: -20 to -40 (recovers detail in bright skies)
- Shadows: +15 to +30 (opens up dark areas)
- Vibrance: +10 to +25
- Clarity: +10 to +20
- Dehaze: +5 to +15 (cuts through atmospheric haze without looking artificial)
Converting to Black and White
Overcast images convert to black and white beautifully. The smooth tonal gradations produced by diffused light translate into rich greyscale images with a full range from deep blacks to clean whites. Without harsh shadows creating extreme contrast, the transitions between tones feel cinematic.
Moody street scenes, misty landscapes, and dramatic portraits all lend themselves to monochrome treatment. The absence of vibrant colour in the original scene means nothing is lost in conversion — only gained. When processing black-and-white conversions, the channel mixer becomes a powerful tool: pulling down the blue channel darkens overcast skies dramatically, adding atmosphere that wasn't visible in the colour original.
Anyone looking to sharpen their overall technique beyond cloudy-day work should explore our ten practical tips for becoming a better photographer — many of those principles apply directly to what we've covered here.
Final Thoughts
Cloudy days aren't a reason to leave the camera at home — they're an invitation to shoot subjects and scenes that harsh sunlight makes difficult. The next time grey skies roll in, grab a fast lens, set the white balance to Cloudy, and head out with intention. Pick one technique from this guide — whether it's long-exposure motion blur, moody black-and-white portraits, or saturated macro close-ups — and dedicate an hour to practising it. The results will prove that overcast light is one of the most underrated tools in any photographer's arsenal.
 |
 |
 |
 |

About Alex W.
Alex is a landscape, equine, and pet photographer based in the Lake District, UK, with years of experience shooting in one of Britain's most photographically demanding natural environments. His work has been featured in Take a View Landscape Photographer of the Year, Outdoor Photographer of the Year, and Amateur Photographer Magazine — publications that reflect a serious, competitive standard of image-making. At Click and Learn Photography, he shares the camera settings, gear choices, and compositional techniques he has developed through real-world shooting and competition-level work.
You can Get FREE Gifts. Furthermore, Free Items here. Disable Ad Blocker to receive them all.
Once done, hit anything below
|
|
|
|