What if the only thing standing between a mediocre snapshot and a breathtaking nighttime image is a handful of camera settings most people never bother to learn? Our team has spent years refining night photography settings for beginners, and the answer is surprisingly straightforward once the core principles click into place. Night shooting intimidates many newcomers, but the fundamental adjustments to aperture, shutter speed, and ISO form a reliable framework that works across nearly every scenario. In our experience working with photographers at every skill level, the biggest barrier is not expensive equipment but rather understanding how these three variables interact in low light. We encourage anyone curious about this genre to explore our night & astrophotography content for deeper dives into specialized techniques.
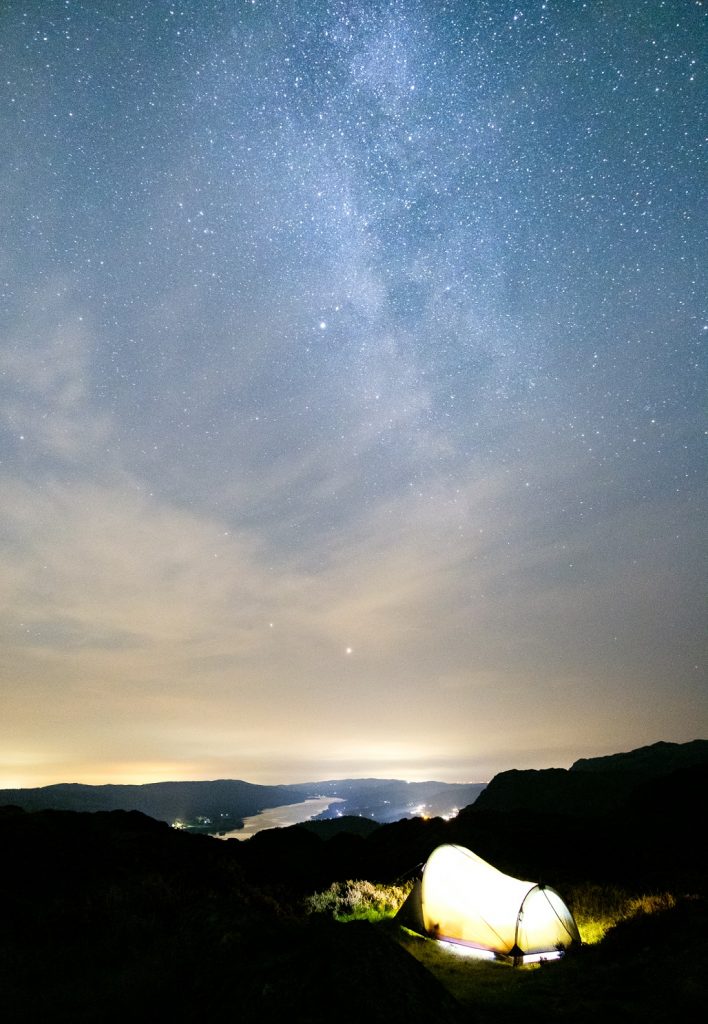
The reality is that modern cameras—even entry-level models—are remarkably capable in darkness when paired with the right technique. Our team consistently finds that understanding the exposure triangle matters far more than owning the most expensive body on the market. A solid tripod and a basic understanding of manual mode will outperform a flagship camera set to full auto every single time after sunset.
This guide breaks down everything from foundational science to real-world field settings, gear costs, and common mistakes our team has made so that others can skip the frustrating trial-and-error phase entirely.
Contents
The Science Behind Shooting After Dark
Before adjusting any dials, it helps to understand why cameras struggle in darkness and what physics-based principles govern every night exposure. Our team considers this foundational knowledge non-negotiable because it transforms settings from arbitrary numbers into logical decisions.
The Exposure Triangle in Low Light
The exposure triangle—aperture, shutter speed, and ISO—controls how much light reaches the sensor and how that light is processed. At night, the challenge is that ambient light drops by several stops compared to daylight, forcing compensations across all three variables simultaneously. Here is how each one responds:
- Aperture (f-stop) — Opening the lens wider (lower f-number) lets in more light per unit of time, making f/1.8–f/2.8 the sweet spot for most night work.
- Shutter speed — Longer exposures gather more photons, but anything beyond roughly 1/focal-length seconds without a tripod introduces motion blur from hand shake.
- ISO — Amplifying the sensor signal brightens the image but introduces grain (noise) that degrades fine detail progressively above ISO 3200 on most consumer bodies.
The interplay between these three settings is what makes night photography settings for beginners feel overwhelming at first, but once the relationship is internalized, adjustments become instinctive rather than guesswork.
Noise, Dynamic Range, and Sensor Behavior
Digital sensor noise follows predictable patterns that our team has documented across dozens of camera bodies over the years. Read noise dominates at low ISOs with short exposures, while shot noise (photon noise) governs longer exposures at moderate ISOs. In practical terms, this means pushing ISO to 6400 on a modern APS-C sensor is entirely acceptable when the alternative is an underexposed frame boosted in post—the result is virtually identical noise-wise, as explained in this overview of image noise from Wikipedia. Dynamic range narrows at high ISOs, so preserving highlight detail in scenes with bright light sources like streetlamps requires careful exposure metering.
Essential Gear and What It Actually Costs
One of the most common misconceptions our team encounters is that night photography demands premium equipment costing thousands. The truth is far more encouraging for anyone working within a modest budget.
A Budget-Friendly Starter Kit
| Item | Budget Option | Estimated Cost | Notes |
|---|---|---|---|
| Camera body | Used Nikon D3500 or Canon T7 | $250–$350 | Manual mode and decent high-ISO performance |
| Fast prime lens | 50mm f/1.8 (Nifty Fifty) | $100–$200 | Sharp, fast, lightweight — ideal starter lens |
| Tripod | Aluminum travel tripod | $40–$80 | Must support the camera's weight without vibration |
| Remote shutter release | Wired or wireless remote | $10–$25 | Eliminates camera shake from pressing the shutter button |
| Headlamp (red mode) | Any hiking headlamp | $15–$25 | Red light preserves night vision while adjusting settings |
A complete starter kit runs between $415 and $680, which is remarkably accessible for a genre that produces portfolio-caliber results. Our team has seen stunning night images from setups costing less than a single L-series lens.
Upgrades That Are Worth the Investment
Once the fundamentals are solid, two upgrades deliver the largest quality jump:
- A full-frame body — larger pixels collect more light, improving high-ISO performance by roughly one full stop over comparable APS-C sensors.
- A wider fast lens (14–24mm f/2.8) — essential for astrophotography compositions that include foreground elements alongside a star-filled sky.
Everything else—intervalometers, dew heaters, star trackers—falls into the category of specialized tools that become relevant only after core technique is established.
Night Photography Settings for Beginners vs. Experienced Shooters
Our team draws a clear line between settings that work reliably for newcomers and the more nuanced approaches that experienced night photographers employ. Starting simple and building complexity is always the recommended path.
Reliable Starting Points
For anyone picking up a camera in manual mode for the first time after dark, these settings produce a solid baseline result across most urban and suburban night scenes:
- Aperture: f/2.8 (or the widest the lens allows)
- Shutter speed: 10–15 seconds on a tripod
- ISO: 800–1600
- White balance: Tungsten or ~3200K for warm city light
- Focus: Manual focus using live view magnification on a distant light source
- File format: RAW (critical for recovering shadow detail in post-processing)
These values represent a safe middle ground that prevents severe underexposure while keeping noise manageable. Our team recommends chimping the histogram after every test shot—the histogram never lies, even when the LCD preview looks deceptively bright in a dark environment.
Where Advanced Shooters Diverge
Experienced night photographers move beyond single-exposure captures into techniques that extend dynamic range and reduce noise dramatically:
- Exposure stacking — capturing multiple frames at the same settings and averaging them in software to reduce random noise without sacrificing detail.
- Focus stacking — blending multiple focal distances to achieve sharp foreground-to-infinity results at wide apertures.
- The 500 Rule — dividing 500 by the focal length to determine the longest exposure before stars begin trailing visibly.
- Bulb mode compositions — exposures exceeding 30 seconds for light painting, star trails, or ultra-smooth water reflections.
These techniques build naturally on the beginner settings above, and our team finds that most photographers transition into stacking within their first few months of consistent night shooting.
When to Shoot at Night and When to Wait
Timing determines the success of a night session just as much as camera settings, and our team has learned this lesson through many wasted outings in poor conditions.
Ideal Conditions and Timing
- Blue hour (20–40 minutes after sunset) — residual sky light fills shadows and adds color gradients that pure darkness cannot replicate.
- New moon nights — essential for astrophotography when minimal lunar light pollution is the goal.
- Clear, cold nights — low humidity reduces atmospheric haze, and cold air steadies thermals that distort long-exposure details.
- Weeknights in urban areas — less traffic and fewer pedestrians simplify long-exposure compositions with cleaner compositions.
Conditions That Work Against the Shot
Not every dark sky equals a productive session, and recognizing unfavorable conditions saves time and frustration:
- High winds above 15 mph introduce tripod vibration that no image stabilization can fully correct during multi-second exposures.
- Heavy overcast skies eliminate star photography entirely and flatten city skylines into dull, gray canopies with minimal visual interest.
- Full moon nights flood the landscape with flat lunar light that overpowers subtle artificial lighting in cityscapes.
- Fog can produce magical results in controlled situations, but dense fog scatters every light source into a featureless glow.
Our team's rule of thumb is simple: if conditions are marginal, we scout the location instead and return when circumstances align properly.
Protecting Gear and Preserving Image Quality After Dark
Night shooting introduces environmental hazards that daytime photographers rarely encounter, and our team has learned several lessons the hard way about protecting both equipment and final image quality.
Condensation and Temperature Management
The single most destructive force during night sessions is condensation forming on the front lens element, which softens images imperceptibly until the damage is visible on a full-size screen later. Preventing it requires awareness of the dew point:
- A lens hood blocks radiant cooling and delays condensation onset significantly.
- Chemical hand warmers rubber-banded around the lens barrel maintain glass temperature above the dew point for hours.
- When returning indoors after a cold shoot, placing the camera in a sealed bag prevents internal condensation as the body warms up.
Maintaining Sharpness in the Field
Several factors conspire to rob night images of critical sharpness beyond the obvious tripod requirement:
- Mirror lock-up (or electronic front-curtain shutter) eliminates internal vibration on DSLR bodies during the exposure.
- Disabling in-body stabilization on a tripod prevents the stabilization motor from introducing micro-movements into a stationary shot.
- Focusing with live view at 10x magnification on a bright point of light is the most reliable manual focus technique after dark.
- Taping the focus ring after achieving focus prevents accidental shifts when adjusting other settings or repositioning the camera.
Our team considers these four steps mandatory for any night session—skipping even one noticeably degrades results when pixel-peeping sharpness in post.
Real Shots, Real Settings: Lessons from the Field
Theory only goes so far, so our team has documented actual settings from two common night photography scenarios that illustrate how these principles translate into practice.
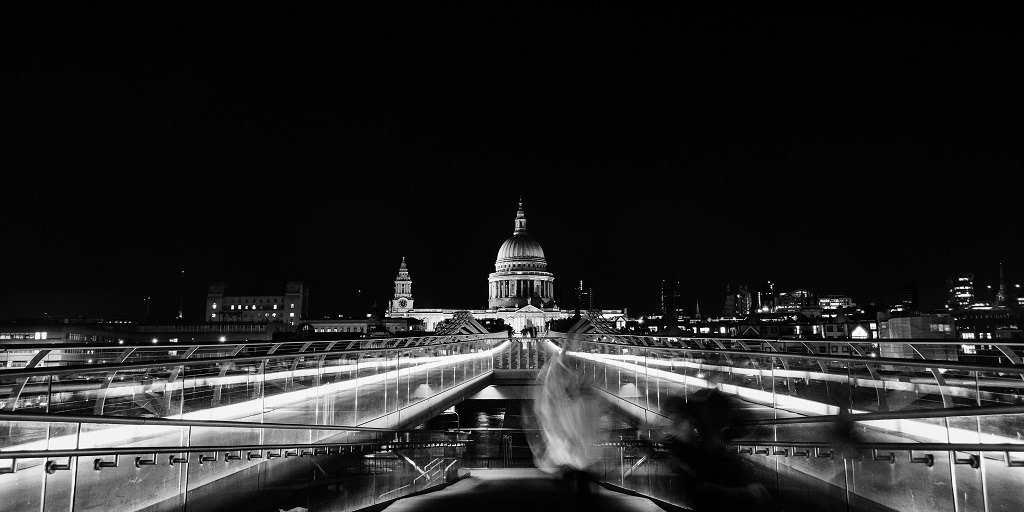
Cityscape Light Trails
One of our favorite techniques involves capturing vehicle light trails against an urban backdrop from an elevated bridge or overpass. The settings that consistently deliver strong results in this scenario:
- Aperture: f/8 (stopped down for starburst effects on streetlights and deeper depth of field)
- Shutter speed: 20–30 seconds (long enough for continuous light trails from passing traffic)
- ISO: 100–200 (low sensitivity is possible because the long exposure compensates for the narrow aperture)
- White balance: Daylight or ~5500K to preserve the warm-cool contrast between headlights and taillights
This scenario is an excellent illustration of how stopping down the aperture at night actually improves results when the subject benefits from extended exposure time. Anyone interested in this style should explore our guide to motion blur techniques for additional creative approaches to long-exposure work.
Starry Sky Wide-Angle
For Milky Way or wide-field star photography, the approach inverts almost entirely compared to cityscapes:
- Aperture: f/1.8–f/2.8 (as wide as the lens allows to maximize light gathering)
- Shutter speed: 15–20 seconds with a 24mm lens (following the 500 Rule to prevent visible star trails)
- ISO: 3200–6400 (pushed high to brighten the faint galactic core in a single exposure)
- White balance: ~3800K to render the Milky Way's warm tones naturally
The noise at ISO 6400 is entirely manageable on most cameras made within the last five years, especially when shooting in RAW and applying luminance noise reduction during editing. Our team stacks four to eight frames for critical work, which drops the noise floor dramatically.
Frequently Asked Questions
What is the best ISO for night photography settings for beginners?
ISO 800–1600 serves as the most reliable starting range for beginners shooting on a tripod, as it balances brightness with manageable noise levels on both APS-C and full-frame sensors. From there, adjustments depend on the specific scene and desired shutter speed.
Is a tripod absolutely necessary for night photography?
For sharp results at shutter speeds beyond 1/30 of a second, a tripod is essential rather than optional. Handheld night photography is possible only with very fast lenses, high ISO values, and subjects that tolerate some motion blur or grain.
Should the camera be set to RAW or JPEG for night shots?
RAW is the only sensible choice for night photography because it preserves the full dynamic range of the sensor, allowing recovery of shadow detail and precise white balance adjustments that JPEG compression discards permanently at capture time.
How does autofocus perform in darkness?
Most autofocus systems struggle or fail entirely in very low light, which is why our team always switches to manual focus using live view magnification. Targeting a distant streetlight or bright star at 10x magnification provides precise focus that autofocus cannot reliably achieve after dark.
What causes star trails and how are they prevented?
Star trails result from Earth's rotation during long exposures, and the 500 Rule (dividing 500 by the focal length) provides the maximum exposure time before trailing becomes visible. A 24mm lens allows roughly 20 seconds, while a 50mm lens permits only about 10 seconds.
Does long exposure noise reduction in-camera help?
In-camera long exposure noise reduction captures a second "dark frame" of equal duration to subtract hot pixel noise, which is effective but doubles the total capture time for every shot. Our team prefers disabling it and handling hot pixel removal in post-processing software instead.
What white balance setting works best at night?
White balance depends on the light sources in the scene—Tungsten (~3200K) corrects warm sodium vapor streetlights, while Daylight (~5500K) preserves the warm-cool contrast in mixed lighting. Shooting RAW makes this a non-destructive decision that can be refined later without quality loss.
Next Steps
- Grab a tripod, set the camera to manual mode with f/2.8, 10 seconds, and ISO 1600, then shoot ten test frames of a nearby streetlit scene tonight—review the histograms and adjust from there.
- Practice manual focusing using live view magnification on a distant light source until the process feels natural and fast enough to repeat confidently in the field.
- Plan a dedicated blue-hour-to-full-dark session at a local landmark, arriving 30 minutes before sunset to scout compositions while light is still available.
- Shoot every frame in RAW and process at least five images in editing software, paying close attention to shadow recovery and noise reduction sliders to understand how much latitude RAW files provide.
 |
 |
 |
 |

About Alex W.
Alex is a landscape, equine, and pet photographer based in the Lake District, UK, with years of experience shooting in one of Britain's most photographically demanding natural environments. His work has been featured in Take a View Landscape Photographer of the Year, Outdoor Photographer of the Year, and Amateur Photographer Magazine — publications that reflect a serious, competitive standard of image-making. At Click and Learn Photography, he shares the camera settings, gear choices, and compositional techniques he has developed through real-world shooting and competition-level work.
You can Get FREE Gifts. Furthermore, Free Items here. Disable Ad Blocker to receive them all.
Once done, hit anything below
|
|
|
|