Travel Photography Tips and Tricks for Better Shots on the Road
by Alex W.
Over 1.4 billion photos are taken every single day worldwide, and a staggering number of those come from travelers trying to capture something meaningful on the road. Yet most of those images end up forgotten in a camera roll, never printed, never shared — because they lack the fundamentals that separate a snapshot from a photograph. Our team has spent years compiling travel photography tips and tricks that actually move the needle, and this guide distills everything we've learned into a practical framework. Whether someone is heading to a national park or wandering through a foreign city, the principles here apply everywhere. For more foundational techniques, our ultimate guides section covers the full spectrum of photography skills.
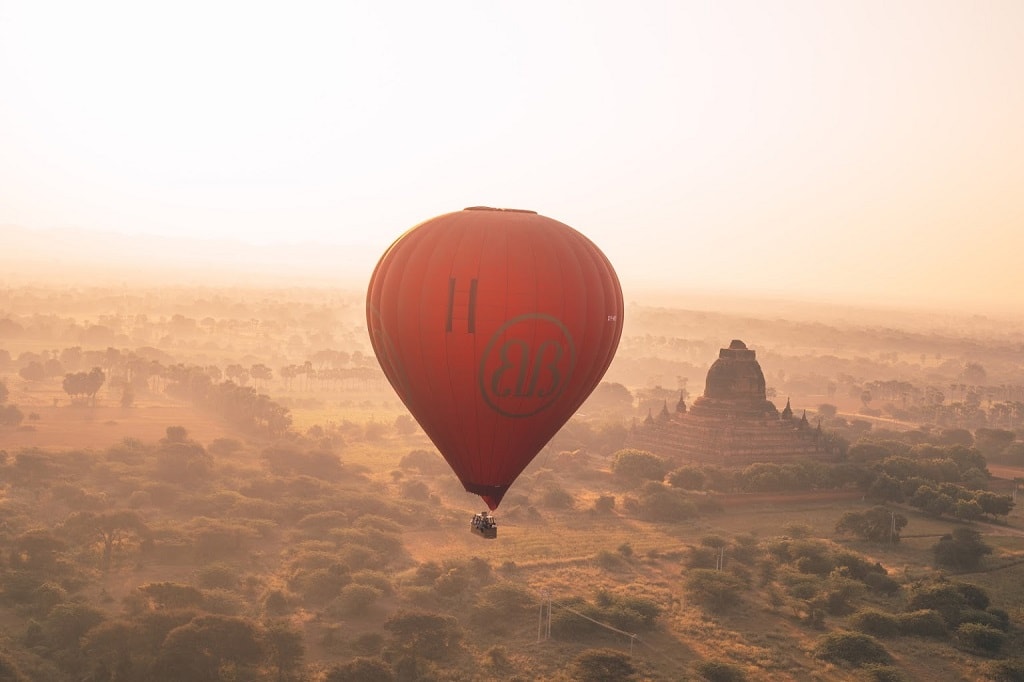
The difference between a good travel photographer and a frustrated one usually isn't gear — it's preparation and mindset. Our experience across dozens of trips has taught us that the best shots come from photographers who plan loosely but react quickly. That means knowing the light, understanding the camera, and showing up with a clear sense of what matters in a scene before pressing the shutter.
This guide breaks the process down into five major areas: when these techniques matter most, myths that need debunking, the gap between beginner and advanced approaches, real lessons from the field, and a long-term workflow that keeps everything organized. Let's get into it.
Contents
When Travel Photography Tips and Tricks Matter Most
Not every moment on a trip demands the same level of technical attention. The real skill is recognizing high-value shooting windows and being ready when they arrive. Most people waste energy photographing midday scenes with flat, harsh light — then pack the camera away right before sunset when the magic actually starts.
Golden Hour and Blue Hour Scenarios
The single biggest improvement anyone can make is simply showing up at the right time. Golden hour — the period shortly after sunrise and before sunset — transforms ordinary locations into extraordinary ones. Our team treats these windows as non-negotiable shooting time on every trip.
- Sunrise sessions almost always outperform sunset ones because there are fewer people, cleaner light, and calmer conditions
- Blue hour (the 20–30 minutes before sunrise or after sunset) is ideal for cityscapes and architecture where ambient light balances with artificial lighting
- Overcast days are not wasted days — diffused light eliminates harsh shadows and is perfect for portraits, waterfalls, and forest scenes
We recommend scouting locations during midday, then returning during golden hour with a composition already planned. This eliminates the frantic searching that eats into prime shooting time.
Street Markets, Festivals, and Crowds
Chaotic environments demand a different approach. In street markets and festivals, there's no time to set up a tripod or fiddle with settings. Our go-to method is switching to aperture priority, setting a moderately wide aperture (f/4–f/5.6), and letting the camera handle shutter speed. A fast prime lens — even a simple 35mm — outperforms a slow zoom in these conditions. Anyone looking at lens options should read our breakdown of why prime lenses deserve a spot in the travel kit.
The key in crowded scenes is patience. Wait for moments to unfold rather than machine-gunning the shutter. A single well-timed frame with genuine human expression beats fifty rushed captures.
Common Travel Photography Myths That Hold People Back
Travel photography has accumulated a frustrating amount of bad advice over the decades. Some of it was true in the film era but is completely irrelevant now. Other myths just persist because they sound authoritative. Here are the ones our team encounters most often — and why they need to go.
The Gear Myth
This is the big one. The belief that better gear produces better travel photos is flatly wrong for most people. A photographer who understands composition, light, and timing will produce stunning work on a mid-range mirrorless body. Meanwhile, someone with a $5,000 setup who doesn't understand exposure basics will come home with mediocre results.
That said, gear does matter at the margins. A weather-sealed body matters in Iceland. A fast telephoto matters on safari. The point isn't that gear is irrelevant — it's that technique improvements deliver 10x the return of gear upgrades until someone hits a genuine technical ceiling. For those just starting out, our guide to the best mirrorless cameras for beginners covers solid options that won't break the bank.
The "Get It Right in Camera" Absolutism
We hear this constantly, and it's half-true at best. Getting exposure, focus, and composition right in camera is obviously important. But the idea that editing is somehow cheating or unnecessary is nonsense. Every professional travel photographer edits. RAW files are designed to be processed — they look flat and dull straight out of camera by design.
- Shooting RAW gives 2–3 extra stops of dynamic range recovery in post
- White balance adjustments in post are lossless with RAW; getting it wrong in-camera with JPEG is permanent
- Lens corrections, perspective fixes, and selective adjustments are standard professional practice
The real advice is: get it as close as possible in camera, then refine in post. Both halves matter.
Our team's rule of thumb: if a photo needs more than five minutes of editing, the problem was likely in the capture, not the processing. Strong captures need minimal post-work.
Foundational Skills vs. Advanced Techniques
One of the most common mistakes in travel photography is jumping to advanced techniques before the foundations are solid. The gap between beginner and advanced isn't about knowing more tricks — it's about executing the basics reflexively so creative decisions happen in real time.
What Every Beginner Should Lock In First
Before worrying about travel photography tips and tricks for specific scenarios, the fundamentals need to be second nature. These aren't glamorous, but they are the difference between consistent results and occasional lucky shots.
- Exposure triangle mastery — understanding how aperture, shutter speed, and ISO interact without needing to think about it
- The rule of thirds and leading lines as default composition frameworks
- Manual focus for low-light and tricky AF situations
- Reading histograms instead of trusting the LCD preview
- Shooting RAW exclusively — no exceptions
Once these are locked in, everything else becomes an extension rather than a struggle. Most people try to run before they walk, and travel is an unforgiving teacher.
Techniques That Separate Intermediate From Advanced
Advanced travel photography is about seeing differently, not just operating differently. Here's what separates the levels:
| Skill Area | Intermediate Approach | Advanced Approach |
|---|---|---|
| Composition | Rule of thirds, centered subjects | Layered foregrounds, negative space, frame-within-frame |
| Light | Avoids harsh light, prefers golden hour | Uses harsh light creatively — shadows, silhouettes, contrast |
| Storytelling | Single strong images | Cohesive series that tell a narrative across 5–10 frames |
| Settings | Aperture priority for most scenes | Full manual with exposure compensation dialed by instinct |
| Post-processing | Global adjustments (exposure, contrast) | Luminosity masks, local adjustments, color grading for mood |
| Planning | Checks weather and sunrise times | Uses ephemeris apps, tide charts, and historical image research |
The jump from intermediate to advanced is slower and harder to measure. It's less about learning new settings and more about developing a personal vision — knowing what to include, what to exclude, and why.
Lessons From Real Trips and Real Mistakes
Theory is useful. Experience is better. Our team has made every mistake in the book, and these real-world lessons tend to stick far longer than anything read in a tutorial. Here are some of the most instructive ones.
Shooting in National Parks
National parks are among the most photographed locations on the planet, which creates a unique challenge: how to capture something original in a place millions have already shot. Our approach after numerous park trips is blunt — skip the iconic viewpoints during peak hours. Everyone gets the same shot from the same overlook at the same time. The images that stand out come from trails less traveled, unusual weather, or simply staying two hours longer than the crowd.
We covered this extensively in our guide to photography in Yosemite National Park, where the difference between a postcard shot and a portfolio shot often comes down to arriving at 4:30 AM instead of 8:00 AM. The same principle applies everywhere — the willingness to be uncomfortable is a competitive advantage.
- Research lesser-known trails and pulloffs before arriving — Google Earth and photography forums are invaluable
- Bring a headlamp and arrive in darkness for sunrise positions at popular viewpoints
- Stay through weather changes — fog, storms, and clearing skies produce the most dramatic light
- A sturdy travel tripod is non-negotiable for dawn and dusk work in parks
Urban and Street Photography Abroad
Urban travel photography demands a completely different rhythm. The light is harder to predict with tall buildings creating unpredictable shadow patterns. People move fast. Interesting moments appear and vanish in seconds.
Our team's approach in cities is to walk slowly with a single lens — usually a 35mm or 50mm — and stay in one neighborhood for at least two hours rather than trying to cover an entire city in a day. Depth beats breadth. Getting to know a single street corner, a particular café, or a transit station produces far more compelling work than a highlight reel of monuments.
One practical tip that has saved us repeatedly: always carry a microfiber cloth and a rain cover. Urban environments are dusty, and weather shifts faster than expected when walking all day. A fogged-up lens or rain-spotted front element has ruined more shots than bad composition ever will.
Building a Travel Photography Workflow That Lasts
The least glamorous part of travel photography is also the most important for long-term success: what happens after the shutter click. A sustainable workflow means never losing images, never falling months behind on editing, and always knowing where everything lives. Most people are terrible at this. Our team was terrible at this for a long time too.
Backup and Storage on the Road
Losing photos from a trip is genuinely devastating. It happens more often than anyone admits, usually from card failures, theft, or accidental deletion. Our backup protocol is rigid and has prevented data loss on multiple occasions:
- Two copies at all times — images exist on the SD card AND on a portable SSD before anything gets deleted from the card
- Cards are formatted only after confirming the backup is complete and readable
- On longer trips (10+ days), a third copy goes to cloud storage whenever reliable Wi-Fi is available
- Multiple smaller cards (64GB) are safer than one large card (256GB) — a single failure loses fewer images
For gear organization on the road, having a dedicated camera bag matters more than most people realize. A well-organized bag means faster access during shooting windows and better protection during transit. Our review of the best camera bags for photographers covers options across every budget and travel style.
A Sustainable Editing Routine
The biggest workflow killer is coming home from a two-week trip with 3,000 RAW files and no plan. Our team has settled on a system that prevents the editing backlog from ever becoming overwhelming:
- Cull ruthlessly on the first pass — reject anything out of focus, poorly exposed beyond recovery, or compositionally weak. This typically eliminates 60–70% of captures.
- Rate the survivors on a 1–3 star scale. Only 3-star images get full edits.
- Batch-edit similar shots (same location, same light) using synced settings in Lightroom or Capture One.
- Final selects get exported, keyworded, and backed up within one week of returning home.
The one-week deadline is critical. Every day that passes makes editing feel like more of a chore. Strike while the memories and emotional connection to the images are fresh. A disciplined editing workflow is what turns a pile of RAW files into a curated portfolio.
Frequently Asked Questions
What is the single most important piece of travel photography gear?
A versatile zoom lens in the 24–70mm range covers the vast majority of travel scenarios. It handles landscapes, street scenes, food, and environmental portraits without needing to swap lenses. Our team considers it the desert-island choice for anyone limited to one lens.
How many photos should someone expect to keep from a trip?
A realistic keeper rate is around 5–10% of total captures. From a week-long trip with 1,500 shots, that means 75–150 images worth editing, and perhaps 20–30 that are truly portfolio-worthy. Ruthless culling is a skill that improves with practice.
Is it better to shoot JPEG or RAW for travel photography?
RAW, without question. The additional file size is a minor inconvenience compared to the flexibility RAW provides in post-processing. Recovery of highlights, shadow detail, and white balance adjustments are dramatically better with RAW files. Storage is cheap — lost data in a JPEG is permanent.
How can someone take better photos with just a smartphone?
Clean the lens (seriously — pocket lint degrades sharpness noticeably), use the grid overlay for composition, tap to set focus and exposure on the subject, and avoid digital zoom entirely. Shoot in the phone's RAW or ProRAW mode if available, and edit with Lightroom Mobile or Snapseed rather than built-in filters.
What camera settings work best for general travel photography?
Aperture priority mode at f/5.6–f/8, auto ISO with a ceiling of 3200–6400 (depending on the camera body), and a minimum shutter speed of 1/125s. This combination handles 80% of daytime travel scenarios reliably. Switch to full manual for sunrise, sunset, and any scene with tricky lighting.
Final Thoughts
The best travel photography tips and tricks are useless without action — so our challenge to anyone reading this is simple: pick one technique from this guide, commit to practicing it on the next trip (or even a local outing this weekend), and review the results honestly. Growth in photography comes from deliberate repetition, not from consuming more tutorials. Grab the camera, get outside, and start building a body of work that tells a story worth sharing.
 |
 |
 |
 |

About Alex W.
Alex is a landscape, equine, and pet photographer based in the Lake District, UK, with years of experience shooting in one of Britain's most photographically demanding natural environments. His work has been featured in Take a View Landscape Photographer of the Year, Outdoor Photographer of the Year, and Amateur Photographer Magazine — publications that reflect a serious, competitive standard of image-making. At Click and Learn Photography, he shares the camera settings, gear choices, and compositional techniques he has developed through real-world shooting and competition-level work.
You can Get FREE Gifts. Furthermore, Free Items here. Disable Ad Blocker to receive them all.
Once done, hit anything below
|
|
|
|