Photography in Yosemite National Park – Tips for the Traveling Photographer
by Alex W.
I still remember pulling into Yosemite Valley for the first time just before sunrise, hands shaking from coffee and excitement, only to realize my memory cards were sitting on the kitchen counter back home. Lesson learned the hard way. Whether you're visiting for a weekend or spending a full week exploring, these Yosemite photography tips for travelers will help you avoid rookie mistakes and come home with images that do this iconic landscape justice. If you're serious about leveling up your craft, check out our ultimate guides for deeper dives into technique and gear.
Yosemite National Park is one of the most photographed places on Earth — and for good reason. Towering granite cliffs, thundering waterfalls, ancient sequoias, and star-filled skies create a landscape photographer's paradise. But that popularity comes with challenges: crowded viewpoints, rapidly changing light, and weather that can shift from bluebird skies to whiteout conditions in an hour.
This guide covers everything from shot selection and camera settings to gear protection and trip planning. You'll walk away with a concrete game plan for capturing Yosemite at its best, no matter what season you visit or what level of experience you bring.
Contents
- Essential Shooting Tips for Yosemite Photography
- From Snapshots to Portfolio Shots: Beginner and Advanced Techniques
- Planning Your Yosemite Photography Trip for Maximum Impact
- Protecting Your Gear in Yosemite's Elements
- Must-Have Gear for Yosemite Photography
- Common Yosemite Photography Myths You Should Ignore
- Frequently Asked Questions
- Key Takeaways
Essential Shooting Tips for Yosemite Photography
Yosemite's grandeur can be overwhelming when you first arrive. The temptation is to point your camera at everything and fire away. Resist that urge. The photographers who walk away with the strongest images are the ones who slow down and shoot with intention.
Chase Golden Hour at the Right Spots
Light makes or breaks every Yosemite image. Here's where to be and when:
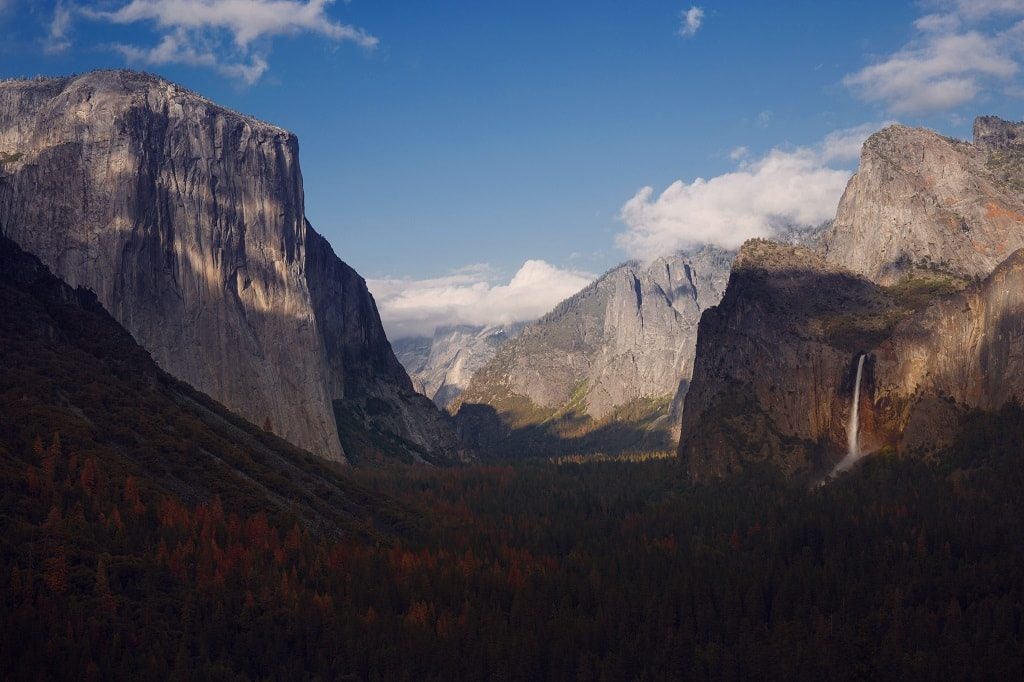
- Tunnel View — arrive 30 minutes before sunrise. The warm light paints El Capitan and Bridalveil Fall simultaneously.
- Valley View — best at sunset when the Merced River creates mirror reflections of the surrounding cliffs.
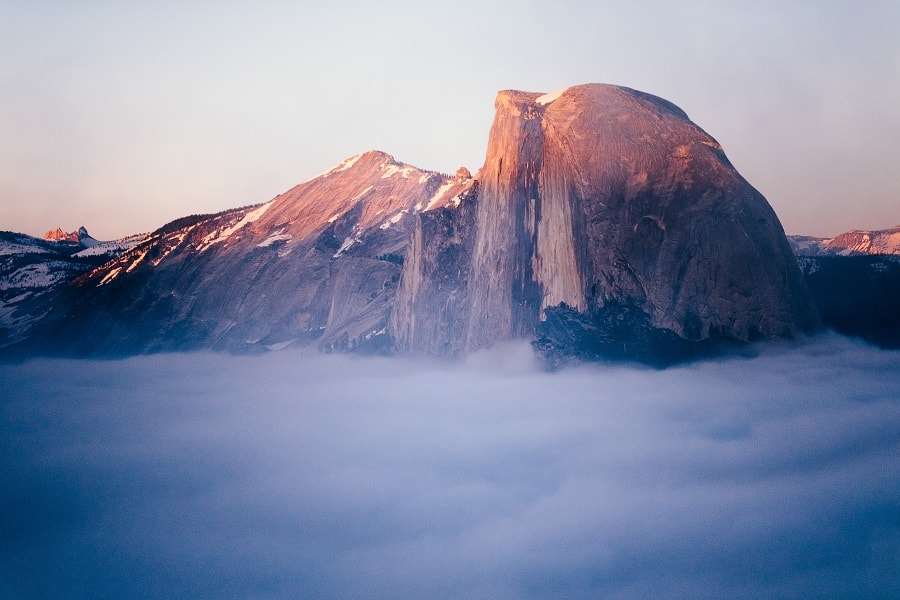
- Sentinel Bridge — the classic Half Dome reflection shot works best on calm mornings.
- Glacier Point — golden hour here gives you a sweeping panoramic of the entire valley bathed in warm tones.
Pro Tip: Set up at your chosen location at least 45 minutes before the golden hour begins. Popular viewpoints fill up fast, and you'll want time to test compositions before the best light hits.
Go Beyond the Postcard Compositions
Everyone shoots Tunnel View and Half Dome from Sentinel Bridge. Those are essential — get them — but then push further. Some of the best Yosemite photography tips for travelers involve finding your own perspective:
- Shoot through tree frames along the Valley Loop Trail for natural vignettes.
- Get low at the Merced River's edge and use rocks as foreground anchors.
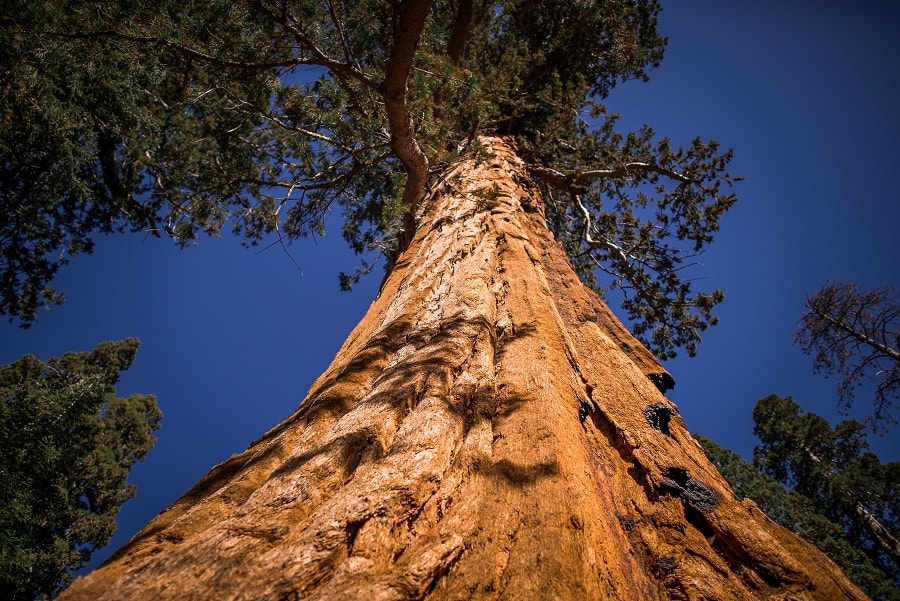
- Look for details — bark textures on sequoias, ice crystals on granite, or wildflowers against blurred cliff backdrops.
- Use telephoto compression to isolate waterfalls against sheer rock faces.
If you enjoy national park photography, you'll find similar composition strategies apply at other iconic locations. Our guide to photography in Banff National Park covers comparable techniques for mountain landscapes.
From Snapshots to Portfolio Shots: Beginner and Advanced Techniques
Your experience level doesn't limit what you can capture in Yosemite — it just changes your approach. Here's a breakdown of camera settings and methods for both ends of the spectrum.
Beginner Camera Settings That Work
If you're newer to manual shooting, start with these reliable settings:
- Aperture Priority mode (A/Av) — set your aperture to f/8 or f/11 for sharp landscapes and let the camera handle shutter speed.
- ISO 100–400 — keep it as low as possible to minimize noise. Bump to 400 in shade or forest canopy.
- Single-point autofocus — place your focus point on the most important element (usually one-third into the scene).
- Shoot RAW — this gives you far more flexibility in post-processing, especially for recovering highlight detail in bright skies.
Don't stress about nailing exposure perfectly in-camera. Shooting RAW means you have significant latitude to correct things later. Focus your energy on composition and timing instead.
Advanced Methods for Dramatic Results
For experienced shooters, Yosemite rewards more technical approaches:
- Exposure bracketing — the dynamic range between shaded valley floors and sunlit granite walls is extreme. Bracket 3–5 stops and blend in post or use HDR merge.
- Focus stacking — when you have a close foreground element (wildflowers, river rocks) and distant cliffs, take 3–4 shots at different focus distances and stack them for corner-to-corner sharpness.
- Long exposures — a 10-stop ND filter turns Yosemite Falls into silky threads against stone. Experiment with 15–30 second exposures. Our complete guide to waterfall photography covers ND filter techniques in depth.
- Milky Way shooting — Yosemite Valley has enough ambient light to be tricky, but Glacier Point and Tioga Pass offer dark skies ideal for astrophotography.
If you want to explore night photography here, our beginner's guide to astrophotography breaks down the settings and planning you need for stunning Milky Way shots above Half Dome.
Planning Your Yosemite Photography Trip for Maximum Impact
Great Yosemite images start long before you click the shutter. Smart planning is the single biggest factor separating photographers who come home disappointed from those who fill portfolios. Here's how to maximize your time.
Seasonal Shooting Guide
Each season transforms Yosemite into a completely different landscape. Your Yosemite photography tips for travelers should account for what's happening when you visit:
| Season | Key Subjects | Light Quality | Crowds | Access Notes |
|---|---|---|---|---|
| Spring (Apr–May) | Peak waterfalls, dogwood blooms, green meadows | Soft, overcast days common | Moderate | Tioga Road often closed; valley fully open |
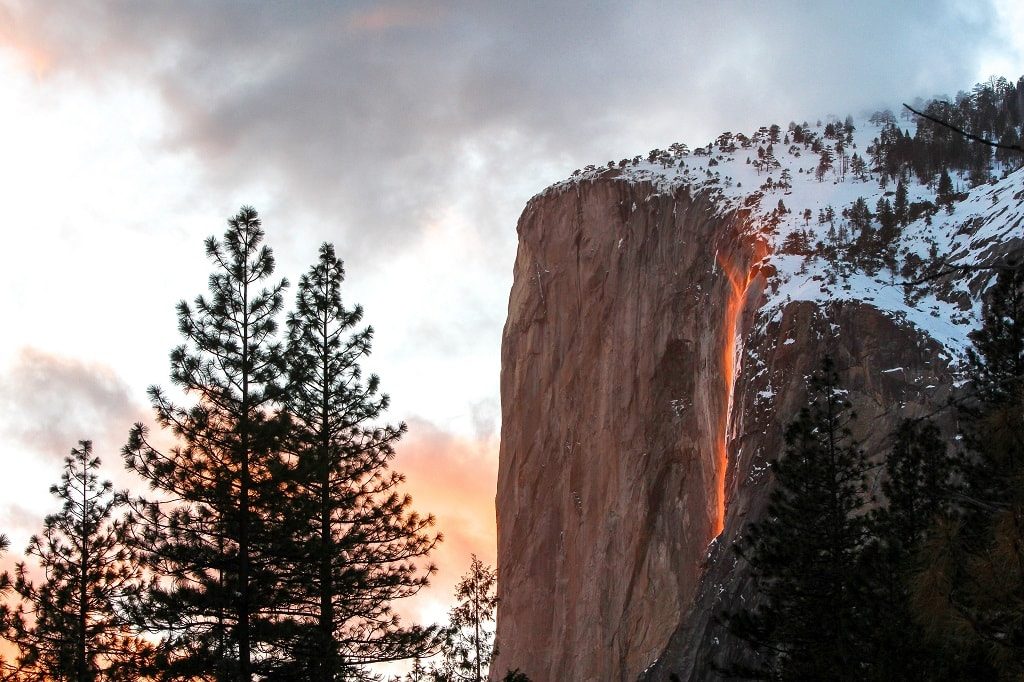
| Summer (Jun–Aug) | Milky Way, wildflowers at high elevations, Horsetail Fall afterglow | Harsh midday; golden hours are prime | Heavy | All roads open; permits required for some trails |
| Autumn (Sep–Nov) | Fall color along Merced River, low water reflections, mist | Warm, angled light all day | Low to moderate | Tioga Road closes mid-Nov (variable) |
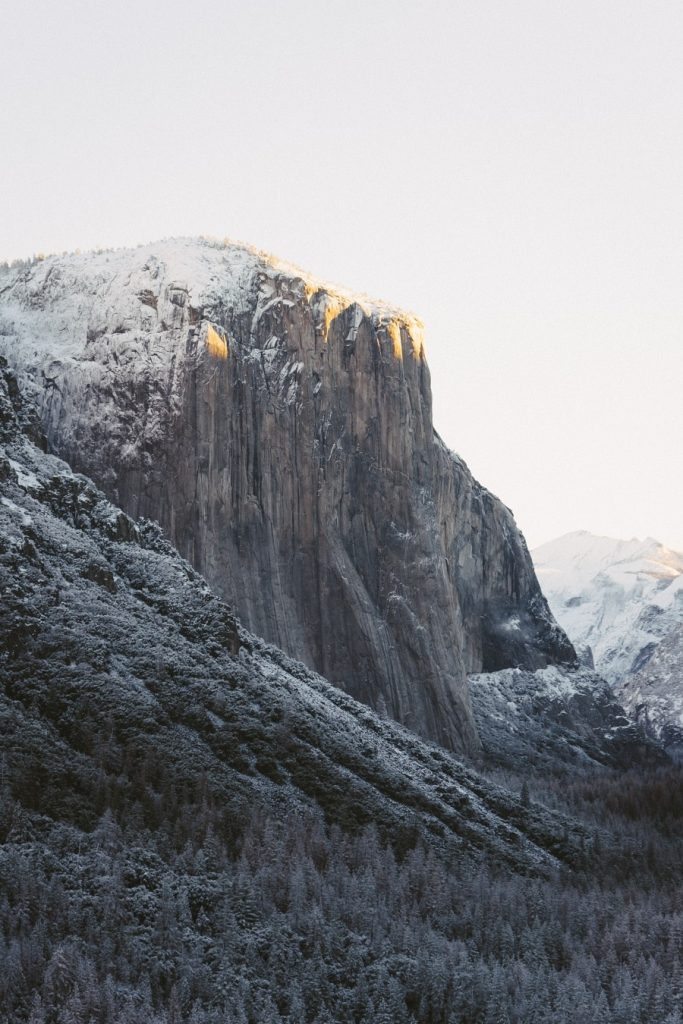
| Winter (Dec–Mar) | Snow-dusted granite, frozen waterfalls, dramatic storms | Low-angle, moody, dramatic | Very low | Chains required; Glacier Point Road closed |
Warning: February's "Firefall" event at Horsetail Fall draws massive crowds and now requires advance reservations for the viewing area. Plan months ahead or you won't get access.
Logistics and Permits
Getting into the park is half the battle during peak season. Keep these logistics in mind:
- Entrance reservations — required during peak months. Book through the National Park Service website as soon as they become available.
- Camping vs. lodging — camping inside the park puts you closest to sunrise spots. Curry Village and the Ahwahnee offer comfort but are expensive and book up fast.
- Shuttle system — the free valley shuttle runs year-round and stops at most major viewpoints. Use it to reduce parking headaches.
- Wilderness permits — needed for overnight backcountry trips. If you plan to hike to remote locations for multi-day shoots, reserve these early.
Protecting Your Gear in Yosemite's Elements
Yosemite's beauty comes with environmental challenges that can damage or destroy camera equipment. Waterfall mist, granite dust, temperature swings, and unexpected rain are all part of the deal. Here's how to keep your gear safe without slowing down your shooting.
Weather Hazards to Prepare For
- Waterfall spray — shooting near Yosemite Falls, Vernal Fall, or Bridalveil Fall coats your front element in minutes. Carry a lens cloth in your pocket and a rain sleeve for your body.
- Temperature swings — valley floors can be 20°F cooler than ridge tops. Moving between temperatures causes condensation on lenses. Let your camera acclimate inside a sealed bag before swapping environments.
- Dust and grit — granite dust is abrasive. Minimize lens changes in the field. If you must swap, point your camera body downward and shield it with your body.
- Snow and ice — winter shooting means cold-induced battery drain. Keep spare batteries warm in an inside pocket close to your body.
Field Maintenance Essentials
A few minutes of care each day prevents costly repairs:
- Wipe down your camera body and lens barrel every evening with a dry microfiber cloth.
- Use a rocket blower (not canned air) to remove particles from your sensor area before each day's shoot.
- Check your tripod legs for grit after shooting near water — sand in the leg locks causes scratching and seized mechanisms.
- Store everything in a padded, weather-resistant bag overnight, even inside your tent or car.
Must-Have Gear for Yosemite Photography
You don't need a truckload of equipment to shoot Yosemite well, but the right tools make a real difference. Here's what belongs in your bag and what you can leave behind.
Camera Bodies and Lenses
Your lens selection matters more than your camera body here. Prioritize versatility:
- Wide-angle zoom (14–24mm or 16–35mm) — your primary lens. Essential for valley panoramas, waterfall compositions, and Milky Way shots. You'll use this 60–70% of the time.
- Mid-range zoom (24–70mm) — covers everything from environmental portraits to tighter landscape compositions. The workhorse for daytime shooting.
- Telephoto (70–200mm or 100–400mm) — isolates distant features like climbers on El Capitan, waterfall details, or wildlife. Surprisingly useful here.
- Fast prime (24mm or 35mm f/1.4–f/1.8) — if you plan to shoot the Milky Way, a fast wide prime is non-negotiable for gathering enough starlight.
Any modern mirrorless or DSLR body handles Yosemite's conditions well. Weather sealing is a significant advantage given the spray and dust, but it's not a dealbreaker if your camera lacks it — just be more cautious.
Accessories That Make the Difference
- Sturdy tripod — non-negotiable for golden hour, long exposures, and night photography. Carbon fiber saves weight on hikes. Avoid flimsy travel tripods that vibrate in wind.
- Circular polarizer — cuts glare on water, deepens blue skies, and saturates fall colors. One of the few filters that can't be replicated in post.
- ND filters (6-stop and 10-stop) — essential for silky waterfall shots during daylight hours.
- Remote shutter release or intervalometer — eliminates camera shake during long exposures and is crucial for time-lapse sequences.
- Extra batteries (at least 3) — cold weather and long exposures drain batteries fast. Mirrorless cameras are especially hungry.
- Headlamp with red mode — you'll be hiking in the dark for sunrise shoots. Red mode preserves your night vision and doesn't disturb other photographers.
Pro Insight: Bring a microfiber cloth specifically designated for your front element and keep it in a sealed plastic bag. Waterfall mist mixed with granite dust creates a paste that smears if you use a dirty cloth.
Common Yosemite Photography Myths You Should Ignore
A lot of bad advice circulates online about shooting in Yosemite. Let's clear up the biggest misconceptions so you don't waste time or miss opportunities based on outdated thinking.
Myth: Summer Is the Best Time to Shoot
Summer is the most popular time to visit, but that doesn't make it the best for photography. Here's why:
- Harsh midday light dominates from 10 AM to 4 PM, leaving a narrow window of usable golden hour.
- Crowds at every major viewpoint mean tripod legs competing for inches of space.
- Waterfalls are often reduced to a trickle by late July.
- Haze and smoke from regional wildfires can obscure the valley for days.
Spring and winter are objectively stronger seasons for dramatic images. Spring delivers peak waterfall flow with lush green meadows. Winter offers snow-covered granite, moody storm clouds, and near-empty viewpoints. Autumn's low water creates glassy reflections on the Merced River that are impossible during high-flow months.
Myth: You Need Pro Gear to Get Great Shots
This one holds photographers back more than any technical limitation. The truth is straightforward:
- An entry-level mirrorless camera with a kit lens can produce stunning Yosemite landscapes when paired with good light and strong composition.
- A smartphone in the right light at the right location beats a $5,000 setup used carelessly at noon.
- The single most impactful piece of gear isn't a camera — it's a tripod. It forces you to slow down, compose deliberately, and shoot during the low-light hours that produce the best results.
Invest in a quality tripod and one good lens before upgrading your camera body. That combination outperforms a top-tier body with a cheap tripod every time.

Frequently Asked Questions
What is the best time of day to photograph Yosemite Valley?
The first hour after sunrise and the last hour before sunset deliver the best light. Yosemite Valley's east-west orientation means morning light hits the north-facing walls (like El Capitan) beautifully, while sunset illuminates Half Dome and Cathedral Rocks. Midday light is flat and harsh — use that time for scouting locations or resting.
Do you need a permit to use a tripod in Yosemite?
No permit is required for personal or editorial photography with a tripod. Commercial photography (advertising, product shoots) requires a permit from the National Park Service. As long as you're shooting for personal use or editorial publication, you can set up a tripod at any public viewpoint without restriction.
Can you photograph the Milky Way from Yosemite Valley?
You can, but it's not ideal. The valley floor has significant light pollution from lodges and campgrounds. For the clearest Milky Way shots, drive up to Glacier Point or along Tioga Road (when open) where the sky is dramatically darker. A fast wide-angle lens at f/1.4–f/2.8 and ISO 3200–6400 with a 15–20 second exposure is the standard approach.
What camera settings work best for Yosemite waterfalls?
For a silky-smooth water effect, use a shutter speed between 0.5 and 2 seconds at f/11 and ISO 100. You'll almost certainly need an ND filter during daylight. For a frozen-action look that captures individual water droplets, shoot at 1/500s or faster with a wider aperture. Both approaches produce strong results — it's a creative choice.
Key Takeaways
- Plan your trip around golden hour timing and seasonal conditions — spring and winter often produce more dramatic images than summer despite lower visitor traffic.
- A sturdy tripod and a versatile wide-angle lens matter more than an expensive camera body for capturing Yosemite's sweeping landscapes and silky waterfalls.
- Protect your gear proactively against waterfall mist, granite dust, and temperature swings — a few minutes of daily maintenance prevents expensive repairs.
- Go beyond the iconic viewpoints by exploring foreground elements, telephoto compression, and off-peak timing to create images that stand apart from the millions already taken here.
 |
 |
 |
 |

About Alex W.
Alex is a landscape, equine, and pet photographer based in the Lake District, UK, with years of experience shooting in one of Britain's most photographically demanding natural environments. His work has been featured in Take a View Landscape Photographer of the Year, Outdoor Photographer of the Year, and Amateur Photographer Magazine — publications that reflect a serious, competitive standard of image-making. At Click and Learn Photography, he shares the camera settings, gear choices, and compositional techniques he has developed through real-world shooting and competition-level work.
You can Get FREE Gifts. Furthermore, Free Items here. Disable Ad Blocker to receive them all.
Once done, hit anything below
|
|
|
|