According to a study by the Royal Photographic Society, photographers who plan their shoots in advance report a 73% higher rate of keeper images compared to those who simply show up and hope for the best. That single statistic should tell you everything about the value of a solid landscape photography planning guide. Whether you're chasing golden hour over a Scottish glen or waiting for the Milky Way to arc above a desert mesa, the work you do before you leave your front door determines at least half of your final result. If you're serious about improving your landscape photography, planning is the single highest-leverage skill you can develop.

For this image, I wanted the trees illuminated and the background in relative darkness to create a deep contrast. Rather than turning up and waiting for hours for the right moment I used some carefully selected tools, turning up 30 minutes before the sun rose over the hills and being in position at just the right time. Proper planning can change your photography!
Planning doesn't mean sucking the spontaneity out of your photography. It means stacking the odds in your favour so that when you arrive at a location, you're free to focus on composition and creativity rather than scrambling to figure out where the sun sets or whether the tide is about to swallow your tripod. In this guide, you'll learn the tools, techniques, and mental frameworks that separate consistently successful landscape photographers from those who rely on luck.
This is Part 3 of our Ultimate Landscape Photography Guide series, and it's arguably the most practical instalment. Parts 1 and 2 covered gear and camera settings — things you do once and largely forget. Planning is something you'll do before every single shoot for the rest of your photographic life. Let's make sure you do it well.
Contents
The Essential Planning Toolkit
Your landscape photography planning guide starts with the right tools. You don't need every app on the market, but you do need a reliable system that covers three bases: location intelligence, sun and moon positioning, and weather forecasting. Get these three pillars right and you'll walk into every shoot with confidence.
Traditional Maps and Navigation
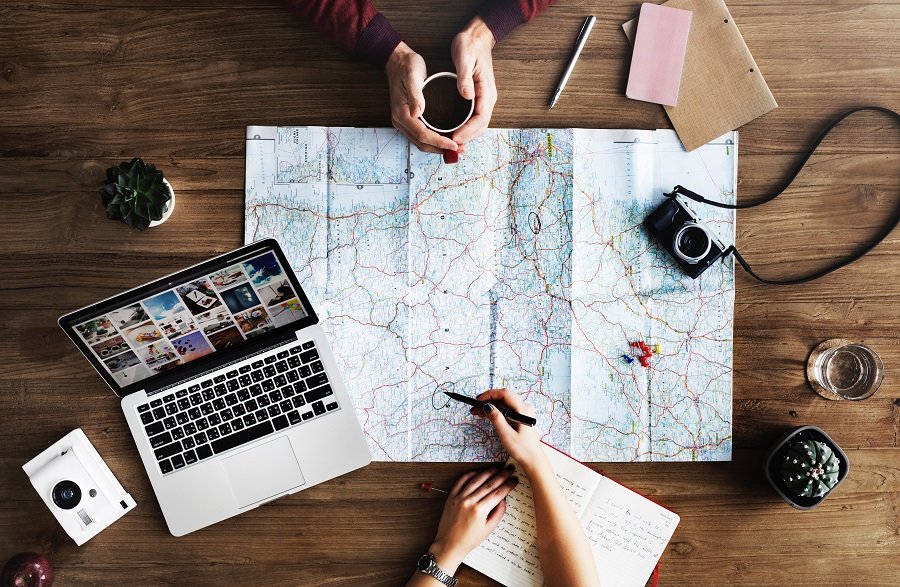
Before you open a single app, consider the humble paper map. Ordnance Survey maps (or their equivalent in your country) give you something no digital tool quite matches: a bird's-eye understanding of terrain, contour lines, footpaths, and access points all visible at once. You can spread a map across your kitchen table and trace potential routes with your finger, noting ridgelines that might frame a composition or valleys that could channel dramatic light.
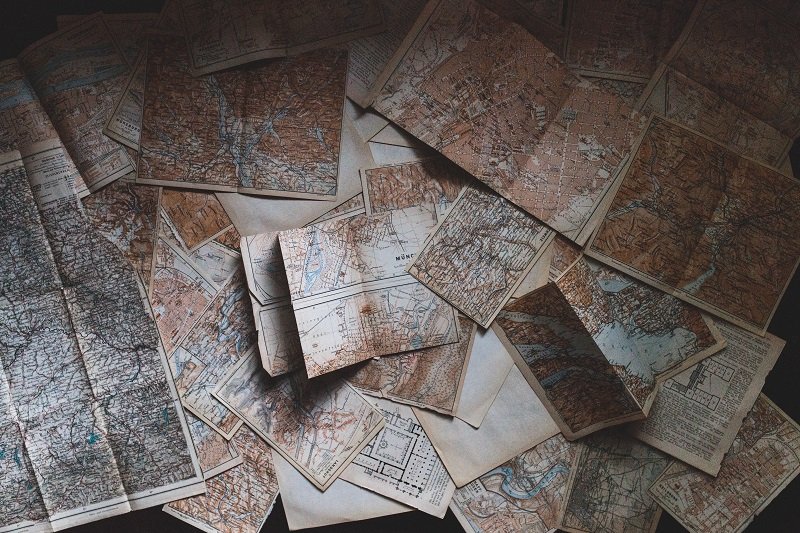
If you know some basic navigation and map reading, using a traditional, non-digital approach can be a very pleasant process.
Contour lines are your secret weapon. Tight contour lines mean steep terrain — great for dramatic foregrounds but potentially dangerous in poor visibility. Wide spacing indicates gentle slopes, often ideal for tripod stability and easy access. Learn to read these and you'll predict compositions before you've ever set foot on location.
Digital Planning Apps
Paper maps can't tell you where the sun will be at 6:47 PM on a specific date. That's where digital tools take over. The two heavyweights in this space are The Photographer's Ephemeris (TPE) and PhotoPills, and both are worth every penny.

The traditional approach may be soothing, but by ignoring the wealth of digital tools at your disposal as photographers you will miss out on some crucial information.
TPE overlays sunrise, sunset, moonrise, and moonset lines directly onto a map. You can scrub through dates and instantly see how the angle of light shifts across the seasons. PhotoPills adds augmented reality — hold your phone up at a location and see exactly where the Milky Way will sit in the sky tonight.
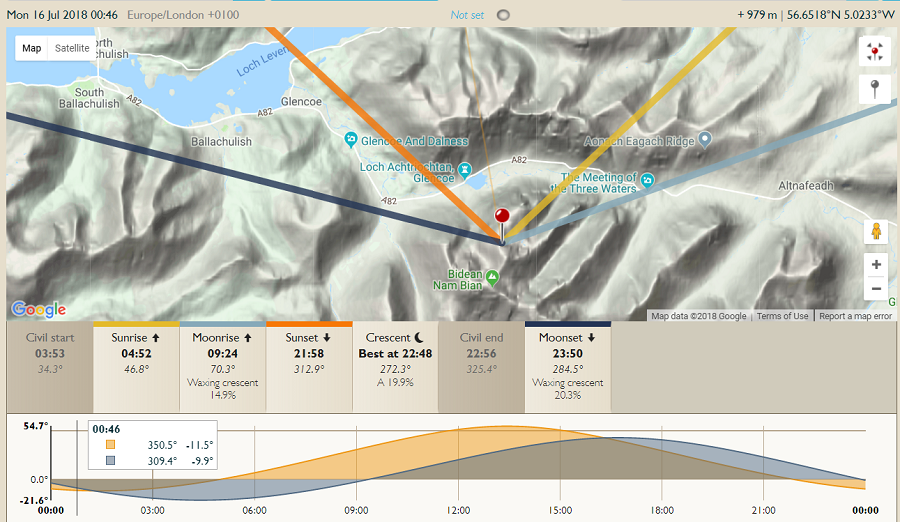
Using TPE, I am able to determine that if I want to shoot the view down the majestic valley of Glencoe a sunset expedition would probably be the most suitable. This is only the most basic of uses for this powerful piece of software.
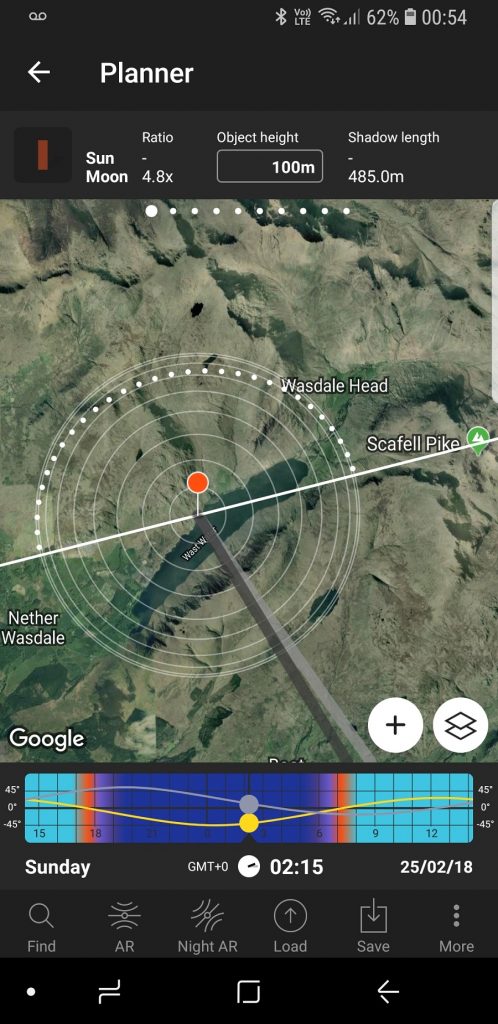
The interface of PhotoPills is slightly different from TPE, but it offers some extra features that could be very helpful. Here, I can see exactly where the Milky Way will appear in the night sky.
Pro tip: Use TPE on your desktop for initial research, then switch to PhotoPills on your phone once you're on location. The AR feature alone justifies having both apps.
Planning Myths That Hold Photographers Back
There's a persistent set of myths in the landscape photography community that actively prevents photographers from reaching their potential. Let's dismantle the most damaging ones.
Myth: Planning Kills Creativity
This is the most common objection, and it's completely backwards. Planning doesn't constrain your creativity — it liberates it. When you arrive at a location already knowing where the light will fall, you don't waste your golden hour fumbling with logistics. You spend it experimenting with compositions, trying different focal lengths, and responding to the scene in front of you.
Think of it like a musician. The best jazz improvisers have spent thousands of hours learning scales and chord progressions. Their planning and practice is what makes their spontaneity possible. Your landscape photography planning guide is your equivalent of learning scales — it builds the foundation that frees you to improvise in the field.
Myth: Bad Weather Means Stay Home
If you only shoot in clear blue skies, you're missing the most dramatic conditions landscape photography has to offer. Broken cloud at sunset produces the fiery skies that stop people mid-scroll. Mist and fog create atmosphere that transforms ordinary woodland into something ethereal — as you might explore in a dedicated forest photography session. Even rain has its uses: wet surfaces reflect light beautifully, and the clearing after a storm often delivers the most spectacular conditions of all.
The key isn't avoiding bad weather — it's understanding what different weather patterns produce photographically. A solid overcast sky gives you flat, dull light. Broken cloud with gaps gives you spotlighting and drama. Learn the difference and you'll know when to grab your bag and when to genuinely stay home.
Warning: "Bad weather is good for photos" does not mean "dangerous weather is good for photos." Always check safety conditions — lightning, flash floods, and high winds on exposed ridges are never worth the shot.
A Real-World Planning Walkthrough
Theory is useful, but let's put this landscape photography planning guide into practice with a concrete example. Say you've decided to photograph the Torridon mountains in the Scottish Highlands. Here's exactly how you'd plan the trip from scratch.
Location Scouting from Your Desk
Start with a broad search on 500px or Flickr for "Torridon photography." You're not looking for compositions to copy — you're looking for proof of potential. Can this place deliver? A quick scan tells you yes: dramatic peaks, lochs, and moody skies dominate the results.
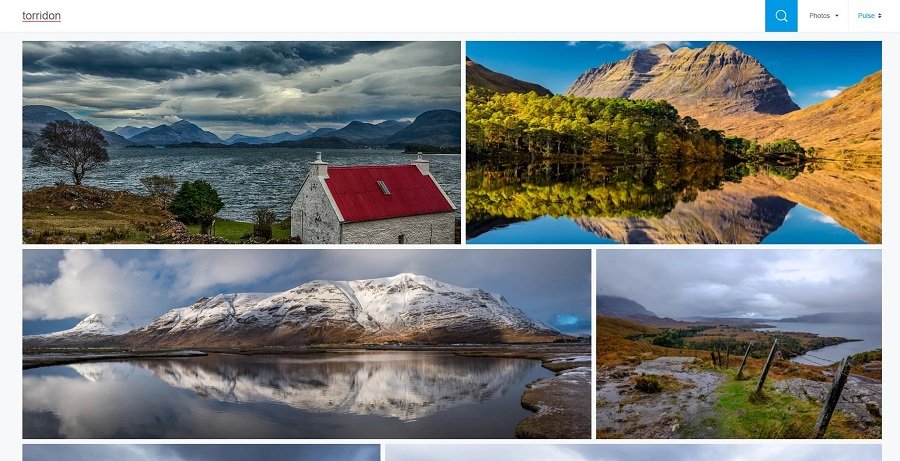
A quick search on 500px shows that Torridon has a huge amount of photographic potential. This is all I need – I don't want to be overly influenced by what other photographer's have shot.
Next, open Bing Maps or Google Maps in satellite view. Identify accessible peaks, lochside viewpoints, and walking paths. Google Street View is particularly valuable here — it gives you a ground-level preview of parking areas, trailheads, and the general character of the terrain.
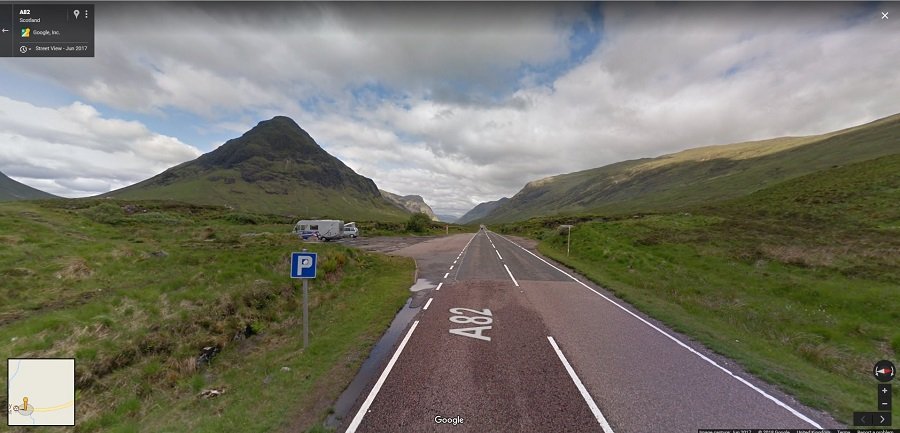
Using Google Street View not only gives you a visual representation of what to expect, but it's great for finding potential parking spots!
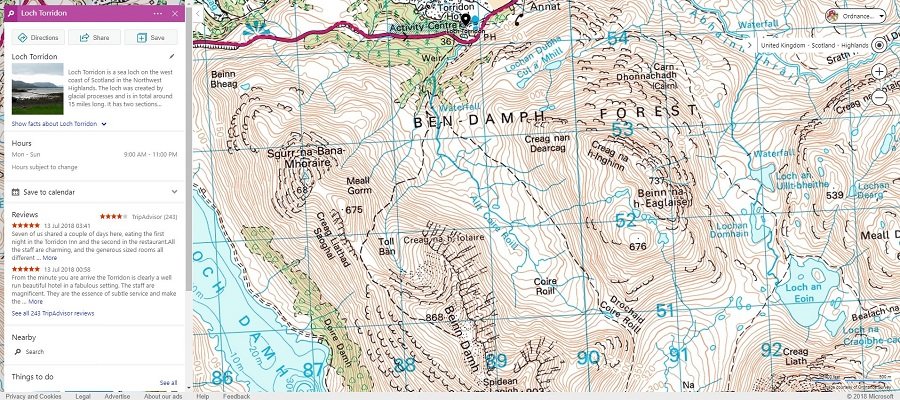
Using Bing Maps I can see that a walk up Beinn Damh would be perfect for a sunset shoot in the summer months, with it likely to offer gorgeous views of the sun setting at the end of the valley.
Now fire up TPE. Drop a pin on your chosen viewpoint — say the summit of Beinn Damh — and scrub through dates. You'll quickly see that during summer months, the sun sets looking straight down the valley. That's your golden ticket. Plan to arrive at least 90 minutes before sunset to scout compositions and set up. There's a good reason why many experienced photographers swear by shooting at sunrise and sunset — the quality of light is incomparable.
Reading Weather for Dramatic Light
A week before your trip, start checking the forecast. You're not looking for perfect weather — you're looking for photogenic weather. The ideal scenario is 40-70% cloud cover with occasional breaks. This gives you dramatic skies, spotlit mountains, and the possibility of colourful light at golden hour.
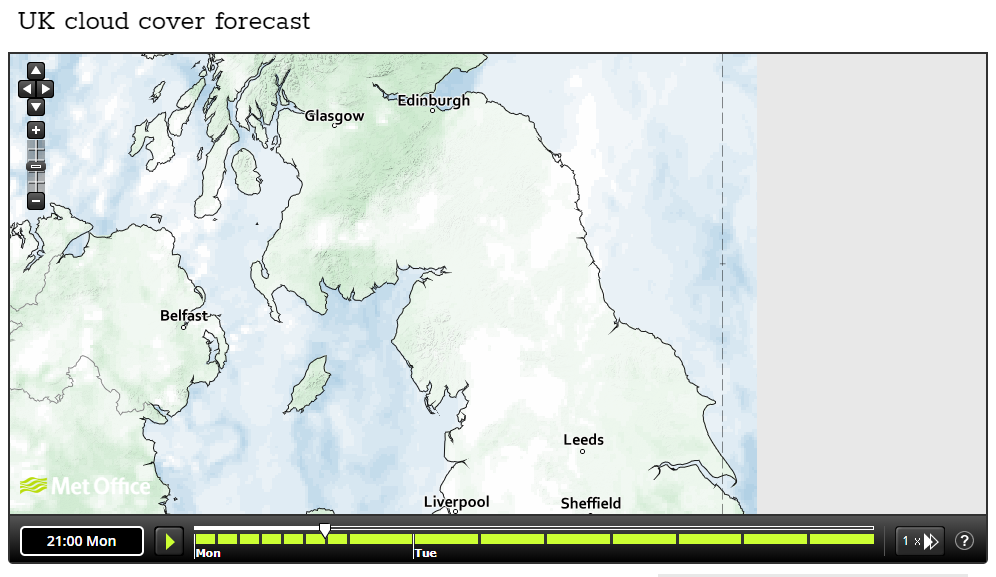
Using a cloud cover forecast you can determine whether the light will be able to break through when on location.
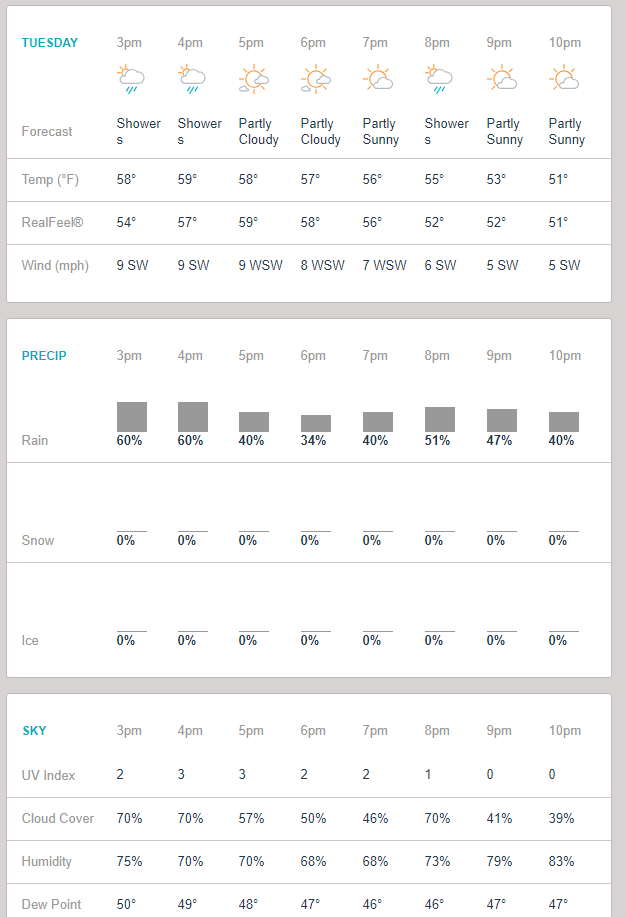
I've struck it lucky! We have sunshine and showers predicted for the hours leading up to sunset in Torridon. With between 40% and 70% cloud cover that means we should be able to capture some gorgeous evening light, as well as some colour in the sky and a bit of drama from the showers.
Use dedicated cloud-cover forecasts rather than generic weather apps. Services like Mountain Weather Information Service (MWIS) for the UK or Mountain-Forecast.com globally provide hour-by-hour cloud cover percentages at altitude — far more useful than a simple "partly cloudy" from your phone's default weather app.
Comparing Planning Methods
With so many tools available, it helps to understand what each one excels at and where it falls short. Your planning workflow should combine multiple tools rather than relying on any single one.
App-by-App Breakdown
| Tool | Best For | Limitations | Cost |
|---|---|---|---|
| The Photographer's Ephemeris (TPE) | Sun/moon positioning on a map, elevation-aware calculations | No weather data, limited mobile AR | Free (web), paid (app) |
| PhotoPills | Milky Way planning, AR visualisation, exposure calculator | Steeper learning curve, Android version lagged historically | One-time purchase |
| Google Earth / Street View | Ground-level scouting, parking, access routes | Imagery can be years old, limited rural coverage | Free |
| Ordnance Survey / Topo Maps | Contour reading, footpaths, terrain assessment | No light/weather data, requires map-reading skills | Varies |
| MWIS / Mountain-Forecast | Altitude-specific cloud cover and wind | Limited geographic coverage outside mountain areas | Free |
| Windy.com | Global weather visualisation, rain radar, multi-model comparison | Can be overwhelming for beginners | Free (basic), paid (premium) |
Matching Tools to Situations
For a simple sunset shoot at a known local spot, you only need a weather check and a quick glance at TPE for exact sunset time and direction. For a multi-day trip to unfamiliar terrain, you want the full stack: topo maps for route planning, Google Earth for ground-level previews, TPE or PhotoPills for light angles across multiple days, and a mountain weather service for altitude-specific forecasts.
Seascape photographers need an additional layer: tide tables. Shooting at a rocky coastline without checking the tides is not just a photographic mistake — it's a safety hazard. Apps like Magic Seaweed or the UK's Admiralty EasyTide service give you precise high and low tide times for thousands of locations.
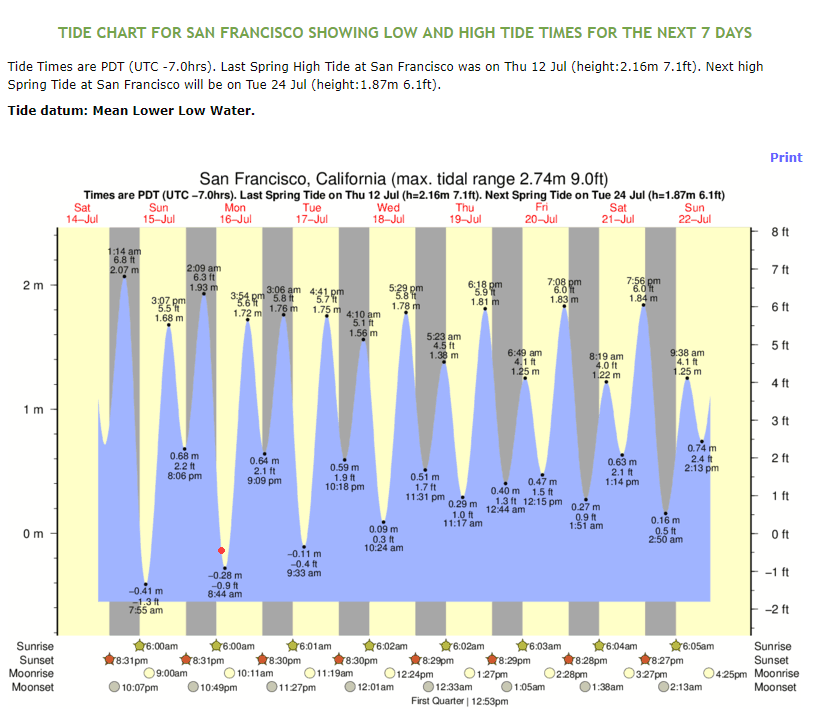
Paying careful attention to the tide times if an absolute necessity if you're planning any seascape shoots – Not just for photography, but also for your safety.
When Your Plan Falls Apart
No plan survives first contact with reality perfectly intact. The weather forecast was wrong, the path is closed, or you arrive to find scaffolding covering your key foreground feature. What matters is how you respond.
Adapting on Location
The best landscape photographers always have a Plan B. If your sunset viewpoint is socked in with low cloud, drop down in elevation — you might find yourself above a temperature inversion, shooting cloud inversions from above. If the light is flat and grey, switch your thinking: this is perfect weather for waterfalls, intimate woodland scenes, or black and white landscape photography where you want even tones.
Keep a mental list of "Plan B locations" within a reasonable drive of your primary target. These should be places that thrive in opposite conditions — if your main spot needs clear skies, your backup should be somewhere that benefits from cloud and mist.
Pro insight: Some of the most awarded landscape photographs in history were captured when the original plan failed completely. Flexibility isn't a backup strategy — it's a core photography skill.
Safety and Contingency Planning
Planning for landscape photography isn't only about getting great images. It's about getting home safely. Always tell someone where you're going and when you expect to return. Carry a fully charged phone, a headtorch with spare batteries, and appropriate clothing for conditions worse than forecast. Mountain weather can deteriorate in minutes, and no photograph is worth a rescue callout — or worse.
If you're shooting coastal locations, give yourself wide safety margins around high tide. Arriving an hour before low tide and leaving well before the turn gives you maximum shoreline access with minimum risk. Check for any coastguard or safety warnings specific to your location before setting out. Also consider your gear: if conditions turn wet, having your camera bag rain-covered and filters accessible in a protective pouch makes the difference between calmly adapting and panicking as rain hits your front element.
A quick search on 500px shows that Torridon has a huge amount of photographic potential. This is all I need – I don't want to be overly influenced by what other photographer's have shot.
Frequently Asked Questions
How far in advance should I start planning a landscape photography trip?
For local shoots, a day or two is usually sufficient — check the weather and sun position the evening before. For trips to unfamiliar locations, start researching at least two to three weeks ahead. This gives you time to study the terrain, identify multiple viewpoints, and monitor weather patterns so you can pick the best window to visit.
Is The Photographer's Ephemeris or PhotoPills better for beginners?
TPE has a simpler interface and is easier to learn, making it the better starting point. Its web version is free, so you can try it without spending anything. Once you're comfortable with sun-tracking concepts, move to PhotoPills for its augmented reality features and Milky Way planner — especially if you want to explore astrophotography.
What cloud cover percentage produces the best sunset photos?
Between 30% and 70% cloud cover tends to produce the most dramatic sunsets. Below 30%, there isn't enough cloud to catch and reflect the warm light. Above 70%, the sun often can't break through at the horizon. The sweet spot is scattered mid-level cloud with clear skies near the horizon line.
Do I really need paper maps when I have GPS on my phone?
Paper maps remain valuable for two reasons. First, they give you a broader spatial awareness of the terrain that a small phone screen cannot match. Second, they work without battery or signal. In remote mountain areas where phone batteries drain quickly in cold weather, a paper map and compass could genuinely save your life.
How do I plan for Milky Way photography specifically?
Use PhotoPills' Milky Way planner to find dates when the galactic core is visible and the moon is below the horizon (ideally within a few days of a new moon). You need dark skies, so check light pollution maps like darksitefinder.com. Plan your composition during daylight, mark your tripod position, and return after astronomical twilight ends.
What should I do when the weather forecast is completely wrong?
Adapt rather than abandon. Overcast skies suit long-exposure seascapes, waterfall photography, and intimate landscape details. Fog and mist create atmospheric images you cannot get in clear conditions. Keep a mental list of nearby locations that thrive in opposite conditions to your primary target, so you always have somewhere productive to go.
How important is tide planning for coastal landscape photography?
It is absolutely critical, both for composition and safety. Low tide reveals rock pools, textures, and foreground interest that disappears at high water. Incoming tides can cut off access to headlands and rock platforms with alarming speed. Always check tide tables for your specific location and give yourself generous safety margins — never assume you can outrun the sea.
Next Steps
- Download TPE (free web version) and PhotoPills today. Drop a pin on your favourite local landscape spot and study how the sun angle changes across the next month. Spend 20 minutes learning the interface before your next shoot.
- Plan your next shoot using the full workflow from this guide. Choose a location, scout it via Google Earth and Street View, check sun angles in TPE, monitor the weather for three days before, and write down your Plan A and Plan B before you leave the house.
- Build a location database. Start a simple spreadsheet or notes file listing locations you want to shoot, the best season and time of day for each, access notes, and parking details. Every trip you plan adds to this resource, and within a few months you'll have a personal planning library that saves you hours of research.
- Practice weather reading for two weeks straight. Each evening, check the forecast for the next morning's sunrise. Note the predicted cloud cover, then look out your window at sunrise and compare. This builds your instinct for when forecasts are reliable and when they're likely to be off — a skill no app can give you.
 |
 |
 |
 |

About Alex W.
Alex is a landscape, equine, and pet photographer based in the Lake District, UK, with years of experience shooting in one of Britain's most photographically demanding natural environments. His work has been featured in Take a View Landscape Photographer of the Year, Outdoor Photographer of the Year, and Amateur Photographer Magazine — publications that reflect a serious, competitive standard of image-making. At Click and Learn Photography, he shares the camera settings, gear choices, and compositional techniques he has developed through real-world shooting and competition-level work.
You can Get FREE Gifts. Furthermore, Free Items here. Disable Ad Blocker to receive them all.
Once done, hit anything below
|
|
|
|