Have you ever watched a sunset compress into ten breathtaking seconds and wondered how photographers pull that off? The answer is simpler than you think — and these time lapse photography tips for beginners will get you shooting your first sequence tonight. Time lapse photography captures slow-moving events and condenses them into short, dramatic clips that reveal motion invisible to the naked eye. Whether you're drawn to rolling clouds, blooming flowers, or bustling cityscapes, the technique is accessible to anyone with a camera and a little patience. If you're just getting started with photography fundamentals, our photography beginners section covers the essential groundwork you need.

The beauty of time lapse is that it doesn't demand expensive gear or years of experience. A solid tripod, a camera with manual mode, and an intervalometer are all you need to start producing compelling results. In this guide, you'll learn the common myths that hold beginners back, how to compare your gear options, the best subjects to practice on, and practical tips that separate amateur attempts from polished sequences.
By the end, you'll have a clear roadmap — from choosing your first subject to editing your final clip. Let's break it down.
Contents
- Time Lapse Myths That Hold Beginners Back
- Gear Comparison: What You Actually Need
- Best Subjects for Your First Time Lapse
- Time Lapse Photography Tips for Beginners That Actually Matter
- When to Shoot (and When to Stay Home)
- Budget Breakdown: Getting Started Without Overspending
- Frequently Asked Questions
- Next Steps
Time Lapse Myths That Hold Beginners Back
Misinformation keeps more people from trying time lapse than any technical barrier. Let's clear up the three biggest misconceptions so you can move forward with confidence.
You Need Expensive Gear
This is the most persistent myth in the genre. You absolutely do not need a top-tier mirrorless body or cinema-grade slider to create stunning time lapse sequences. Many iconic time lapses have been shot on entry-level DSLRs and even smartphones. The DSLR vs mirrorless debate matters far less here than in other genres — both systems handle time lapse equally well.
What matters more than your camera body:
- A stable tripod that won't shift during long shoots
- An intervalometer (built-in on many cameras, or $15–$30 external)
- A memory card with enough capacity for hundreds of RAW files
Pro tip: Before buying any new gear, shoot your first time lapse with what you already own. Most cameras made after 2015 have a built-in interval shooting mode buried in the menu.
It Takes Forever and It's Boring
A typical time lapse session runs 30 minutes to two hours. That's comparable to a landscape photography outing. The difference is that your camera does the repetitive work while you monitor the scene. Bring a book, scout your next composition, or review shots on your phone. Experienced photographers often run multiple cameras simultaneously to maximize their time on location.
It's Just Sped-Up Video
Time lapse photography and sped-up video look similar but differ fundamentally. A time lapse captures individual still frames at set intervals — each one a full-resolution photograph. Sped-up video simply increases playback speed of continuous footage, resulting in lower resolution per frame and less control over exposure. Understanding this distinction is key because it affects your entire workflow, from exposure triangle settings to post-processing options.
Gear Comparison: What You Actually Need
Your gear choices shape the quality, flexibility, and cost of your time lapse work. Here's a practical breakdown of what works at each level.
Camera Options at Every Budget
| Camera Type | Interval Shooting | Image Quality | Battery Life | Best For |
|---|---|---|---|---|
| Smartphone | App-based | Moderate | 2–3 hours | Casual clips, social media |
| GoPro / Action Cam | Built-in | Good | 1.5–2.5 hours | Outdoor, adventure, wide-angle |
| Entry DSLR/Mirrorless | Built-in or external | Excellent | 3–5 hours | Serious hobbyists, 4K output |
| Full-frame Mirrorless | Built-in | Outstanding | 4–8 hours | Professional, low-light, holy grail |
| Dedicated Time Lapse (e.g., Brinno) | Built-in | Moderate | Days to weeks | Construction, long-term projects |
Essential Accessories
Beyond the camera, a few accessories make a significant difference:
- Tripod: Non-negotiable. Even slight movement between frames creates unusable jitter. Heavier is better for wind resistance.
- Intervalometer: Controls the interval between shots. Built-in options work fine; wired remotes offer more precision.
- ND filters: Essential for daytime long exposures that create smooth motion blur between frames. A good neutral density filter lets you drag your shutter speed even in bright conditions.
- Extra batteries: A 2-hour session at 5-second intervals means 1,440 shutter actuations. Carry at least two spares.
- Large memory cards: Shooting RAW at that rate fills a 64GB card fast. Bring 128GB minimum.
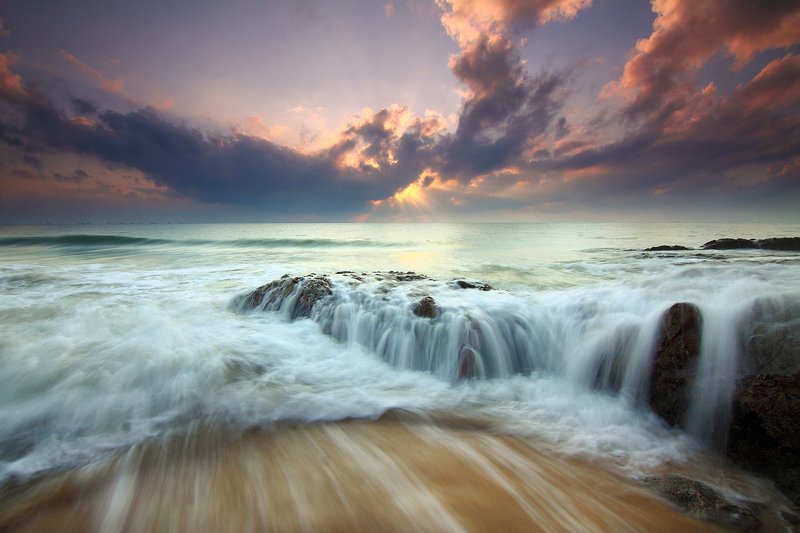
Image source: Good Free Photos
Best Subjects for Your First Time Lapse
Choosing the right subject is half the battle when you're starting out. You want something with visible, predictable motion that unfolds over a reasonable timeframe.
Outdoor Subjects
Nature offers the most forgiving subjects for beginners:
- Clouds: The classic starter subject. Cumulus clouds on a partly sunny day move fast enough to produce dramatic results in 20–30 minutes with 3–5 second intervals.
- Sunsets and sunrises: Golden hour transitions are visually spectacular. If you're already an early riser for sunrise landscape photography, adding a time lapse camera takes minimal extra effort.
- Star trails: Night sky time lapses demand longer intervals (15–30 seconds) and wider apertures, but the results are extraordinary. Use manual focus set to infinity.
- Tides: Ocean tides rising and falling produce mesmerizing movement, especially around rocky coastlines.
- Flowers blooming: Requires a longer commitment (hours to days) but delivers captivating close-up sequences.
Indoor and Urban Subjects
You don't need to travel far for compelling subjects. Urban environments and indoor settings offer reliable, controllable conditions:
- Traffic light trails at a busy intersection
- Construction projects from a fixed vantage point
- Crowded public spaces showing pedestrian flow
- Art projects — painting, building, or cooking from start to finish
- Shadow movement across a room throughout the day
Cityscape time lapses combine especially well with urban composition techniques. The key is finding a static elevated position where you can leave your camera undisturbed.
Warning: Always secure your tripod in public spaces. A curious passerby bumping your rig mid-sequence ruins the entire shoot — and there's no way to fix it in post.
Time Lapse Photography Tips for Beginners That Actually Matter
Forget the overly complicated guides. These core techniques cover 90% of what determines whether your time lapse succeeds or fails.
Choosing Your Interval
Your interval — the time between each frame — directly controls how fast motion appears in the final video. Here's a practical reference:
- 1–2 seconds: Fast-moving clouds, busy traffic, crowds
- 3–5 seconds: Standard clouds, sunsets, general outdoor scenes
- 10–15 seconds: Slow clouds, shadows, construction progress
- 15–30 seconds: Stars, moonrise, very slow natural processes
- 1–5 minutes: Flowers blooming, ice melting, long-term projects
A standard video plays at 24 or 30 frames per second. So 720 photos at a 5-second interval equals 60 minutes of shooting for a 24–30 second clip at 24fps. Always calculate your total shoot time before pressing start. Running out of battery or card space at the climax of a sunset is a rookie mistake you only make once.
Locking Exposure and Focus
This is where most beginners fail. If you leave your camera in auto mode, the exposure shifts slightly between frames, creating an ugly flicker in the final video. The fix is straightforward:
- Set your camera to full manual mode (M)
- Dial in your aperture, shutter speed, and ISO manually
- Switch your lens to manual focus and lock it
- Turn off auto white balance — set a fixed Kelvin value
- Disable image stabilization (it introduces micro-shifts on a tripod)
The exception is "holy grail" time lapses that capture dramatic light changes like day-to-night transitions. These require aperture priority or specialized software like LRTimelapse to ramp exposure smoothly. But master manual mode first — it's the foundation everything else builds on. If you need a refresher on how these settings interact, review the exposure triangle.
Composition for Motion
Time lapse composition differs from still photography in one critical way: you're composing for where motion will travel through the frame, not just for a static moment. Before pressing start, ask yourself:
- Where does the movement enter and exit the frame?
- Is there a strong foreground anchor that stays static while the background moves?
- Does the movement lead the viewer's eye through the composition?
The strongest time lapses pair a rock-solid foreground element — a building, a tree, a mountain ridge — with dramatic background motion like clouds or stars. This contrast between stillness and motion is what makes the final clip visually compelling. The same composition fundamentals apply here, with the added dimension of thinking about motion over time.
When to Shoot (and When to Stay Home)
Not every condition suits time lapse photography. Learning to read conditions saves you wasted sessions and frustration.
Ideal Conditions
These scenarios consistently produce strong results:
- Partly cloudy skies: Moving clouds add drama without obscuring the scene completely
- Golden hour transitions: The 30 minutes before and after sunset or sunrise deliver the most dramatic color shifts
- Clear nights: For star trails and Milky Way time lapses, moonless nights with low light pollution are essential
- Mild wind: Enough to move clouds and vegetation without shaking your tripod
- Events with predictable timing: Crowds dispersing after a concert, boats entering a harbor at dawn, market vendors setting up
Conditions to Avoid
Save yourself the trip when conditions work against you:
- Completely overcast, flat skies: No cloud movement means a static, boring sky in your final video
- Heavy rain or snow: Water on your lens between frames creates inconsistent spots. Protecting your gear becomes the priority instead of shooting.
- Strong gusty wind: If your tripod is visibly shaking, your frames won't align. No amount of software stabilization fully fixes this.
- Rapidly shifting light with no plan: Shooting in auto to compensate causes flicker. If you're not prepared to ramp exposure manually or with software, avoid transitional light.
Pro insight: Check the Beaufort wind scale before heading out. Force 3–4 (gentle to moderate breeze, 8–18 mph) gives you ideal cloud movement without tripod instability.
Budget Breakdown: Getting Started Without Overspending
One of the best things about time lapse photography is the low barrier to entry. You likely own most of what you need already.
Three Budget Tiers
| Tier | Total Cost | What You Get | Output Quality |
|---|---|---|---|
| Free (smartphone) | $0 | Phone + free app (e.g., Hyperlapse) + DIY phone mount | 1080p, good for social media |
| Budget | $50–$150 | Existing camera + budget tripod ($30) + wired intervalometer ($20) + extra battery ($25–$50) | Full-res RAW, 4K-ready |
| Intermediate | $200–$500 | Above + ND filter set ($100–$250) + motorized slider ($150–$300) | Professional motion time lapse |
Notice the jump from budget to intermediate. The core gear — tripod and intervalometer — costs almost nothing. The premium features like motion control and ND filters are where the investment climbs. But those are upgrades for later, not requirements for starting.
Free and Low-Cost Alternatives
Several strategies keep your costs at zero while you learn the fundamentals:
- Built-in interval timers: Check your camera's menu — many models include one. No external intervalometer needed.
- Smartphone apps: Both iOS and Android have capable time lapse apps that handle interval shooting and assembly.
- Free editing software: DaVinci Resolve assembles image sequences into video at no cost, with professional-grade color tools included.
- DIY stabilization: A bag of rice or sand placed on your tripod's center column hook adds weight and wind resistance for free.
If you're shooting RAW files and editing in Lightroom, applying a consistent preset across all frames speeds up your workflow dramatically. Browse our free Lightroom presets to find a starting point for color grading your sequences.
Frequently Asked Questions
How many photos do you need for a time lapse?
For a smooth clip, aim for a minimum of 250–300 frames. At 24fps playback, that gives you roughly 10–12 seconds of video. For a 30-second clip — a solid length for most projects — you need around 720 frames. Calculate backwards from your desired clip length: multiply the seconds by your playback frame rate.
Can you shoot time lapse in JPEG instead of RAW?
You can, and JPEG saves card space and simplifies assembly. However, RAW gives you significantly more flexibility in post-processing — especially for recovering highlights in sunset sequences or pushing shadows in night shoots. Shoot RAW if your card space and workflow allow it. The editing flexibility is worth the extra storage.
How do you avoid flicker in time lapse videos?
Flicker comes from inconsistent exposure between frames. The primary fix is shooting in full manual mode — manual exposure, manual focus, manual white balance. If you still see subtle flicker (common with electronic aperture control), software like LRTimelapse or GBDeflicker removes it in post. Some photographers also tape their aperture ring to prevent micro-shifts.
What's the best shutter speed for time lapse photography?
Follow the 180-degree shutter rule from cinema: set your shutter speed to roughly half your interval. For a 4-second interval, use a 2-second exposure. This creates natural motion blur that smooths the final video. In bright daylight, you'll need ND filters to achieve these longer exposures without overexposing your frames.
Do you need a motorized slider for time lapse?
No. Motorized sliders add cinematic lateral or pan movement, but they're an intermediate-to-advanced tool. Static tripod time lapses are equally powerful when you nail the composition and subject. Master the fundamentals on a stationary tripod before investing in motion control equipment.
Next Steps
- Shoot a cloud time lapse today. Set your camera on a tripod, use a 4-second interval in full manual mode, and capture 300 frames. Assemble them in any free video editor. This single exercise teaches you more than reading ten more articles.
- Master manual exposure lock. Practice setting aperture, shutter speed, ISO, white balance, and focus all to manual before your next session. Review your test frames for consistency — if brightness stays even across 50+ frames, you've nailed it.
- Plan a golden hour session. Pick a location with a clear western horizon, arrive 45 minutes before sunset, and shoot through the full transition. Use a 3-second interval and aim for 600+ frames. This is where time lapse photography transforms from a technique into something genuinely cinematic.
- Build a basic editing workflow. Import your RAW sequence into Lightroom, batch-edit for color and exposure, export as JPEGs, then assemble in DaVinci Resolve at 24fps. Having a repeatable process makes every future project faster.
- Join the conversation. Share your first time lapse in photography communities for feedback. Critique accelerates your learning faster than solo practice alone.
 |
 |
 |
 |

About Alex W.
Alex is a landscape, equine, and pet photographer based in the Lake District, UK, with years of experience shooting in one of Britain's most photographically demanding natural environments. His work has been featured in Take a View Landscape Photographer of the Year, Outdoor Photographer of the Year, and Amateur Photographer Magazine — publications that reflect a serious, competitive standard of image-making. At Click and Learn Photography, he shares the camera settings, gear choices, and compositional techniques he has developed through real-world shooting and competition-level work.
You can Get FREE Gifts. Furthermore, Free Items here. Disable Ad Blocker to receive them all.
Once done, hit anything below
|
|
|
|