Have you ever tried photographing a tiny insect or a single dewdrop and ended up with nothing but a blurry mess? The problem usually isn't your technique — it's your gear. Building the right macro photography essential equipment kit transforms those frustrating close-up attempts into sharp, stunning images that reveal a hidden world. Whether you're shooting flowers in your garden or documenting small product details, the gear you choose determines your ceiling. This ultimate guide walks you through every piece of equipment you need, what it costs, and how to use it effectively so you can start capturing professional-level macro shots without wasting money on things you don't need.
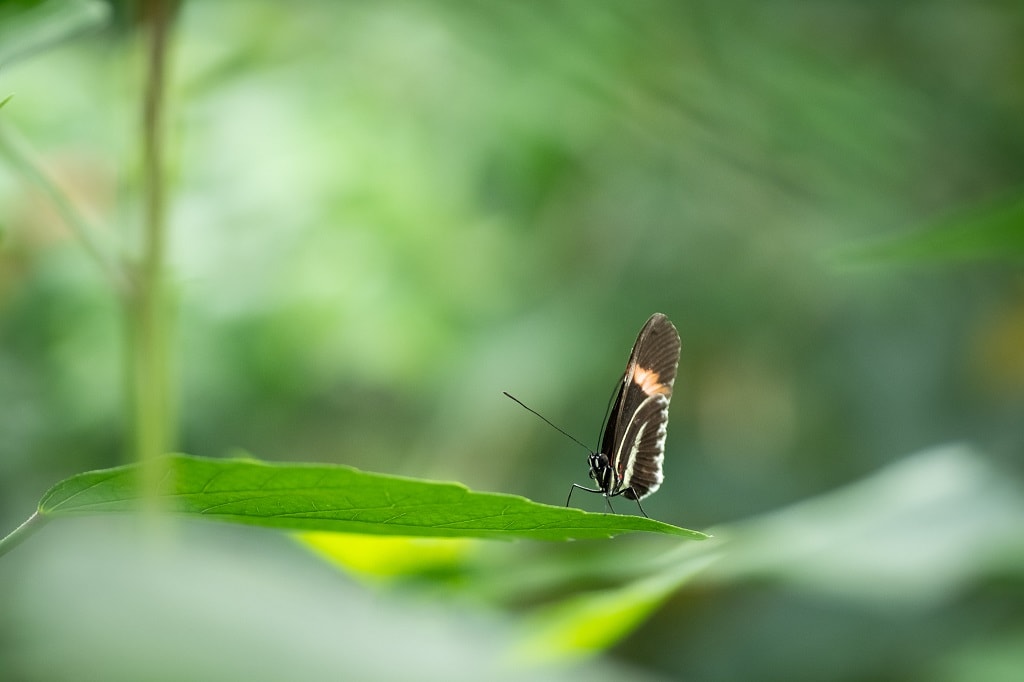
Macro photography is one of the most rewarding niches you can explore because you don't need exotic locations or perfect weather — your backyard, kitchen table, or a local park holds endless subjects. The barrier to entry is lower than you think, but the wrong gear choices can send you down an expensive and disappointing path. Understanding what each piece of equipment actually does for your images helps you invest wisely and build a kit that grows with your skill level.
If you've been experimenting with creative photography ideas at home, macro work is a natural next step that keeps you engaged and challenged without leaving your doorstep.
Contents
Macro Photography Essential Equipment Breakdown
Your macro kit doesn't need to be complicated, but each piece serves a specific purpose that affects image quality in a measurable way. Here's what belongs in your bag and why each item earns its place.
Dedicated Macro Lenses
A true macro lens offers 1:1 magnification, meaning your subject is reproduced at life-size on the sensor. This is the single most important piece of macro photography essential equipment you can own. Common focal lengths include:
- 60mm — lightweight, affordable, ideal for flowers and flat subjects where working distance isn't critical
- 90-105mm — the sweet spot for most macro photographers, offering comfortable working distance for insects and small wildlife
- 150-200mm — maximum working distance for skittish subjects, heavier and pricier but invaluable for field work
If you're already invested in a lens system, check out our guide to the best Micro Four Thirds lenses for options that deliver excellent macro performance on a smaller, lighter platform. Prime lenses dominate the macro world for good reason — the optical advantages of prime lenses become even more pronounced at close focusing distances where every bit of sharpness matters.
Extension Tubes and Close-Up Filters
Extension tubes sit between your camera body and lens, reducing the minimum focus distance so you can get closer to your subject. They contain no optical elements, so they don't degrade image quality. Close-up filters screw onto the front of your lens like a magnifying glass and offer a quick, portable alternative. Consider these points:
- Extension tubes work with lenses you already own, keeping initial costs low
- Stacking multiple tubes increases magnification but reduces light reaching the sensor
- Close-up filters add convenience but cheaper versions introduce chromatic aberration at the edges
- Neither option matches the optical quality of a dedicated macro lens at 1:1 reproduction
Dedicated Lenses vs Budget Alternatives at a Glance
Choosing between a dedicated macro lens and budget accessories depends on how seriously you plan to pursue this genre and what subjects you'll photograph most often.
| Feature | Dedicated Macro Lens | Extension Tubes | Close-Up Filters |
|---|---|---|---|
| Max Magnification | 1:1 (life-size) | Varies by lens paired | Typically 0.5:1–0.7:1 |
| Image Quality | Excellent corner-to-corner | Good (uses host lens optics) | Moderate (edge softness) |
| Typical Cost | $300–$1,200 | $50–$150 | $15–$80 |
| Autofocus | Full AF support | AF with electronic tubes | Full AF retained |
| Light Loss | None | 1–2 stops | None |
| Portability | One lens unit | Small, stackable rings | Thin filter threads |
| Best For | Serious macro work | Experimenting on a budget | Travel and casual use |
When a Dedicated Lens Wins
If you plan to shoot macro regularly — even once a week — the optical quality and autofocus reliability of a dedicated lens pay for themselves quickly. You'll spend less time fighting your gear and more time composing your shots, which accelerates your learning curve considerably.
When Budget Options Make Sense
Extension tubes are perfect for testing whether macro photography holds your interest before committing several hundred dollars to a specialized lens. They're also a smart addition to a travel kit where weight and space are limited, complementing the lenses you already carry.
What Your Macro Setup Actually Costs
Macro photography has one of the widest price ranges in the hobby, and you can produce compelling images at nearly every budget level if you spend strategically.
Starter Kit
You can build a functional macro setup for under $150 if you already own a camera body:
- Manual extension tubes — $20–$40 for a basic set without electronic contacts
- Tabletop tripod or beanbag — $15–$30 for stabilization at close range
- LED ring light or small flashlight — $20–$40 for supplemental illumination
- Reflector disc — $10–$15 for bouncing natural light onto shadowed subjects
This kit has limitations — no autofocus with manual tubes, limited magnification, and you'll need patience — but it produces surprisingly good results for the investment and teaches you core macro fundamentals through hands-on problem-solving.
Intermediate Kit
Once you know macro is your thing, an intermediate investment of $500–$800 unlocks dramatically better results:
- A used 90–105mm dedicated macro lens ($300–$500) delivers 1:1 magnification with autofocus
- A sturdy tripod with a ball head ($100–$200) — something like the Vanguard Veo 2 handles the precision adjustments macro demands
- A dedicated macro flash or twin flash system ($100–$150 used) gives you consistent, controllable light
Setting Up Your First Macro Shoot Step by Step
Owning the right equipment is only half the equation — knowing how to configure everything for macro-specific challenges is what actually produces sharp images with beautiful detail.
Camera Settings
- Set your aperture between f/8 and f/16 — depth of field at macro distances is razor-thin, and stopping down recovers sharpness across your subject
- Keep ISO as low as your light allows — noise is more visible in the fine details macro images capture, so ISO 100–400 is your target range
- Use a shutter speed of 1/200s or faster for handheld work — camera shake is magnified at close focus distances just like subject detail is
- Switch to manual focus or use back-button AF — at 1:1 magnification, physically rocking your body forward and back often beats turning the focus ring
- Enable focus peaking if your camera supports it, as it highlights the in-focus plane in real time through the viewfinder
Focusing Technique
At high magnification, the focus plane is often thinner than a millimeter, which means traditional autofocus hunting becomes your worst enemy. Try these approaches:
- Set your lens to the desired magnification and move your entire body or tripod to find focus rather than adjusting the focus ring
- Use a focusing rail on your tripod for precise, repeatable adjustments measured in fractions of a millimeter
- Take multiple frames at slightly different focus distances, then merge them using focus stacking software for front-to-back sharpness
- For handheld work, brace your elbows against your body and exhale slowly before pressing the shutter
Putting Your Gear to Work in the Field
Theory only takes you so far — understanding how your macro photography essential equipment performs in real shooting scenarios helps you anticipate problems and adapt quickly to different subjects.
Insects and Wildlife
Shooting live insects demands a longer focal length macro lens (100mm or above) so you can maintain enough working distance to avoid scaring your subject away. Early morning is ideal because cooler temperatures slow insect movement, giving you precious extra seconds to compose and focus. A ring flash or twin flash provides even illumination without the harsh shadows that a single speedlight creates on small, three-dimensional subjects. You'll want to use props and backgrounds thoughtfully — check our list of photography props for every genre for ideas that work equally well in macro setups.
Flowers and Plant Details
Flowers are more forgiving subjects because they hold still, letting you work on a tripod and explore focus stacking without time pressure. Key considerations include:
- Use a plamp (plant clamp) or a thin wire to hold stems steady in light wind
- Backlight translucent petals with a reflector or a small LED panel for a luminous, ethereal quality
- Spray a light mist of water to add droplets that catch light and create visual interest
- Shoot on overcast days or in open shade to avoid harsh specular highlights on waxy leaves
Habits That Separate Good Macro Shots from Great Ones
The best macro photographers share consistent habits that have nothing to do with owning expensive gear and everything to do with discipline, observation, and deliberate practice.
Controlling Light
Light management at macro distances requires more precision than general photography because every shadow and highlight is magnified alongside your subject. Build these practices into your workflow:
- Diffuse your flash — a bare flash at close range produces harsh, unflattering light with blown-out specular highlights
- Use a small softbox or a piece of tracing paper over your flash to create soft, wraparound illumination
- Position your light source at 45 degrees to your subject rather than straight on to create depth and dimension
- Consider using continuous LED lighting so you can see exactly how shadows and highlights fall before you press the shutter
Composition at Close Range
Composition rules still apply in macro, but they work differently when your frame contains just a few square centimeters of the world. Your backgrounds become abstract washes of color, which means paying attention to what's behind your subject is just as important as the subject itself. Keep these principles front of mind:
- Place your subject's most important feature — an eye, a stamen, a texture detail — on a third-line intersection
- Use leading lines within natural structures like leaf veins or insect antennae to guide the viewer's eye through the frame
- Leave negative space in the direction your subject faces or points to create a sense of movement and intention
- Rotate around your subject to find the angle where the background is cleanest and most complementary in color
The same compositional awareness that makes you better at macro work will improve your photography across every genre, from food photography to landscape and beyond.
Frequently Asked Questions
Do you need a special camera for macro photography?
No, any interchangeable-lens camera works for macro photography. The lens and accessories matter far more than the camera body, so invest in a quality macro lens or extension tubes before considering a body upgrade.
What focal length is best for macro lenses?
A 90–105mm macro lens is the most versatile choice for most photographers because it provides comfortable working distance from your subject while remaining compact enough for field use. Longer options like 150mm or 200mm are better for skittish insects.
Can you use extension tubes with any lens?
Extension tubes work with most lenses, though they pair best with prime lenses and short telephoto lenses. Wide-angle lenses with extension tubes produce extreme magnification but very short working distances that make lighting difficult.
Is a tripod necessary for macro photography?
A tripod is strongly recommended for controlled macro work because depth of field is extremely thin at close focus distances. Handheld macro is possible with fast shutter speeds and image stabilization, but a tripod enables focus stacking and slower shutter speeds.
What aperture should you use for macro shots?
Start at f/8 for the sharpest results and stop down to f/11 or f/16 when you need more depth of field. Going beyond f/16 introduces diffraction softening that reduces overall sharpness at high magnifications.
How does focus stacking work in macro photography?
Focus stacking involves taking multiple images at slightly different focus distances and merging them in software like Photoshop or Helicon Focus. The software combines the sharpest areas from each frame to produce a final image with front-to-back sharpness that a single exposure cannot achieve.
What lighting equipment do you need for macro?
A ring flash or twin flash system provides the most consistent macro lighting because it wraps light evenly around your lens axis. LED ring lights and small diffused speedlights are affordable alternatives that work well for stationary subjects.
The best macro photography doesn't come from the most expensive gear — it comes from understanding the five essentials, mastering your light, and having the patience to let a tiny world reveal its extraordinary detail.
 |
 |
 |
 |

About Alex W.
Alex is a landscape, equine, and pet photographer based in the Lake District, UK, with years of experience shooting in one of Britain's most photographically demanding natural environments. His work has been featured in Take a View Landscape Photographer of the Year, Outdoor Photographer of the Year, and Amateur Photographer Magazine — publications that reflect a serious, competitive standard of image-making. At Click and Learn Photography, he shares the camera settings, gear choices, and compositional techniques he has developed through real-world shooting and competition-level work.
You can Get FREE Gifts. Furthermore, Free Items here. Disable Ad Blocker to receive them all.
Once done, hit anything below
|
|
|
|