The best cityscape photography tips come down to understanding light, choosing the right vantage point, and mastering a handful of camera settings that turn flat skyline shots into compelling images. Seoul is one of the most rewarding cities in the world for this genre, blending ancient temples with ultra-modern towers in ways that create striking visual contrast at every turn. Whether you're just stepping into photography as a beginner or you've been shooting landscapes for a while and want to tackle urban scenes, these techniques drawn from Seoul's streets will sharpen your cityscape work no matter where you point your lens.
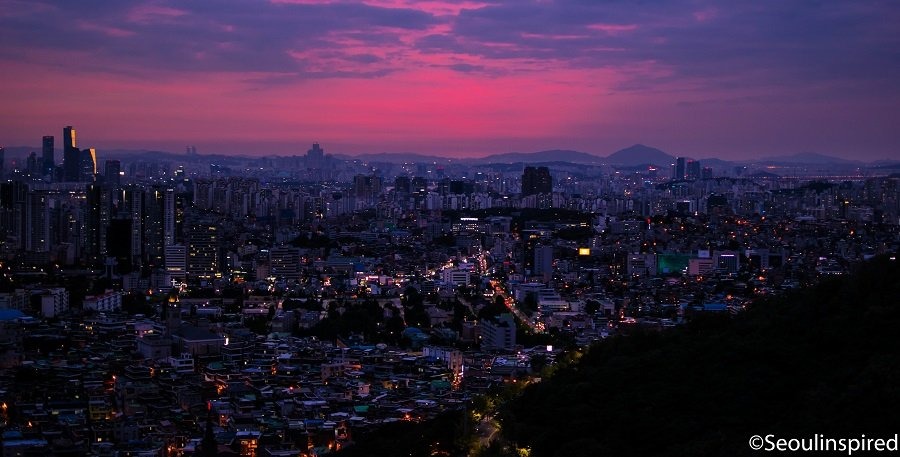
Seoul rewards photographers who plan ahead and stay patient, because the city transforms dramatically between golden hour, blue hour, and full darkness. Each phase offers a completely different mood, and knowing how to work through all three during a single session is what separates memorable cityscape photographs from forgettable snapshots. The advice below covers gear choices, camera settings, composition strategies, and post-processing approaches that you can apply to Seoul or any metropolitan skyline.
Contents
How to Shoot a Seoul Cityscape from Start to Finish
Scouting Your Location
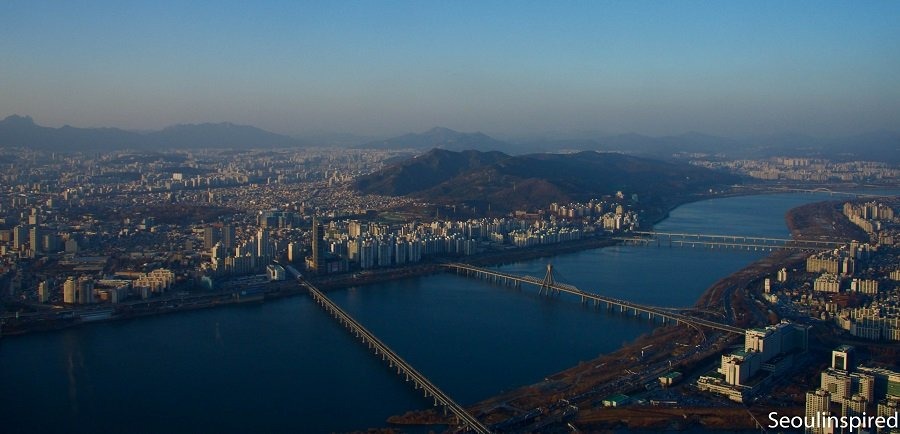
Your first step before any cityscape session is finding an elevated viewpoint that gives you a clean sightline across the skyline. In Seoul, spots like Namsan Tower, the rooftop of Lotte World Tower, and the hillside trails behind Bukchon Hanok Village all deliver panoramic views that work beautifully at multiple focal lengths. Use satellite imagery and apps like PhotoPills to preview the sun's path relative to your planned composition, so you arrive knowing exactly where the light will fall. If you're combining cityscape work with broader travel photography, scouting during a casual walk earlier in the day saves you from scrambling at sunset.
Dialing In Your Camera Settings
Start in aperture priority mode at f/8 to f/11 for the sharpest results across the frame, keeping your ISO at 100 during daylight or blue hour. Understanding the exposure triangle is essential here, because cityscape photography constantly pushes you to balance depth of field against shutter speed as the light fades. Switch to manual mode once the ambient light becomes unpredictable, and bracket your exposures in one-stop increments so you have clean shadow and highlight data for post-processing. Always shoot in RAW format when working cityscapes, since the dynamic range between bright neon signs and deep shadows demands maximum flexibility in editing — if you need convincing, our breakdown of why RAW beats JPEG covers the technical reasons in detail.
Daylight vs. Night Cityscape Photography
Shooting in Daylight
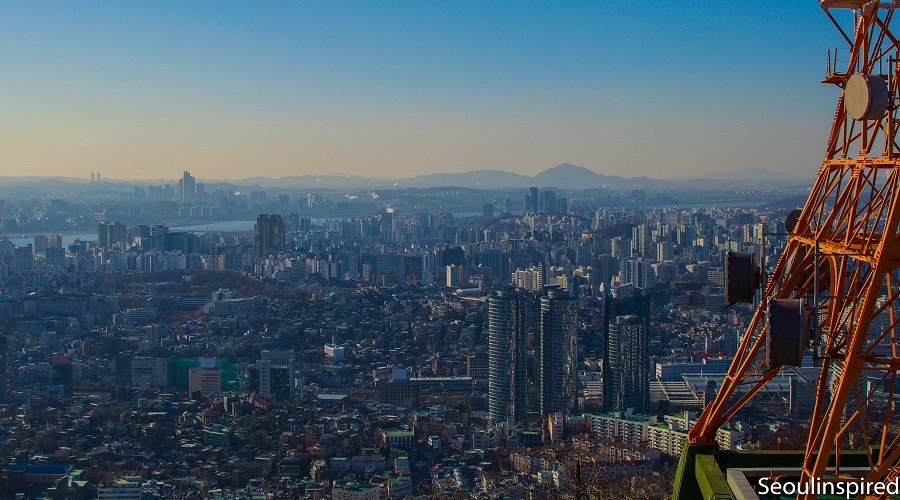
Daytime cityscapes give you fast shutter speeds, low ISO, and full control over depth of field, which makes handheld shooting perfectly viable. The main challenge is harsh midday light that flattens buildings and washes out the sky, so you'll get the best results within ninety minutes of sunrise or sunset when sidelight rakes across facades and emphasizes architectural texture. Seoul's mix of glass towers and traditional tiled roofs looks particularly striking during golden hour, when warm light catches the modern surfaces while older structures glow with rich earth tones.
Shooting After Dark
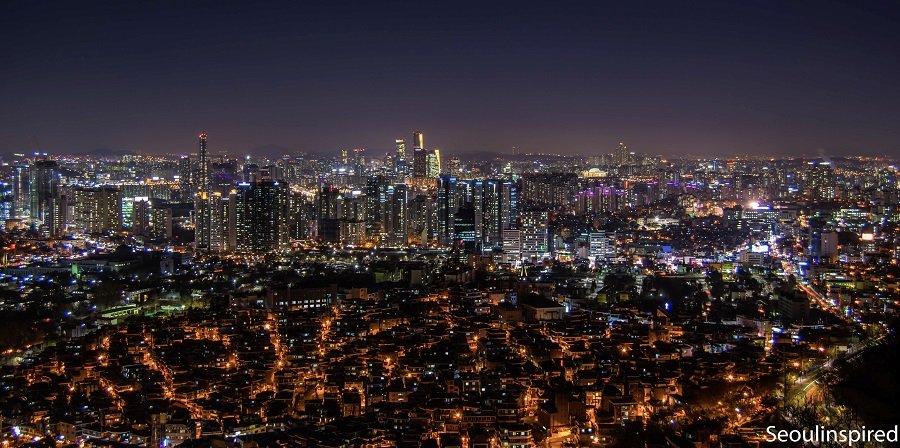
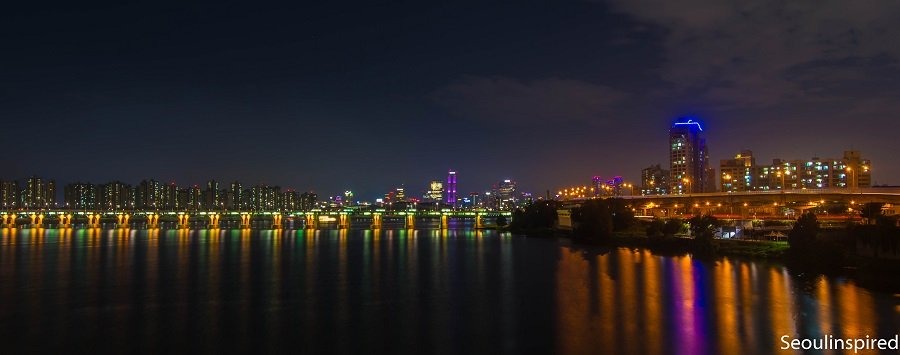
Night cityscapes introduce longer exposures, higher ISO considerations, and the challenge of balancing artificial light sources that vary wildly in colour temperature. Blue hour — the twenty to thirty minutes right after sunset — is the single best window for cityscape photography, because the sky retains enough colour to provide a backdrop while city lights are already switched on. In Seoul, the neon districts of Gangnam and Myeongdong explode with colour during this window, and the Han River reflects everything like a second canvas beneath the skyline.
Cityscape Photography Tips for Sharper Results
Tripod and Stability Essentials
A sturdy tripod is non-negotiable for any serious cityscape session, especially once shutter speeds drop below 1/60th of a second. Use a remote shutter release or your camera's two-second timer to eliminate vibration from pressing the shutter button, and turn off image stabilization when the camera is tripod-mounted because the system can actually introduce micro-vibrations when there's no real movement to correct. If wind is an issue on elevated viewpoints — and Seoul's hillside spots can get gusty — hang your camera bag from the tripod's centre column hook for extra ballast.
Focusing Techniques for Maximum Detail
Switch to manual focus and use live view at 10x magnification to nail critical sharpness on your main subject, whether that's a distant tower or a mid-ground bridge. Focus roughly one-third into the scene for maximum depth of field at apertures between f/8 and f/11, and resist the temptation to stop down past f/16 where diffraction softens the entire image. Solid composition fundamentals matter just as much as technical sharpness, so spend time refining your framing before locking focus.
Five-Minute Fixes That Improve Any Cityscape Shot
White Balance Adjustments
Auto white balance tends to neutralize the very colour casts that make cityscapes atmospheric, so set a custom Kelvin value instead. Try 3800K–4200K during blue hour to preserve that cool, moody tone, or push toward 5500K–6000K if you want warmer golden-hour tones to dominate the frame. Seoul's LED signage and sodium-vapour street lamps create fascinating mixed lighting that you lose entirely when the camera averages everything to a neutral reading.
Adding Foreground Interest
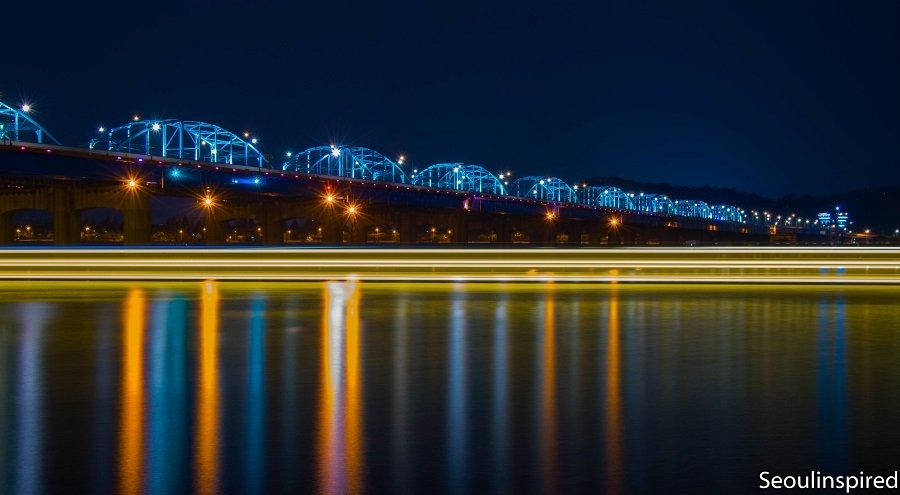
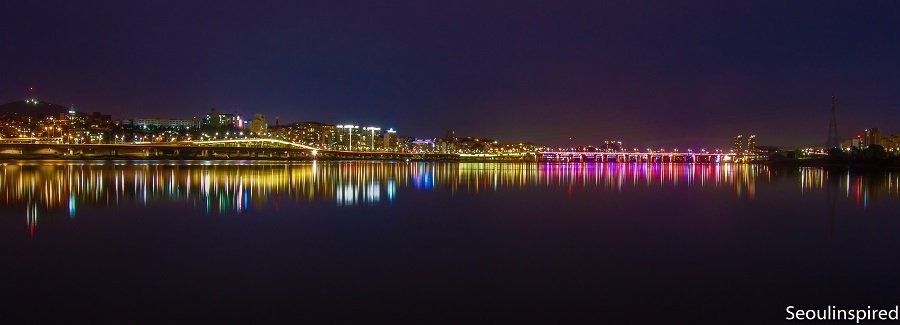
A common mistake in cityscape photography is pointing the camera at the skyline and ignoring everything between you and the horizon. Including a foreground element — a railing, a river bank, a row of traditional lanterns — gives the viewer's eye an entry point and creates a sense of depth that flat skyline-only compositions lack. The bridges crossing Seoul's Han River work exceptionally well as leading lines that pull the eye toward Yeouido's cluster of skyscrapers, and this same principle applies to any city where infrastructure connects foreground to background. Converting these kinds of layered compositions to black and white can emphasize structural lines even further when colour becomes a distraction.
Advanced Techniques for Dramatic Urban Scenes
Long Exposure and Light Trails
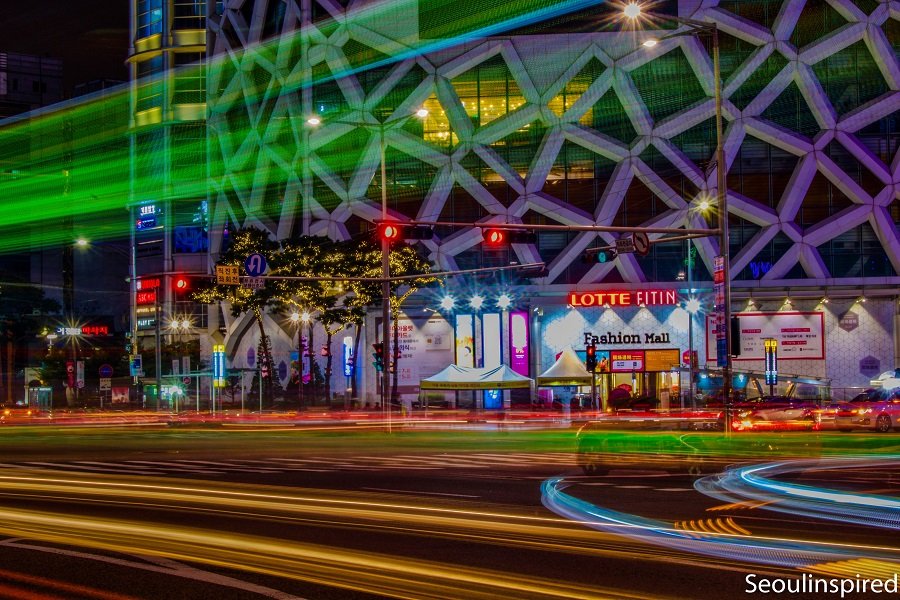
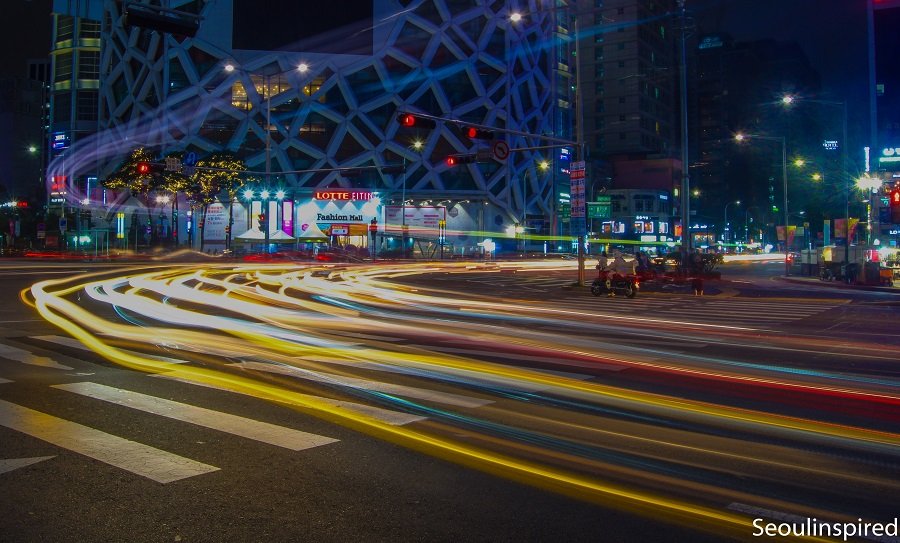
Long exposures transform busy roads into rivers of red and white light trails, and Seoul's elevated highways and multi-lane bridges provide some of the best canvases for this technique. Set your aperture to f/11, drop the ISO to 100, and attach an ND filter if ambient light is still too bright for a 10–30 second exposure. The key is finding a vantage point where traffic flows in a curved or diagonal path through the frame rather than straight across, because curves create more dynamic compositions. If you apply the same patience to mountain landscape photography, you'll notice how long exposures smooth clouds over peaks in a similar way to how they smooth traffic in urban scenes.
Working with Reflections
Water reflections double your composition and add symmetry that draws the eye immediately, which is why riverfront and harbour viewpoints are so prized in cityscape photography. Seoul's Cheonggyecheon Stream and the Han River both offer clean reflection opportunities, though you'll need calm conditions and a low shooting angle to maximize the mirror effect. A circular polarizer lets you dial the reflection intensity up or down depending on whether you want a perfect mirror or just a subtle shimmer beneath the skyline.
Gear Comparison for Cityscape Photography
Wide-Angle vs. Telephoto
Your lens choice fundamentally changes the story your cityscape tells, and understanding the trade-offs helps you pack the right glass for each shoot. If you're still deciding on a camera body, our DSLR vs. mirrorless comparison covers the practical differences that affect cityscape work specifically.
| Factor | Wide-Angle (14–24mm) | Telephoto (70–200mm) |
|---|---|---|
| Best for | Sweeping skylines, foreground-to-infinity depth | Compressed layers, isolating architectural detail |
| Distortion | Barrel distortion at edges; correct in post | Minimal distortion; straight vertical lines |
| Depth of field | Deep at f/8; easy front-to-back sharpness | Shallower; requires f/11+ for full-scene focus |
| Tripod need | Helpful but not critical during daylight | Essential even in good light due to focal length |
| Foreground impact | Strong — objects close to lens appear large | Weak — foreground elements are compressed |
| Typical cityscape use | Panoramic overlooks, river-level reflections | Stacking buildings, isolating towers from distance |
For most cityscape sessions in Seoul, a 16–35mm wide-angle lens handles roughly eighty percent of the compositions you'll want to capture, while a 70–200mm telephoto fills in the remaining detail shots and compressed skyline layers that wide angles physically cannot achieve.
Essential Filters
A graduated neutral density filter balances the exposure between a bright sky and darker buildings below, which is especially useful during golden hour when the dynamic range exceeds what a single exposure can capture cleanly. A 3-stop or 6-stop solid ND filter gives you the shutter speed flexibility needed for long exposure light trails even when ambient light hasn't fully faded. A circular polarizer rounds out the essential filter kit by cutting glare from glass buildings and deepening sky contrast, though you'll want to remove it during night shoots where you need every bit of light reaching the sensor.
The best cityscape photograph you'll ever take starts with patience — arrive early, stay late, and let the city reveal its own light.
 |
 |
 |
 |

About Alex W.
Alex is a landscape, equine, and pet photographer based in the Lake District, UK, with years of experience shooting in one of Britain's most photographically demanding natural environments. His work has been featured in Take a View Landscape Photographer of the Year, Outdoor Photographer of the Year, and Amateur Photographer Magazine — publications that reflect a serious, competitive standard of image-making. At Click and Learn Photography, he shares the camera settings, gear choices, and compositional techniques he has developed through real-world shooting and competition-level work.
You can Get FREE Gifts. Furthermore, Free Items here. Disable Ad Blocker to receive them all.
Once done, hit anything below
|
|
|
|