Learning how to photograph waterfalls comes down to three things: controlling your shutter speed, nailing your composition, and showing up in the right light. That's it. Everything else is refinement. Whether you're chasing a towering cascade in Iceland or a quiet woodland stream in your local state park, the fundamentals stay the same. This ultimate guide walks you through every decision — from gear selection to creative composition — so you can consistently walk away with shots that stop people mid-scroll.

Waterfall photography sits at the intersection of landscape work and technical precision. You're dealing with moving water, often in shaded gorges with tricky dynamic range, and your creative choices around shutter speed dramatically change the final image. The silky smooth look gets all the attention, but it's far from the only option — and understanding why you'd choose one approach over another is what separates deliberate photography from guesswork.
Below, you'll find everything from the gear you actually need to composition strategies used by working landscape photographers. No fluff, no filler — just the knowledge you need to get better waterfall images starting on your next outing.
Contents
- Why Waterfalls Make Such Compelling Subjects
- When and Where to Photograph Waterfalls
- Waterfall Photography Myths You Should Ignore
- Essential Gear for How to Photograph Waterfalls
- Composition Techniques That Transform Your Shots
- Long Exposure vs. Fast Shutter: The Trade-Offs
- Video Tutorial
- Frequently Asked Questions
- Key Takeaways
Why Waterfalls Make Such Compelling Subjects
The Interplay of Movement and Stillness
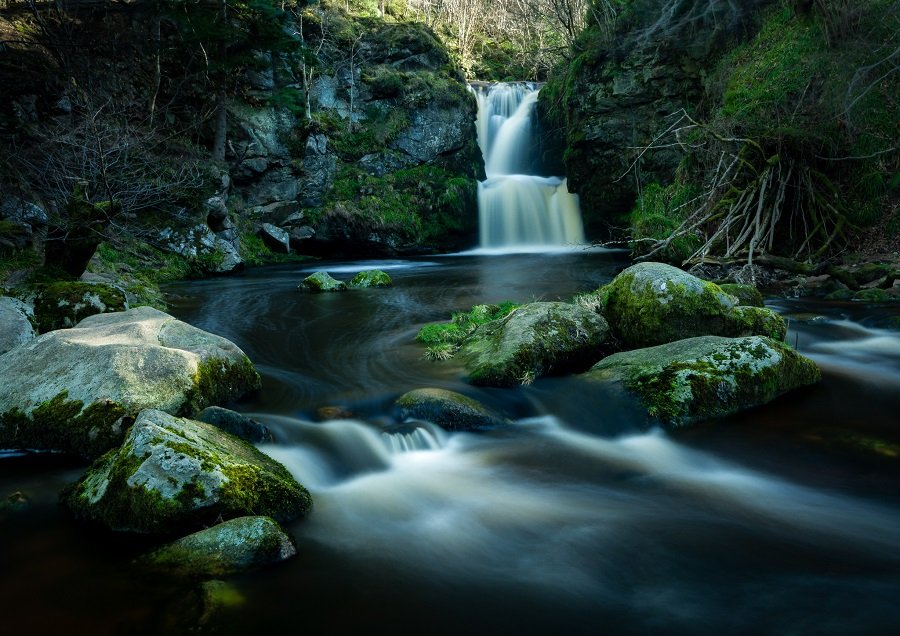
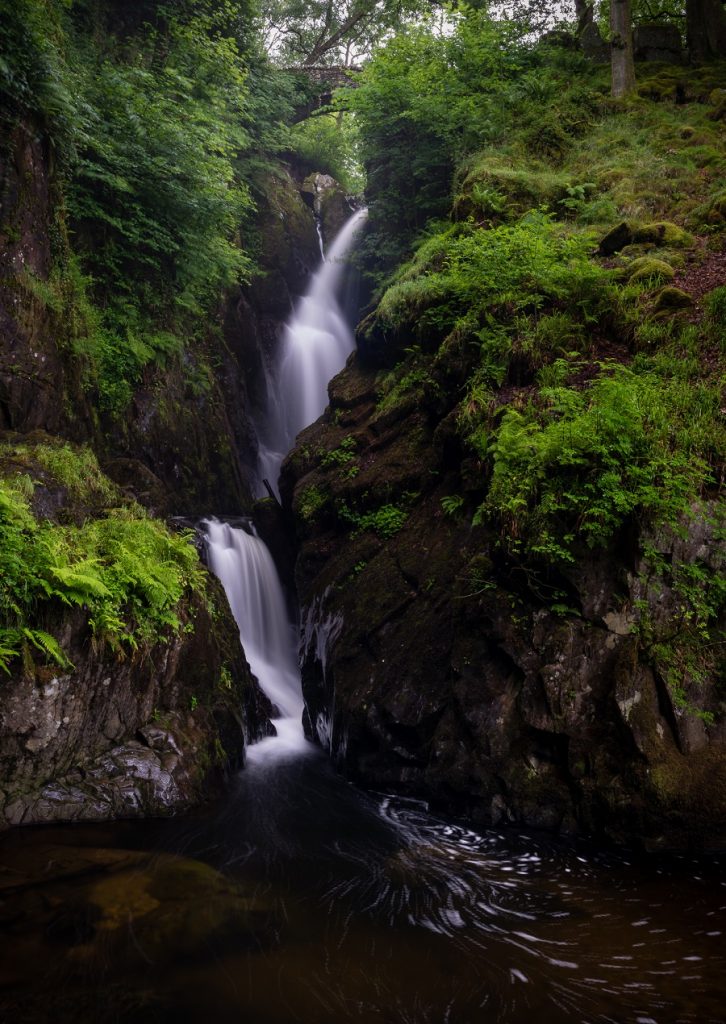
Waterfalls give you something rare in landscape photography: guaranteed motion in an otherwise static scene. That contrast between rushing water and solid rock creates natural visual tension. Your eye is drawn to the movement, then anchored by the surrounding environment. It's a built-in compositional advantage that most landscapes simply don't offer.
This is also why waterfalls reward repeat visits. The same cascade looks completely different after heavy rain versus a dry spell. Water volume changes the character of the falls, the spray patterns, even the surrounding greenery. Each visit gives you a genuinely different photograph.
Accessible Drama
Unlike astrophotography or aurora chasing, waterfall photography doesn't require exotic travel or rare conditions. Most regions have waterfalls within a few hours' drive. You can practice and refine your technique repeatedly without major logistics. That accessibility makes waterfalls one of the best subjects for developing your long-exposure and composition skills — skills that transfer directly to every other area of landscape work.

When and Where to Photograph Waterfalls
Ideal Weather and Light Conditions
Overcast days are your best friend. Cloud cover acts as a giant softbox, eliminating harsh shadows and blown-out highlights on wet rocks and white water. Bright sunshine is actually the worst condition for waterfall photography — it creates extreme contrast between shadowed gorge walls and sunlit water that no amount of post-processing can fully recover.
Early morning works well too, especially for forest waterfalls where the canopy blocks direct light. If you understand how natural light works in photography, you already know that diffused light brings out colour saturation in moss, rock, and foliage — exactly the elements that frame most waterfall scenes.
Finding Lesser-Known Locations
Tourist-heavy waterfalls come with crowds, guardrails, and limited angles. Some of the best waterfall images come from lesser-known cascades you discover by exploring river systems on topographic maps. After heavy rainfall, even small streams can produce temporary waterfalls worth shooting.
Waterfall Photography Myths You Should Ignore
The Silky Water Myth
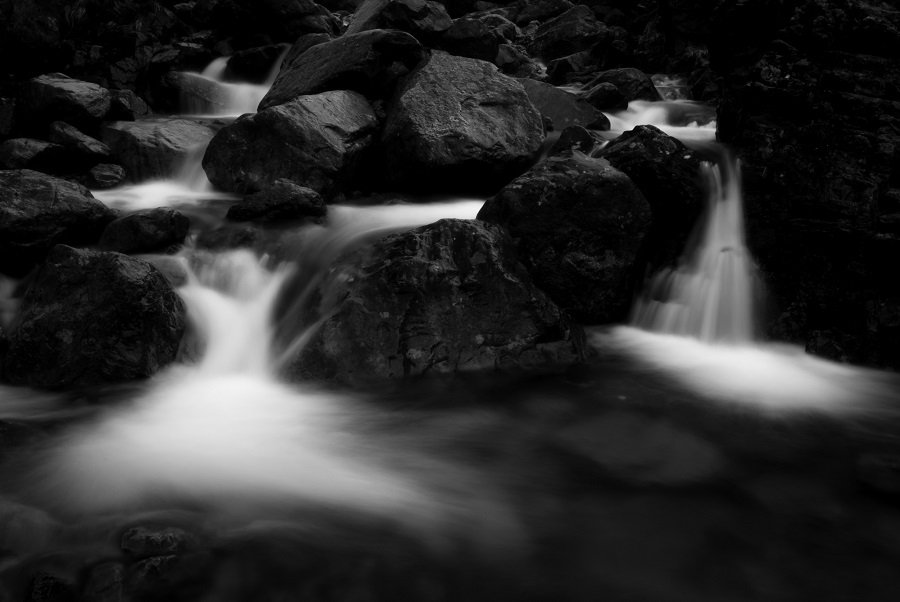
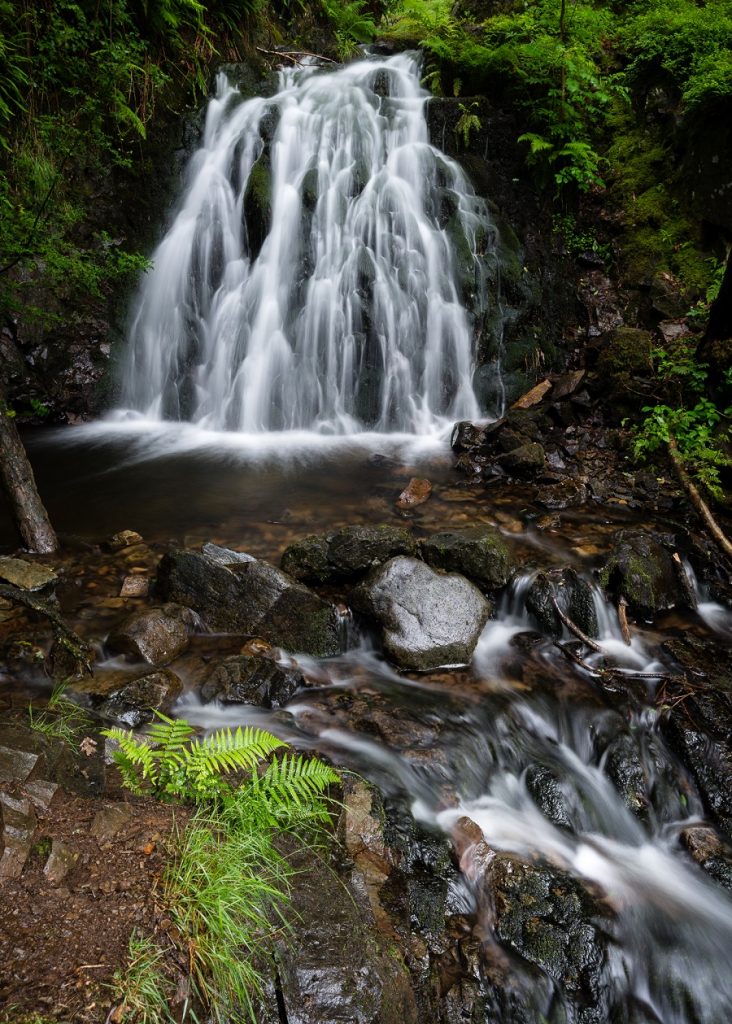
The biggest misconception in waterfall photography is that you must use a multi-second exposure to get that silky, ethereal water effect. You don't. Plenty of award-winning waterfall images use moderate shutter speeds — around 1/4 to 1 second — that show motion without turning water into featureless mist. Ultra-long exposures can actually destroy the texture and power of a waterfall, leaving you with a white smear that lacks character.
The Expensive Gear Myth
You don't need a full-frame body or premium glass to get strong waterfall photos. Any camera with manual controls and a decent kit lens works. The critical investments are a solid tripod and an ND filter — not a camera body upgrade. If you're just getting started, a beginner mirrorless camera paired with a basic ND filter set will get you 90% of the way there.
Pro tip: Spend your money on a quality tripod before upgrading your camera body. A sharp lens on a shaky tripod produces worse results than a kit lens on rock-solid legs.
Essential Gear for How to Photograph Waterfalls
Must-Have Equipment
Your gear list doesn't need to be long, but every item on it matters. A sturdy tripod is non-negotiable — you're shooting slow shutter speeds in wet, uneven terrain. A remote shutter release (or your camera's built-in timer) eliminates the vibration from pressing the shutter button. And at least one ND filter lets you extend your exposure time even in moderate light.
| Gear Item | Purpose | Priority |
|---|---|---|
| Sturdy tripod | Stable platform for long exposures on uneven ground | Essential |
| ND filter (6-stop or 10-stop) | Reduces light to allow slower shutter speeds | Essential |
| Circular polariser | Cuts reflections on wet rocks, boosts colour saturation | Essential |
| Remote shutter release | Eliminates camera shake when triggering the shutter | Recommended |
| Wide-angle lens (16-35mm) | Captures the full scene with foreground interest | Recommended |
| Microfibre cloth | Wipes spray and mist from the front element | Essential |
| Waterproof camera bag | Protects gear from spray and rain | Recommended |
Nice-to-Have Additions
A circular polarising filter is arguably as important as your ND filter for waterfall work. It cuts glare on wet rocks, removes surface reflections from pools, and deepens colour saturation in surrounding vegetation. Stack it with your ND filter for maximum control. Refer to our f-stop chart if you need a refresher on how adding filters affects your exposure calculations.
Composition Techniques That Transform Your Shots
Leading Lines and Foreground Interest
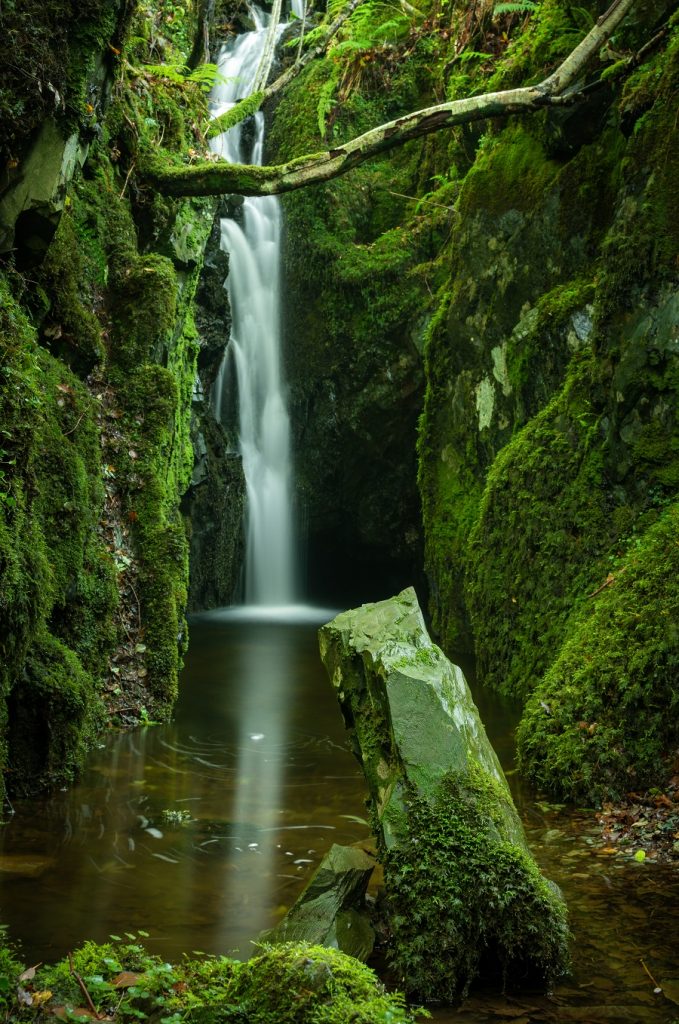
The river or stream feeding the waterfall is a ready-made leading line. Get low to the water and use the flow as a visual path that draws the viewer's eye directly to the falls. Adding a foreground element — a mossy rock, fern, or fallen branch — gives the image depth and a sense of place.
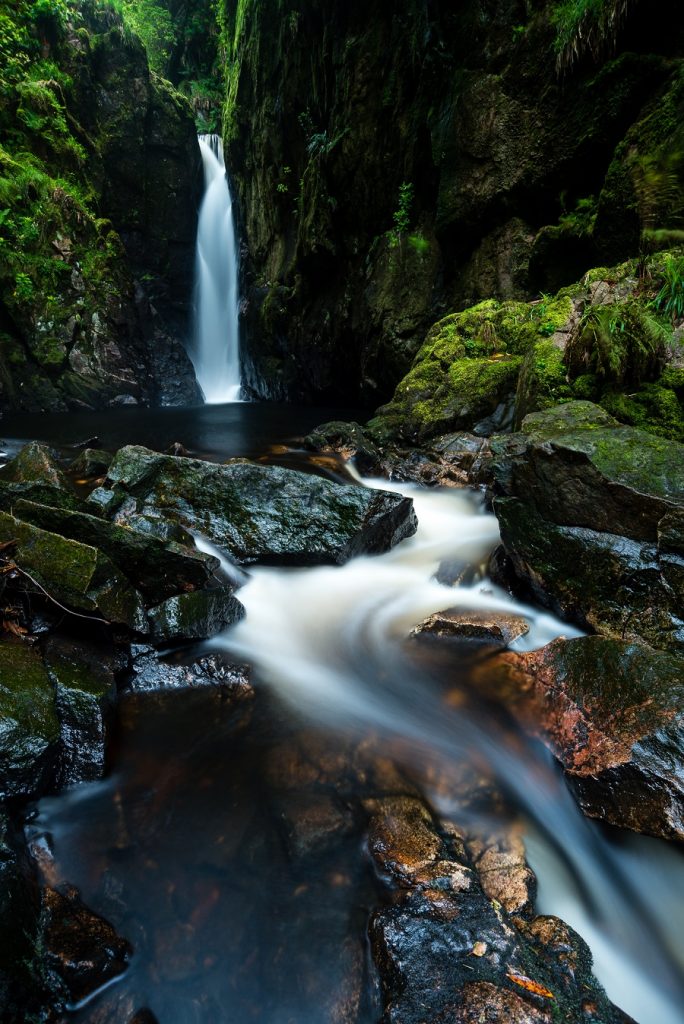
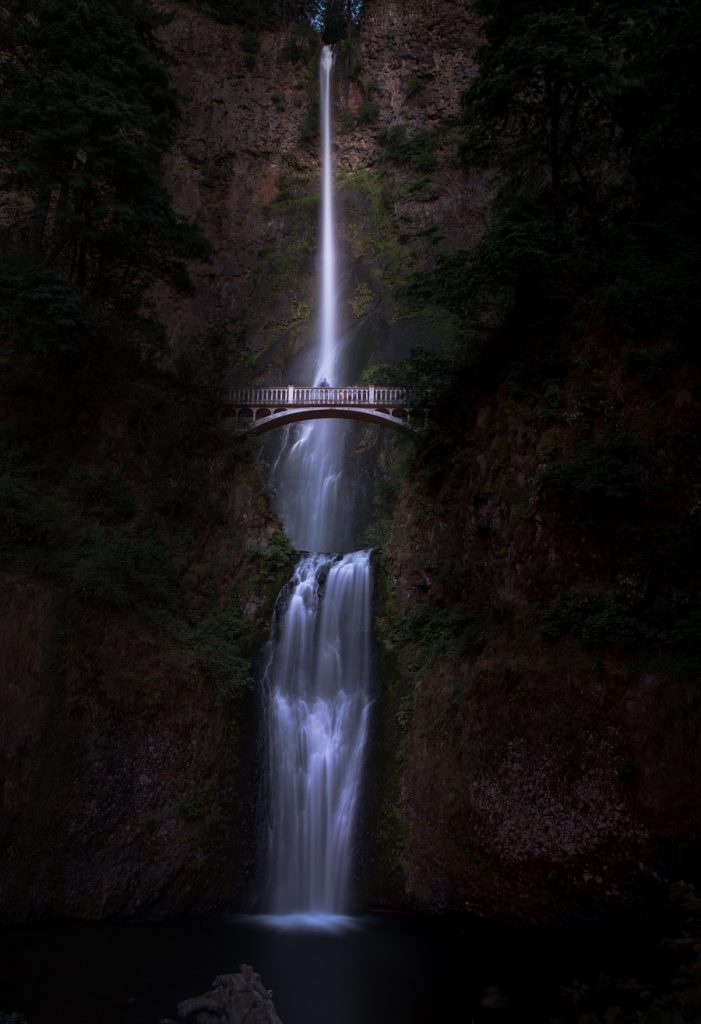
Don't default to centring the waterfall in every frame. Try placing it on a rule-of-thirds intersection, or shoot from an angle that reveals the cascade's shape and the surrounding environment. Some of the strongest compositions show only part of the waterfall, letting the viewer's imagination fill in the rest.
Scale and Mystery
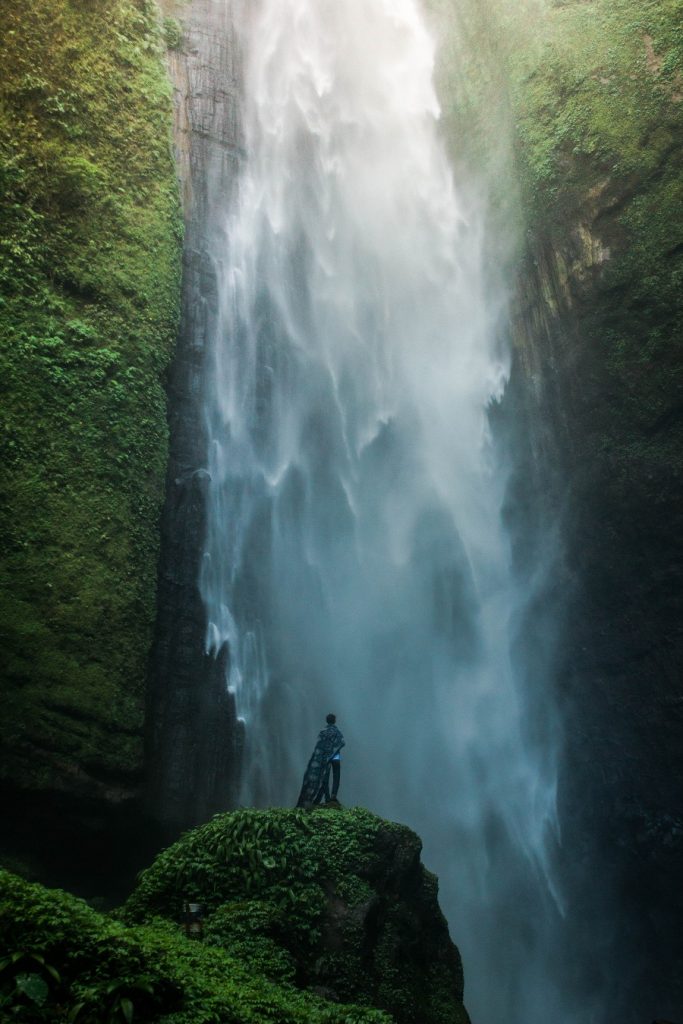
Including a person in your waterfall shot immediately communicates scale. A tiny figure beside a massive cascade tells a story that a waterfall-only shot cannot. Conversely, cropping tightly and excluding the top or bottom of the falls creates mystery — the viewer senses enormity without seeing it all. Both approaches work. The key is choosing deliberately rather than defaulting to whatever framing you happen to walk up to.
Long Exposure vs. Fast Shutter: The Trade-Offs
Shutter Speed Comparison
Your shutter speed is the single most impactful creative decision when you photograph waterfalls. There's no universally "correct" speed — each range produces a different emotional quality. Understanding these trade-offs lets you make intentional choices rather than relying on a single formula. For a deeper dive into how shutter speed affects all types of photography, check out our shutter speed cheat sheet.
Finding Your Sweet Spot
Start at around 1/4 second and review your results on the LCD. Gradually increase your exposure time and compare. Most photographers find their preferred look falls between 0.5 and 2 seconds — long enough for visible motion blur but short enough to retain texture in the water. According to the Wikipedia entry on long-exposure photography, exposures beyond 10 seconds are typically reserved for extreme creative effects rather than naturalistic rendering.

Experiment with every waterfall you visit. Shoot the same composition at multiple shutter speeds and compare later on a proper screen. Your camera's LCD lies about sharpness and tonality — what looks perfect at the scene often tells a different story at home.
Frequently Asked Questions
What shutter speed should I use for waterfall photography?
Start at 1/4 second and work your way up. The sweet spot for most waterfalls is between 0.5 and 2 seconds, which gives you visible motion blur while keeping texture in the water. Ultra-long exposures of 10+ seconds create a more abstract, milky look that works for some scenes but not all.
Do I need an ND filter to photograph waterfalls?
In most lighting conditions, yes. An ND filter reduces the light entering your lens so you can use slower shutter speeds without overexposing. A 6-stop ND is the most versatile choice for waterfall work. On very overcast days or in deep shade, you might manage without one.
What is the best time of day for waterfall photography?
Overcast conditions at any time of day are ideal. If the sky is clear, shoot early morning or late afternoon when the sun is low and less likely to create harsh highlights on the water. Midday sun in a shadeless location is the worst scenario.
Can I photograph waterfalls with a smartphone?
You can, but you'll be limited. Most smartphones don't natively support long exposures, though some offer a "long exposure" mode or you can use third-party apps. The main challenge is stabilisation — you'll still need a phone tripod mount for sharp results.
Why are my waterfall photos blurry?
The most common cause is camera shake from an unstable tripod or from pressing the shutter button. Use a remote release or your camera's 2-second timer. Also check that your tripod legs are firmly planted and that you haven't extended the centre column, which reduces stability.
Should I shoot in RAW or JPEG for waterfall photography?
Always shoot RAW. Waterfall scenes often have a wide dynamic range — deep shadows in gorge walls alongside bright white water. RAW files give you far more latitude in post-processing to recover detail in both highlights and shadows.
Key Takeaways
- A sturdy tripod, ND filter, and circular polariser are the three gear essentials — upgrade those before your camera body.
- Overcast skies deliver the best waterfall light by eliminating harsh contrast between shadows and bright water.
- The 0.5–2 second shutter speed range gives you the most versatile results, balancing motion blur with water texture.
- Strong composition — leading lines, foreground interest, and deliberate framing — matters more than any single camera setting.
 |
 |
 |
 |

About Alex W.
Alex is a landscape, equine, and pet photographer based in the Lake District, UK, with years of experience shooting in one of Britain's most photographically demanding natural environments. His work has been featured in Take a View Landscape Photographer of the Year, Outdoor Photographer of the Year, and Amateur Photographer Magazine — publications that reflect a serious, competitive standard of image-making. At Click and Learn Photography, he shares the camera settings, gear choices, and compositional techniques he has developed through real-world shooting and competition-level work.
You can Get FREE Gifts. Furthermore, Free Items here. Disable Ad Blocker to receive them all.
Once done, hit anything below
|
|
|
|