The holidays are approaching fast but there’s one more exciting hurdle to get over before the festivities really begin – Black Friday 2019 falls on …
by Alex W.
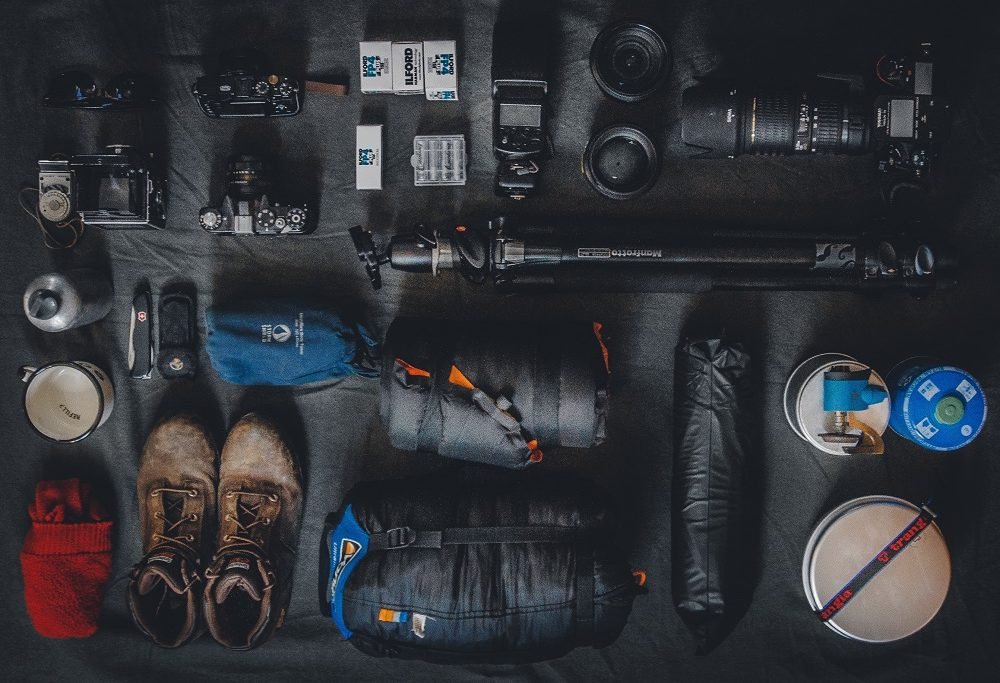
In Part 1 of our Ultimate Guide to Landscape Photography, we’ll discuss all the landscape photography equipment and gear you might need when starting out.
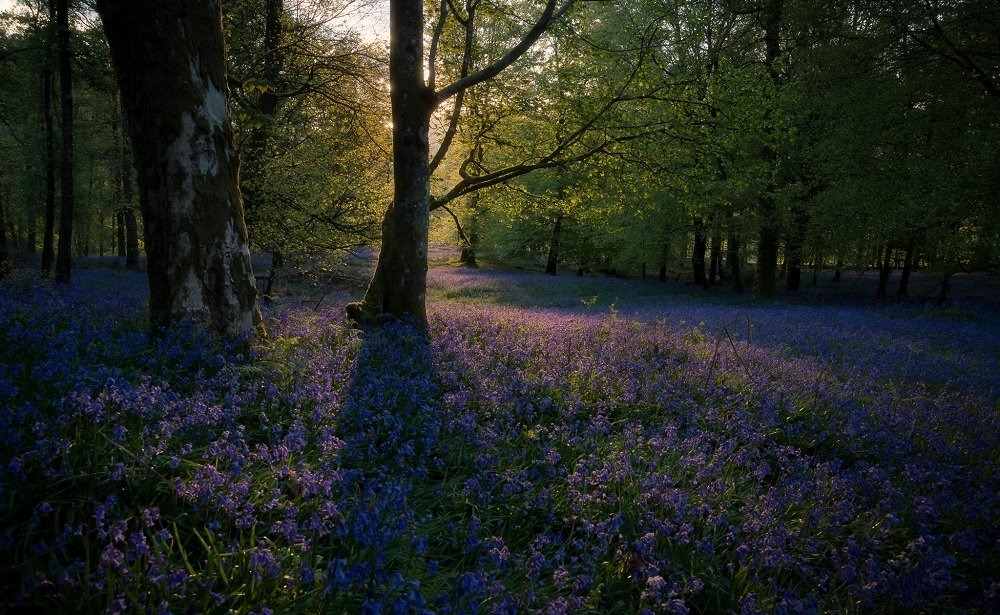
Landscape photography continues to grow in popularity, with platforms such as Facebook and Instagram bringing nature’s beauty into the spotlight and inspiring the masses to get out and experience it for themselves.
I’m assuming you’re here because you’re interested in doing exactly the same, and we’ve put together the ultimate guide to getting started on your landscape photography journey. Part One of this comprehensive guide covers all the landscape photography equipment you might want when heading out into nature. Part Two covers the basics of camera settings, Part Three takes you into the world of planning and preparing for a landscape photography shoot, and Part 4 gets us out in the field and shooting!
Makes sure to read out Learn The Basics section first if you’re a complete beginner in photography, otherwise you might get a bit lost in some of the terminology!
Note: This is Part 1 of our Ultimate Guide to Landscape Photography. Part 2 is here, Part 3 here, and Part 4 here.
Want all this and more in an ebook? Register your interest for our Ultimate Guide to Landscape Photography Ebook here.

Camera equipment, or gear as it’s commonly referred to, is a big talking point in the photography community, but it’s often overestimated in terms of what it will actually do for your photography.
Better and more expensive lenses and cameras do not make you a better photographer. The most famous landscape photographer in history, Ansel Adams, put it better than I ever could:
“The single most important component of a camera is the twelve inches behind it.”
Ansel Adams
That being said, some well selected landscape photography equipment can make your life easier and your images better.
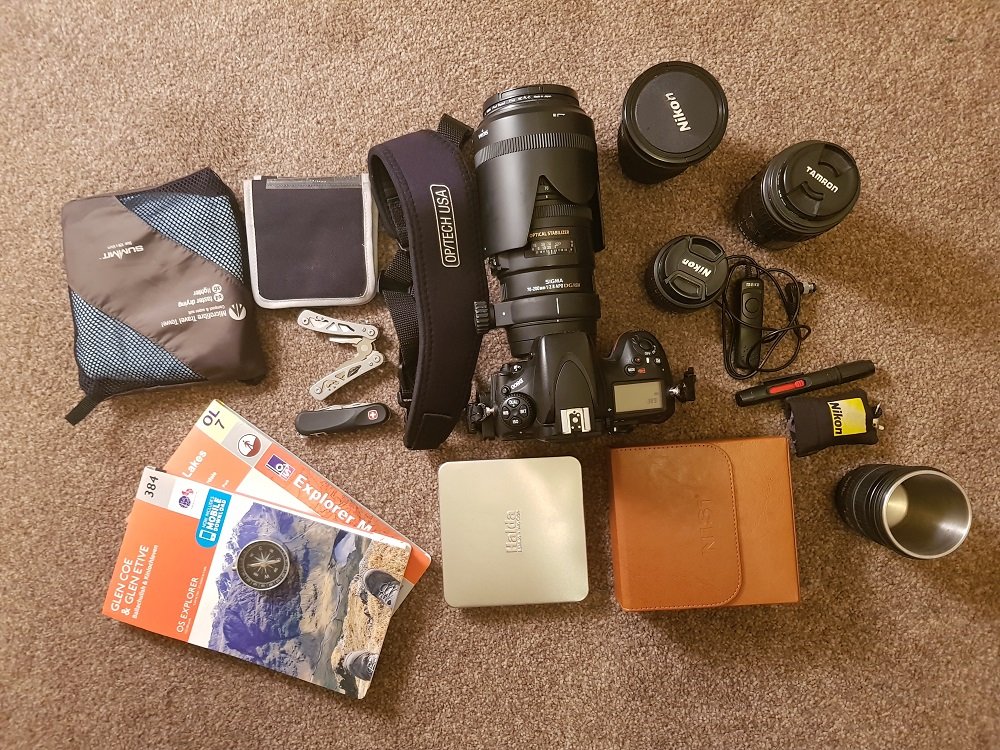
These are things that I rarely ever leave behind on a shoot, and whilst not all of them are essential they can definitely help you improve your landscape photography.
If you’re still hunting for a camera body then check out these helpful resources to help you make the correct decision for you:
DSLR or Mirrorless – Which Camera Works for You?
Best Beginner Mirrorless Cameras
Best Cameras for Landscape Photography
Assuming you already have a camera, the lenses are the next most important part of your landscape photography equipment list. This list is for those of you with cameras with interchangeable lenses, most notably DSLRs and Mirrorless bodies.
You Might Like…Best Landscape Photography Lenses
The kit lenses that come with these systems offer surprisingly good image quality, but they do have their limitations in landscape photography. The main limitation is their more reserved range of focal lengths, which range from moderately wide-angle to very short telephoto. Once you start delving deeper into landscape photography, you’ll almost certainly want to experiment with both wider angle lenses and longer telephoto lenses.
These are lenses with a short focal length, which essentially allows you to fit more of the landscape into your photograph. Once you get one it will become a staple in your landscape photography equipment arsenal, and it’s a purchase you will never regret making.
For crop-sensor camera bodies such as those entry-level systems they start at around 8mm, and for the purposes of this article we’re classing a wide-angle lens as anything with a focal length of below 18mm.
What Are They Used For?
There’s a very good reason that wide-angle lenses are favoured by landscape photographers: Because they allow you to fit more of the beautiful landscape in front of you into your frame. This means you can get everything from your foreground to background in the same shot, and they can give a fantastic sense of grandeur to the image.
Advantages of Wide-Angle Lenses
As we’ve already mentioned they allow you to fit more into your frame, but there are other key advantages to them as well:
One is their increased depth of field. To put it simply – the shorter the focal length, the more inherent depth of field the lens has.
Assuming all other camera settings stay the same, a lens set at 10mm will have a greater depth of field than a lens set at 50mm. This means that more of our image will be in focus, and that’s something we often want in a landscape photograph.
A wide-angle lens also distorts perspective in an interesting way. I’ll avoid the technical jargon, but all you need to know is that they make objects in the foreground look bigger and objects in the background appear smaller. This means we can make great use of interesting foreground subjects by enlarging them. It also emphasises any leading lines that you might be using in your composition, enhancing the depth in your image.
However, this perspective distortion has it’s drawbacks as well…
Disadvantages of Wide-Angle Lenses
As I mentioned above, the perspective distortion of a wide-angle lens makes the foreground appear larger. However, one of the issues is that is causes the background to shrink off into the distance as well. Unless we have an image very heavily focused around the foreground this can cause problems.
For example, if we’re shooting some dramatic mountains being lit by the morning sun, using a wide-angle lens might not be the best option. These mountains will shrink in the frame, and all the drama and emphasis of them will disappear. In this case it’s probably better to opt for a longer focal length to retain that drama.
When to Use Wide-Angle Lenses in Landscape Photography
As with almost anything in this world, there are good quality wide-angles and poor quality ones.
The lens is the most important part of the camera when determining things such as sharpness and contrast, so it’s important not to get saddled with a sub-par wide-angle lens.
These are all lenses I have used personally and can recommend with 100% confidence in their ability to do the job. They range from budget friendly options to high end professional gear:
[amazon href=https://www.amazon.com/dp/B002D2VS9U?tag=clickandl-20&linkCode=ogi&th=1&psc=1]
[amazon href=https://www.amazon.com/dp/B00K899B9Y?tag=clickandl-20&linkCode=ogi&th=1&psc=1]
Buy this if…You have a decent budget and are looking for the best compromise between image quality, price, and specifications.
Buy This If… You use a Canon camera and are looking for the best budget wide-angle lens.
[amazon href=https://www.amazon.com/dp/B00E3Y4Y74?tag=clickandl-20&linkCode=ogi&th=1&psc=1]
Buy This If… You have a bit of money to spend and are thinking about venturing into astrophotography as well, where the constant f/2.8 aperture is a massive bonus.
[amazon href=https://www.amazon.com/dp/B000VDCTCI?tag=clickandl-20&linkCode=ogi&th=1&psc=1]
Buy This If… You have a large budget, a Nikon camera, and want the very best wide-angle lens on the market.
These are those long lenses you often see wildlife photographers using. They have a longer focal length than wide-angle lenses, which means greater magnification.
They allow you to zoom in much further, and can be used to hone in on the aspects of a landscape you like the most.
When selecting a landscape photography equipment list, most newcomers tend to discount telephoto lenses. Those bulky miniature telescopes are the domain of the wildlife photographers, right? Nope.
There are plenty of reasons to bag yourself one of these, and having that versatility at your disposal can be invaluable at times.
Again, for the purposes of this article we’re going to class any focal length longer than the 55mm a kit lens goes to as telephoto. More often than not the zoom ranges for telephoto lenses are either 55-200m, 55-300mm, 70-200mm, or 70-300mm.
What Are They Used For?
While telephoto lenses are often overlooked for landscape photography, they are actually incredibly useful.
Wide-angle lenses are used to capture strong foreground material and grand vistas, but if we want to hone in on specific sections of a landscape, a telephoto lens is crucial.
With them, we can enhance the drama in a scene, show off a sense of scale, and find intimate images within a landscape.
Advantages of Telephoto Lenses
We’ve already mentioned the ability to zoom in much further and pick out small details within a grander landscape. This allows us to really fill the frame with exactly what we want to photograph, and as such create more compelling images.
In addition to this, using a telephoto lens generally results in us capturing more unique landscape photographs. To put it bluntly, most landscape photographers rarely move away from the wide-angle view, and by going against the grain in this respect we can capture images often missed by the masses.
We discussed how wide-angle lenses distort perspective in the last section, but telephoto lenses also have their own distortion effects.
They do the opposite to wide-angle lenses, making background subjects appear larger in the frame and compressing the overall perspective. This is a great advantage to have when you have layers upon layers of mountains stretching out into the distance, and it can be used to create a grand sense of scale as well.
Finally, it’s a lot easier to use depth of field creatively with a telephoto lens. The longer focal length gives it an inherent lack of depth of field – The opposite to a wide-angle lens. This means that using a large aperture on a telephoto lens allows very selective focusing, and can be used to focus the viewer’s eye on exactly what you want.
As with anything though, these advantages can often turn into disadvantages…
Disadvantages of Telephoto Lenses
That ability to utilise creative depth of field can become a curse when we want the entire image to be in focus. Because of the small depth of field on a telephoto lens we need to stop down and use smaller apertures than normal to retain the focus in our image. This means that slower shutter speeds are necessary, and a tripod is an absolute must!
There are other pitfalls to telephoto lenses as well. Good quality ones often cost quite a lot of money, and in addition to that they are large, heavy, and often cumbersome to use.
Having said that, the versatility they can bring to your landscape photography means I would still highly recommend getting one.
When to Use a Telephoto Lens in Landscape Photography
[amazon href=https://www.amazon.com/dp/B06WP5F2HK?tag=clickandl-20&linkCode=ogi&th=1&psc=1]
Buy This If… You have a decent sized budget and are interested in other types of photography as well. This rivals the professional range from both Canon and Nikon and comes in at about half the price. We recommended it here too.
[amazon href=https://www.amazon.com/dp/B000AM7CJ0?tag=clickandl-20&linkCode=ogi&th=1&psc=1]
Buy This If… You’re on a tight budget and aren’t worried about the narrow maximum aperture. Also has partial macro capability if you’re interested in trying out another genre of photography.
[amazon href=https://www.amazon.com/dp/B009VZOK0Q?tag=clickandl-20&linkCode=ogi&th=1&psc=1]
Buy This If… You want superb image quality but aren’t bothered about the f/2.8 aperture of it’s competitors. The compromise on aperture, which isn’t a concern if you only shoot landscapes, is made up for by reduced weight and size.
[amazon href=https://www.amazon.com/dp/B07DFVF7M4?tag=clickandl-20&linkCode=ogi&th=1&psc=1]
Buy This If… You have a large budget and want the very best image quality, focusing, build quality, and weather sealing. The best all rounder, but you have to pay top whack for it.
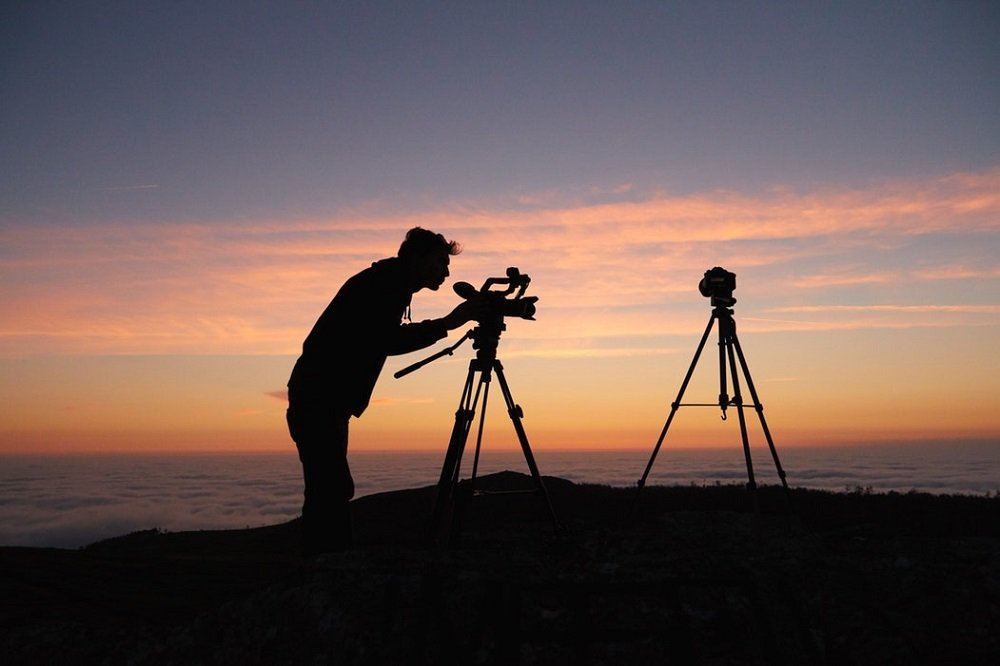
Having great camera bodies and lenses is one thing, but that won’t be enough if you can’t hold your gear steady. Enter the next piece of the landscape photography equipment jigsaw – The Tripod.
Most beginner photographers think they’ll never need a tripod, and even if they do a bargain basement one will do. It’s just three metal legs right?
Unfortunately, that isn’t the case. Tripods are essential in landscape photography, and buying the cheapest possible one will cause many more problems than it solves.
That’s not to say you have to go out instantly and spend hundreds on a top of the range tripod, but it’s worth remembering that you get what you pay for.
Want to know more about tripods? Head over to our Ultimate Guide to Buying a Tripod here.
Why Do We Need a Tripod?
Although I recommend all types of photographer to try out using a tripod, for landscape photographers it’s really a non-optional requirement.
If we’re doing landscape photography correctly, we’re spending a lot of our photography time at sunrise and sunset. This means darker conditions, which in turn means a longer shutter speed is required compared to shooting in the middle of the day. To avoid camera shake we need to mount our system on a tripod to keep it steady.
That’s the most obvious reason for needing a tripod, but there are other ways it can improve our photography. I discussed the advantages at length in the article below, but to cut a long story short using a tripod allows us to slow our photography process down and think very carefully about our composition.
Using a neutral density filter (discussed below) to purposefully lengthen your shutter speed is a useful technique to have up your sleeve in landscape photography. We can blur water, clouds, and basically anything that’s moving to create a surreal and dreamy image. Because we’re using shutter speeds of anything over 1 second in this type of photography it is simply impossible to do without a tripod.
Things to Consider when Buying a Tripod
Tripod Material – The tripods we’re interested in are generally either made from carbon-fibre or aluminium, and both offer different advantages and disadvantages. Carbon-fibre models are very light, sturdy, and incredibly stable considering their weight, but they come with a high price tag. Alternatively, an aluminium construction will weigh more and but can cost a lot less. Which one you choose ultimately comes down to your budget and whether you’re planning on hiking long distances with a tripod in tow.
Tripod Head – Most tripods these days come with a head attached to the legs, but you can chop and change this depending on your preferences. This, again, all comes down to a balance between budget and preference, so try some for yourself and decide which type you prefer:
Tripod Height – This doesn’t just refer to how high it goes, but how low to the ground it can operate as well. Often we’ll want to try out unusual angles in landscape photography, and for that we need a tripod that can get right down to ground level to offer a different perspective. We also want it to be operational at a more comfortable level though, as well as being light and folding down small enough to travel comfortably with. All this comes at a price, so once again it’s a compromise between factors that are important to your own photography needs.
Budget – Considering they appear to just be three pieces of metal and a head the price of tripods can vary wildly. We’re talking anywhere between £20 (avoid) to approaching £1,000, all offering a trade off between quality and price. I’d recommend you consider what is important to you in a tripod (weight, height, stability, size etc) and work your way towards an affordable model from there.
Below are some models that I can personally recommend, along with their advantages and disadvantages. Choose from one of these according to your budget and you won’t be disappointed!
However, for a more thorough rundown I definitely recommend checking out our Ultimate Guide to Buying a Tripod.
[amazon href=https://www.amazon.com/dp/B07BGCLBN2?tag=clickandl-20&linkCode=ogi&th=1&psc=1]
Advantages: Cheap, removable centre column for low-angle use, comes with included ballhead and quick release plate.
Disadvantages: Aluminium rather than carbon-fibre, ballhead could be better.
[amazon href=https://www.amazon.com/dp/B01I1C8VGI?tag=clickandl-20&linkCode=ogi&th=1&psc=1]
Advantages: Cheap, carbon fibre construction, incredibly light, folds down very small for transport.
Disadvantages: Centre column not removable, doesn’t extend as high as some others.
[amazon href=https://www.amazon.com/dp/B06ZYJ1P8Q?tag=clickandl-20&linkCode=ogi&th=1&psc=1]
Advantages: Sturdy, packed full of features, voted Tripod of the Year. Full review can be found here.
Disadvantages: Very few
[amazon href=https://www.amazon.com/dp/B014EQFSL6?tag=clickandl-20&linkCode=ogi&th=1&psc=1]
Advantages: Incredible quality construction, very light, easily transportable, top of the range ballhead included, built to last
Disadvantages: Expensive, ridiculous name.
Filters are by no means a necessity for getting started in landscape photography, but they can be used to take your photography to the next level once you’ve nailed the basics.
There are dozens of different manufacturers and multiple different types of filter though, and with some pieces of glass costing over £100 they can turn into a heavy investment if you’re not careful.
Fortunately, you don’t need £600 worth of Lee Filters to get started using them. There are some more budget friendly brands, and in some cases they actually outperform some higher end equipment.
What Are Filters Used for in Landscape Photography?
There are three main types of filter that we’ll be focusing on for landscape photography: The polarising filter, the neutral density filter, and the graduated neutral density filter.
These are the mainstays of many landscape photography equipment lists, and each one has a different effect on our photos.
Polarising Filters
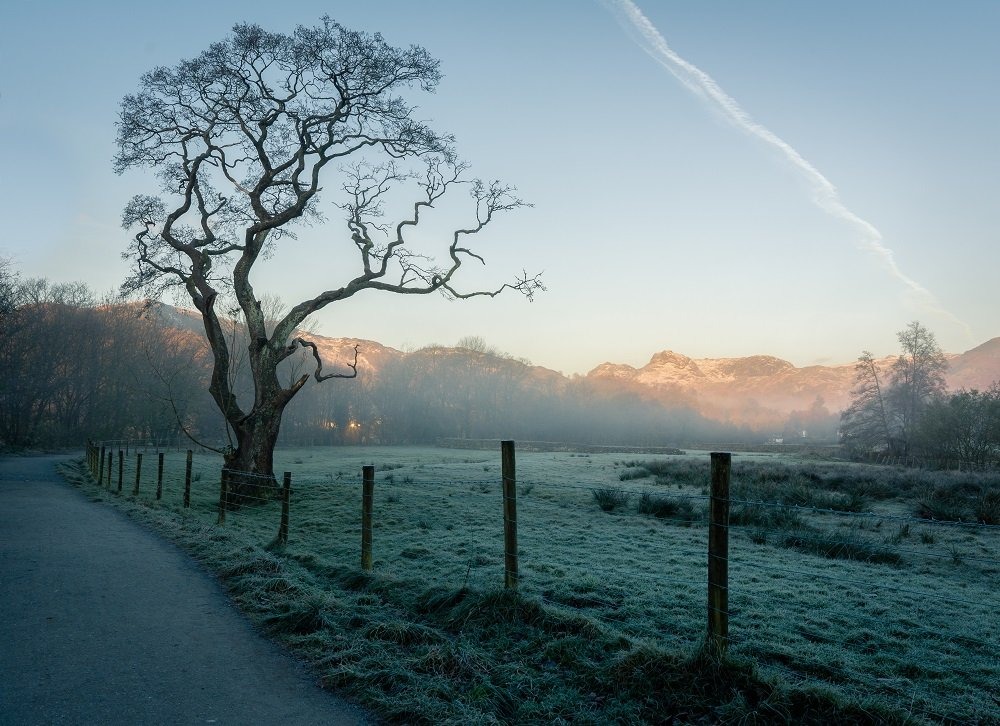
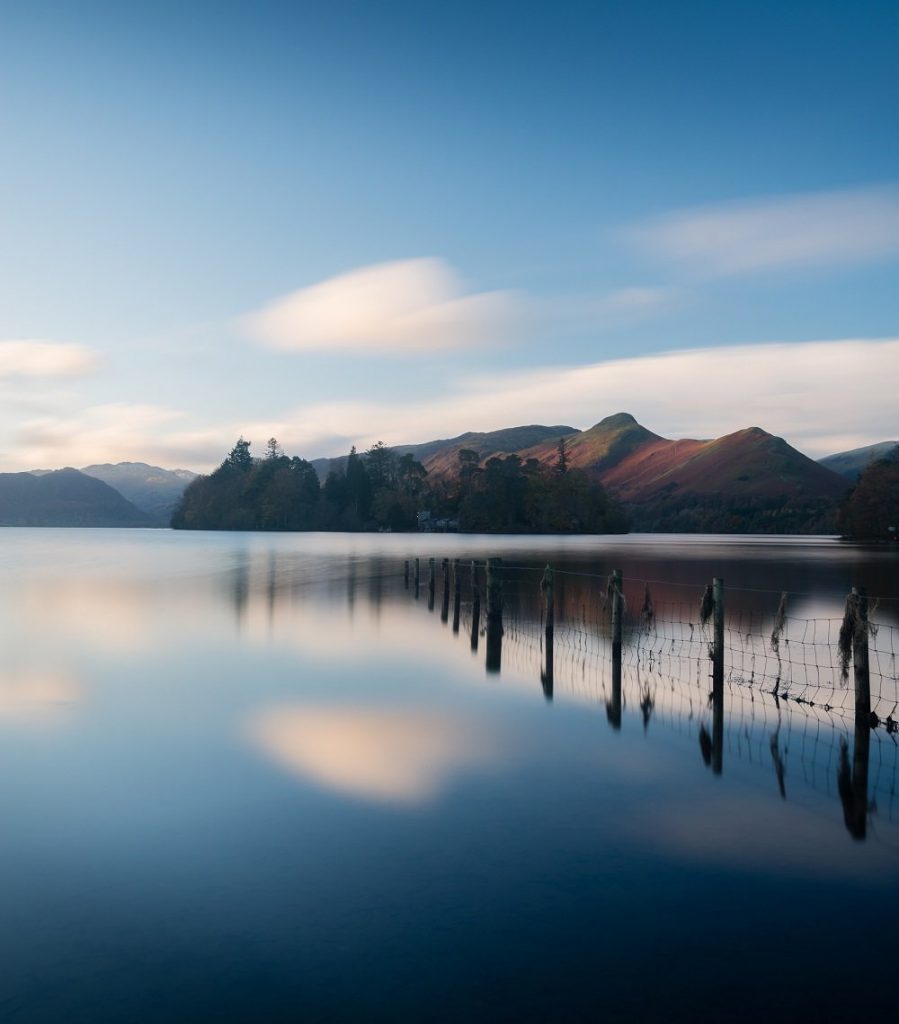
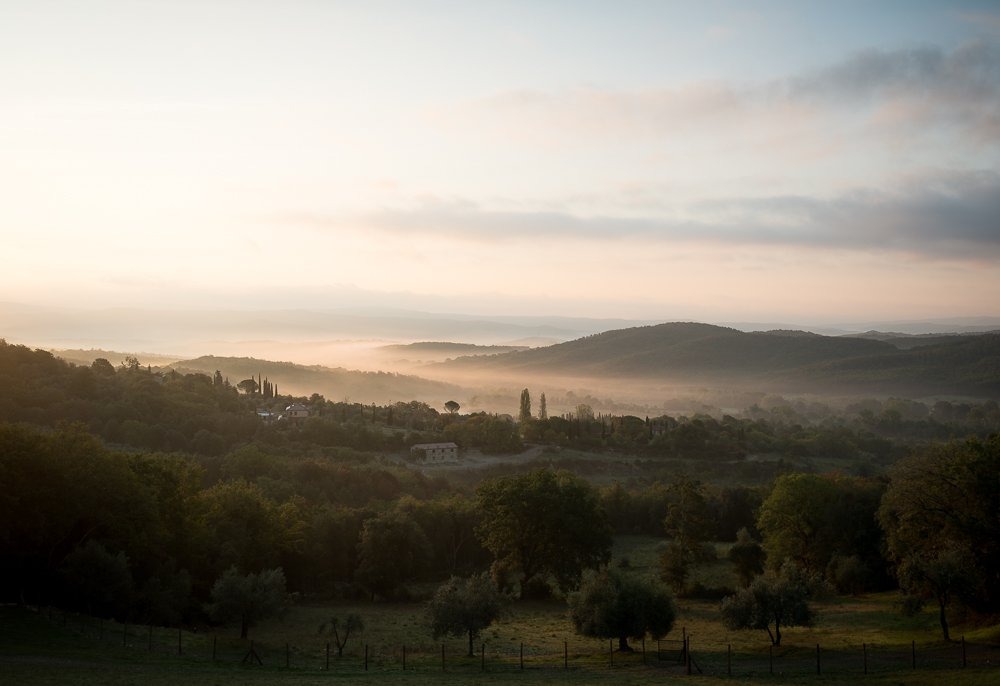
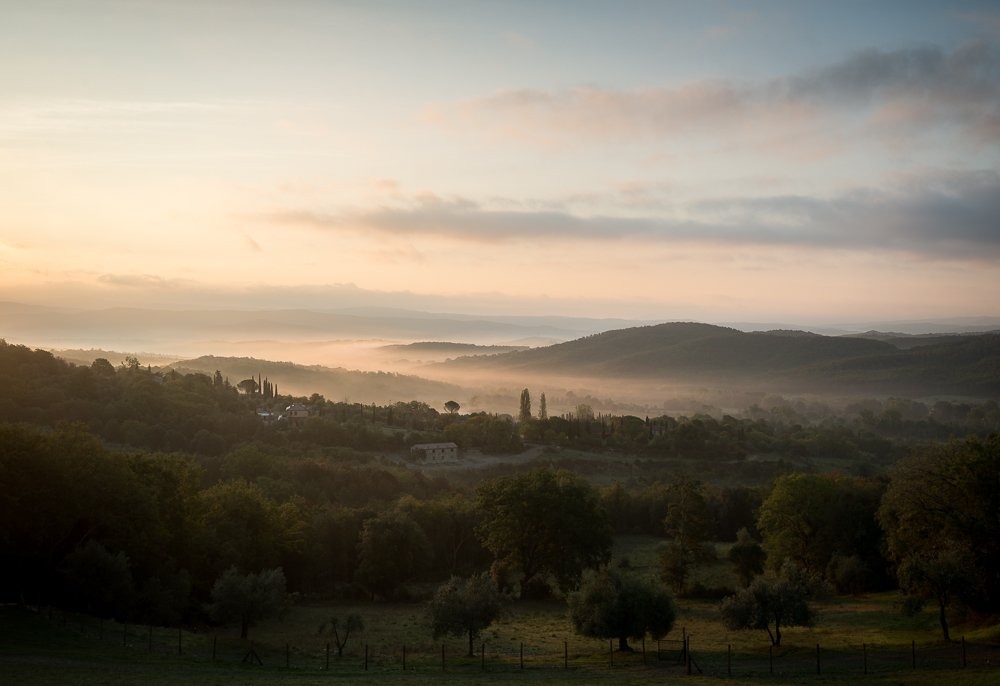
This, in my opinion, is a must have piece of kit for any landscape photographer. The polarising filter works by filtering out polarised light from the sun (it works best when viewing the scene at a 90 degree angle to the sun) and results in boosted contrast and a deeper blue colour in the sky.
The biggest use I have for it is reducing glare on bodies of water (this applies to wet surfaces as well,) which increases saturation and also allows you to capture anything under the surface of the water.
Look at the images below and you can see the effect clearly, with reduced glare on the water, decreased haze in the distance, and a deeper blue to the sky.
[amazon href=https://www.amazon.com/dp/B001G7PMG8?tag=clickandl-20&linkCode=ogi&th=1&psc=1]
When using them without my full square filter set (more on that later) I have used Hoya Polarising Filters since the start of my photography journey. They’re often on offer and come in at a very reasonable price, and they are still the best quality polarisers I’ve ever found (I still use my very first polariser that I bought over four years ago.)
Other good brands include B+W, Singh Ray, and Heliopan.
Neutral Density Filters
I’m sure you’ve seen those photographs of silky smooth rivers and gorgeous streaky clouds many times before and wondered how you can do the same. Now you know – Use a neutral density filter.
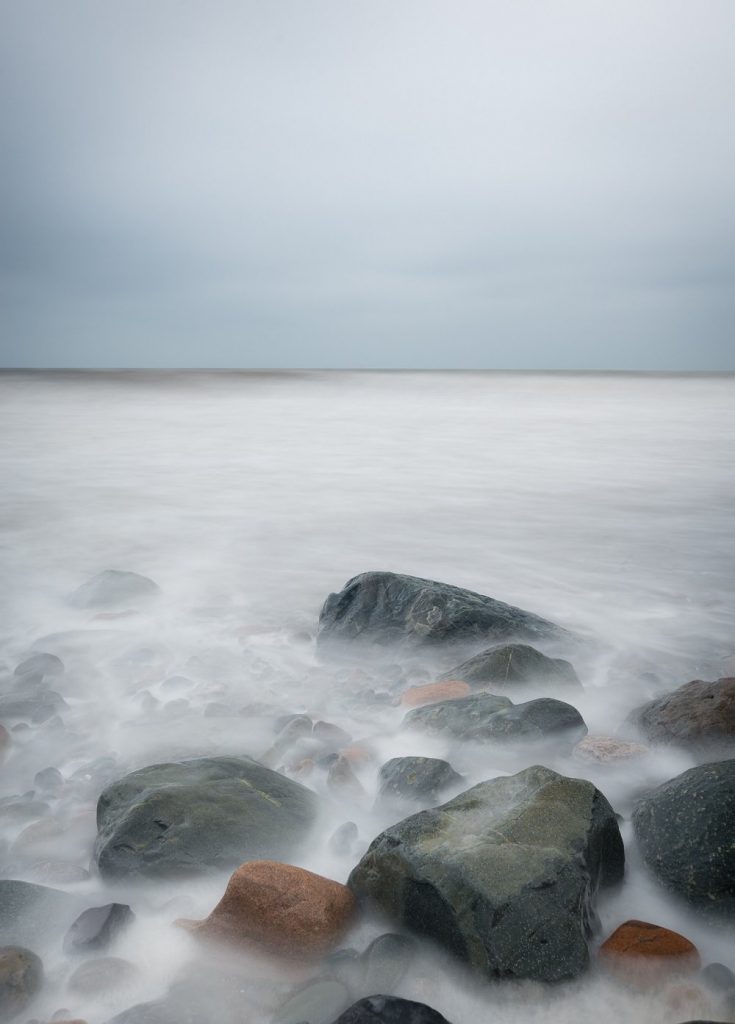
Technically, neutral density filters (or ND filters) are just pieces of dark glass. They are used to reduce the amount of light reaching the camera sensor, and as such allow us to lengthen the exposure time and use the motion blur or water, clouds, and trees in our composition.
ND Filters come in a variety of strengths, from 1 stop (doubles your original exposure) to a huge 15 stops (allowing ultra-long exposures in the middle of the day.) and also vary wildly in quality. In addition, you can also get screw-in circular filters or square filters for a detachable filter system.
And, despite them just being dark panes of glass, they actually require a lot of work to manufacturer due to the need for colour neutrality and sharpness.
Naturally, this pushes prices up, but there are some more budget friendly options out there that do a good job. My favourite budget option is SRB Photographic’s range of 10-stop filters, which start at a ridiculously cheap £24.95 and actually produce very good quality images.
Honestly, these are better quality than the £120 Lee Filters 10-stop and I can highly recommend them for anybody wanting to give long exposure photography a try.
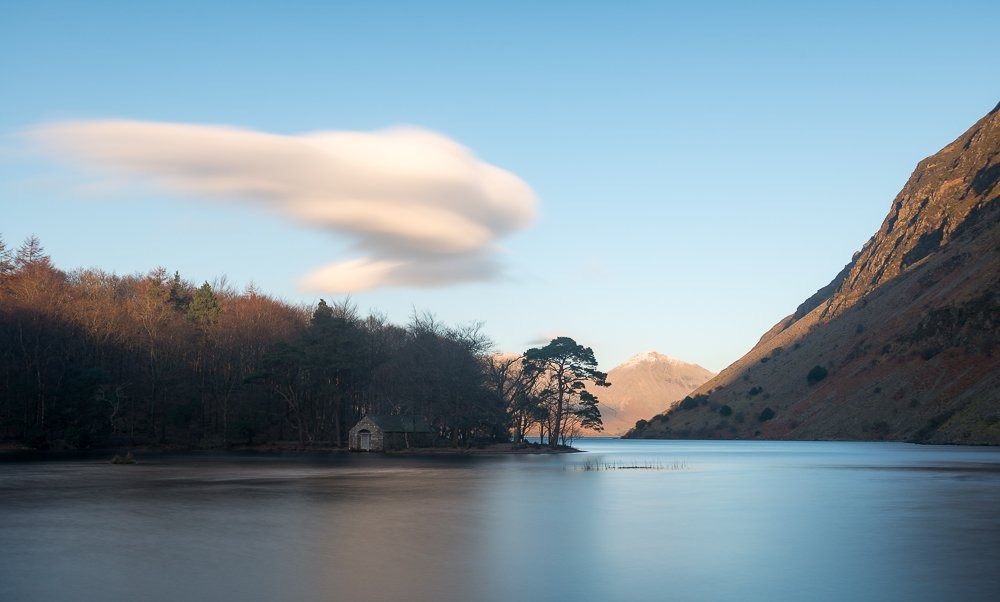
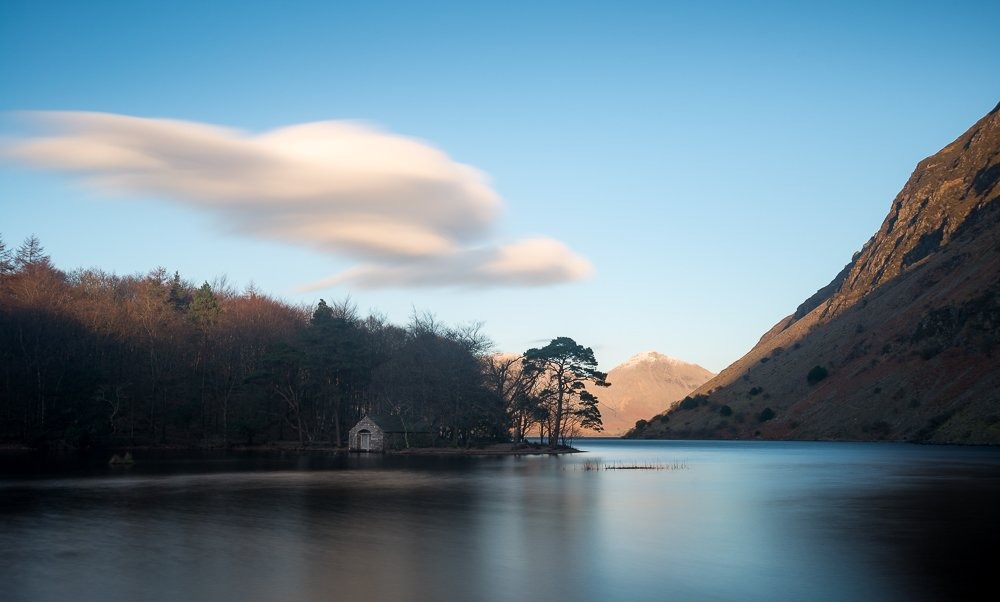
Graduated Neutral Density Filters
These are similar to the neutral density filters above, but instead of darkening the whole image they only darken a portion of it. Their primary use is to reduce exposure in the sky, which avoids overexposure and blown highlights and allows high contrast scenes to be photographed in a single exposure.
You can see this in effect by looking at the images below, where the first image has no detail in the bright sky but the GND has controlled this in the second image.
I personally don’t use these anymore. They’re extra weight in my bag and the same results can easily be achieved by bracketing and blending exposures in post processing.
However, many photographers understandably prefer to do all the work in-camera, and as such require a set of GND Filters.
The thing with these filters is that they require a square filter set (read below,) which again is extra cost and weight if we want to travel light. The square filters slot into the filter holder attached to the front of your lens and can then be moved up and down or rotated to give the correct orientation. If you want to try them out but don’t want to shell out hundreds I can, once again, highly recommend SRB Photographic’s Elite Filter System.
Square Filter Systems for Landscape Photography
We’ve mainly been focusing on the round, screw-in filters so far, but filter systems are definitely worth a mention.
No products found.
The square filter systems typically consist of a filter holder that attaches to the front of your lens, and then a selection of square filters that slide into the filter holder. I use one of these myself, but I wouldn’t recommend a beginner getting one. Why? Because the good quality ones are expensive.
Not only do you have to spend over £100 on the filter holder itself, but the pieces of glass that slot into the holder are more expensive too because they measure 100mmx100mm in size; much bigger than your average screw-in. To put things into perspective, a brand new filter system containing 2 ND filters, a holder, and a polariser can easily cost over £400. Meanwhile, you can buy 2 screw-in ND filters and a polariser for a 77mm lens for around £100. If you are insistent on starting off with a square filter system, my personally recommended brands are NiSi, Formatt-Hitec (the Firecrest range), and Haida.
You can see full reviews of the NiSi filter system here and the Haida 10-Stop ND filter here.
A Word on Lee Filters – Many photographers sing the praises of Lee Filters. However, in my personal opinion they are being left behind by the competition. They remain one of the most expensive brands on the market, but their filters have a pronounced colour cast and they are yet to implement any useful innovations such as an in built polariser. I’d stay away and opt for a cheaper, better brand.
We’ve covered the bulk of the landscape photography equipment now, but there are still a few things that I like to pack in my kit bag.
That’s a good starting point actually, what are you carrying this gear in? And what about our memory cards? Are we going off up a mountain in jeans and a t-shirt?
Are Expensive Photography Bags Really Worth It?
Like so many things, it depends.
[amazon href=https://www.amazon.com/dp/B01HIXQN48?tag=clickandl-20&linkCode=ogi&th=1&psc=1]
They’re very well made and do their job fantastically, but many of them do cost a small fortune and offer little extra functionality than budget models. However, the higher end bags do excel when it comes to comfort, so if you have the extra cash and are planning on carrying it over long distances it might be worth getting your wallet out!
Looking for recommendations? Check out our Best Camera Bags for Photographers article
I started with a budget backpack when I first got interested in photography. It cost about a quarter the price of the brand name versions and lasted me nearly two years of use and abuse. Having tested the Amazon Basics range here, I can vouch that it will definitely do the job!
Memory Cards
Memory cards are something that I wouldn’t recommend skimping on. You don’t want to find out the hard way when your knock-off SD card corrupts with a whole day’s worth of shots on there.
Go for one of the trusted brands like SanDisk or Lexar. Storage is cheap enough these days that there really isn’t a good reason to buy low quality SD cards.
Additionally, if your camera has dual SD slots make sure to make use of them and set it to duplicate. That way if one of the cards corrupts for any reason you always have a backup.
Safety and Miscellaneous Accessories
Landscape photography can be a rather brutal pastime. We’re often out in the dark, in cold and wet conditions and away from all civilisation.
It has the potential to be very dangerous, but by taking a few simple precautions and adding some choice items to our gear we can make our shoots both safer and more comfortable.
After all, nobody performs at their peak when they’re cold, hungry, and thirsty. Here are a few pieces of equipment I would highly recommend:
Suitable Clothing – Obviously this depends on what conditions you’re shooting in, but always wear suitable clothing for your landscape photography expeditions. This is more common sense than anything, but bear in mind that we’ll often be out either before sunrise or after sunset so it will be colder than usual. And if we’re taking advantage of ‘bad’ weather we have to be extra careful!
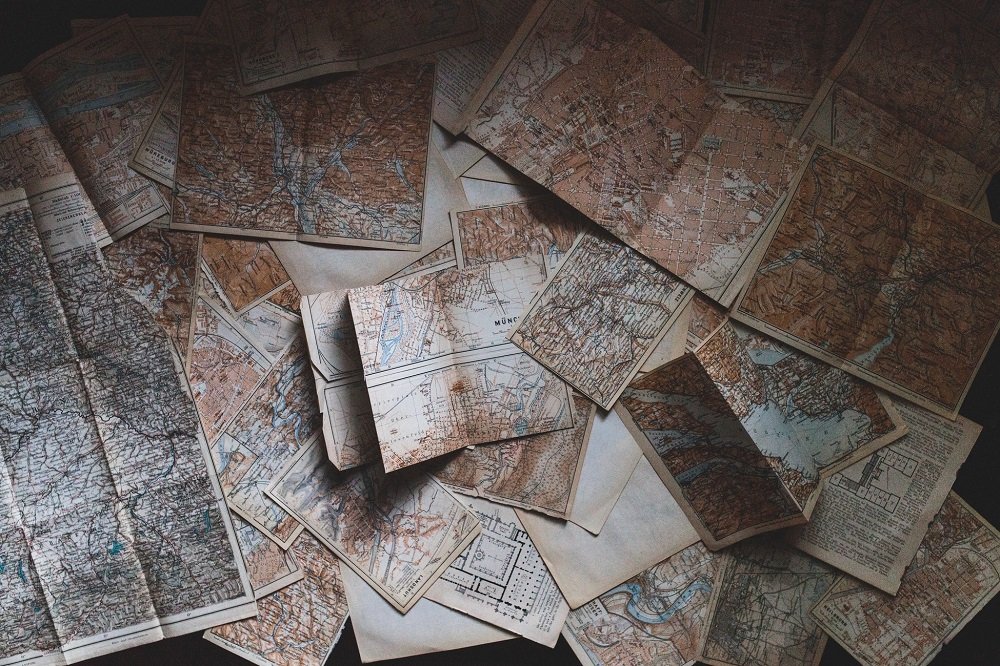
Maps, Compass – Google maps is great, but I always pack a physical map of the area when I go on a landscape shoot. Phone batteries can die, signal can be lost, but a detailed map of the area and a compass can save your life if you get lost. You’ll want one of these for the preparation and planning stage of landscape photography too.
Food and Drink – Again, common sense. We’re not going to be at our best if we’re starving on the top of a mountain, so just pack a cereal bar and a bottle of water. If you get lost this can be a life saver, but equally there is nothing more rewarding than having a chocolate bar and a cup of coffee on top of a mountain as you watch the sun rise.
[amazon href=https://www.amazon.com/dp/B00MPH1LEU?tag=clickandl-20&linkCode=ogi&th=1&psc=1]
Water Filter – This is a real hidden gem of an addition to your gear list, especially if you enjoy long hikes and camping. Honestly, this Sawyer Mini is one of the best purchases I’ve ever made. It filters all the harmful bacteria out of lake and river water, which means you don’t have to carry litres of water every time you head out of the door. This is an absolutely fantastic product if you like to camp out in the hills, because it means you don’t have to haul a full day and night’s supply of drinking water to the top of a mountain. Just make sure that you’ll be in the vicinity of water before you set off!
Phew, you made it.
Bear in mind that all of these items are personally recommended by a landscape photographer of many years, but that doesn’t mean you have to go out and buy every single one of the items mentioned in this guide.
You can get started in landscape photography with a simple point and shoot camera, but eventually you will want to upgrade your landscape photography equipment and this is what you might want to aim for.
Join us in Part 2 of our Ultimate Guide to Landscape Photography, where we discuss the settings you will most use for landscape photography.
Make sure to subscribe to our email newsletter to stay up to date on all the latest photography guides, tutorials, and news on Click and Learn Photography.
If you liked this piece of content please consider sharing it with your friends or leaving a comment below.
Top Rated Entry Level DSLR Cameras for Beginners
8 Quick Tips to Transform your Landscape Photography
Ultimate Guide to Spring Photography
Leading Lines – How to Use Them to Improve Your Photography
 |
 |
 |
 |

About Alex W.
Alex is the owner and lead writer for Click and Learn Photography. An avid landscape, equine, and pet photographer living and working in the beautiful Lake District, UK, Alex has had his work featured in a number of high profile publications, including the Take a View Landscape Photographer of the Year, Outdoor Photographer of the Year, and Amateur Photographer Magazine.
|
|
|
|
You can Get FREE Gifts. Furthermore, Free Items here. Disable Ad Blocker to receive them all.
Once done, hit anything below
|
|
|
|