Ultimate Guide to Landscape Photography Part 4 – Shooting on Location
by Alex W.
Note – This is Part 4 of our Ultimate Guide to Landscape Photography series. You can see Part 1 here, Part 2 here, and Part 3 here.
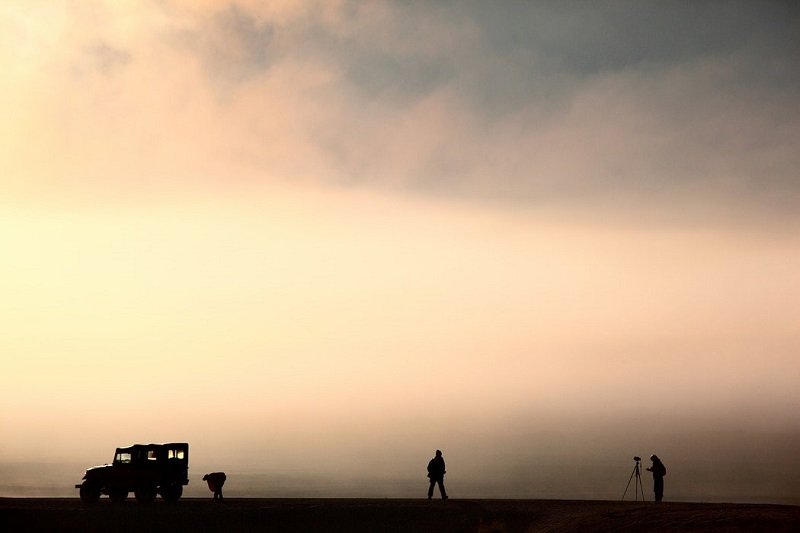
It’s been a long time coming, but here we are ready for our landscape photography shoot. We’ve learned all about the photography gear, the different settings we can make use of, and how to plan the perfect landscape photography shoot.
There have also been some follow up articles on the best cameras for landscape photography and the best lenses for landscape photography.
Now all that’s left is to put all of this knowledge into practise.
As we mentioned last time, landscape photography is all about being in the right place at the right time with the right equipment and the knowledge on how to use it.
National Geographic photographer Jim Richardson came up with one of my favourite quotes about photography:
“If you want to be a better photographer, stand in front of more interesting stuff.”
We’ve used our planning skills to be in an interesting location at the right time of day, but now we have to dig out the best image possible from what we have in front of us.
Please note that this article isn’t about telling you arbitrary rules for you to follow when making a landscape photograph. It’s more about teaching you how to think for yourself and about how certain things that often get neglected can actually have a big impact on the final image.
We have plenty of articles regarding composition that can be applied to landscape photography, all of which are listed further down in this guide. We’re not going to rehash all of that – Instead we want you to understand why these things work and teach you what you should be thinking about when out in the field.
Hopefully, this will lead you to create some truly unique landscape images, rather than just the cliche shots that come from following ‘rules’.
You Might Like… Ultimate Guide to Waterfall Photography
Travelling to the Landscape
You know why I recommended that you aim to arrive on location 30 minutes before you need to be there?
It’s not just because those minutes before dawn can yield some spectacular colour in the sky. In fact, it’s mostly because you will need some time to breathe, relax, and explore the landscape.
Take it from somebody who knows – You do not want to be rushing around trying to find somewhere to park just when the light is right because you didn’t allow enough time. Not only do you miss out on some great photographic potential, but you also completely lose the state of mind that you need to be in.
Most people, myself included, need to be in a comfortable and relaxed state of mind before any flashes of creative inspiration come to them. Strangely enough, being stressed out, frantic, and late is not a conducive mindset for landscape photography.
Set off early – You won’t regret it.
Arriving on Location
You’re at your chosen location with plenty of minutes to spare, so take the time to familiarise yourself with the landscape.
It might seem counter intuitive, but just leave the camera in the bag for a while and wander around. Honestly, it’s quite hard to explain this part of landscape photography because it’s such a personal thing, but I’ll give it a go.
It’s all about narrowing down the search area, and this is highly dependant on what type of landscape you’re shooting in.
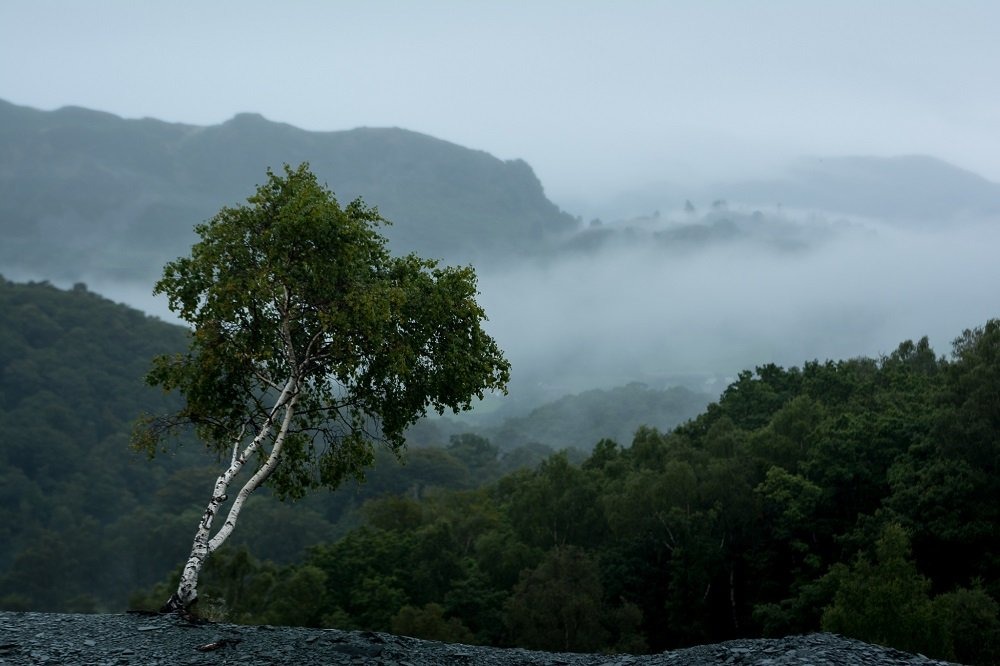
The chances are that there will be an aspect of the landscape that stands out. It could be a lake, a mountain, a beautiful view of the rolling countryside, or a well placed tree. Discover that standout feature that you definitely want in your image and focus your efforts on that.
- Is it a mountain in the background? Avoid areas of the landscape where the mountain is obscured.
- Is it a vista from a summit? Stay near the edges of the summit so the view is still visible.
- Is is a well placed tree? Focus on getting an unobstructed view of that and work from there.
What we’re doing here is narrowing down that search area for a composition and making the first steps towards any great landscape photograph – Simplicity.
Finding the Features
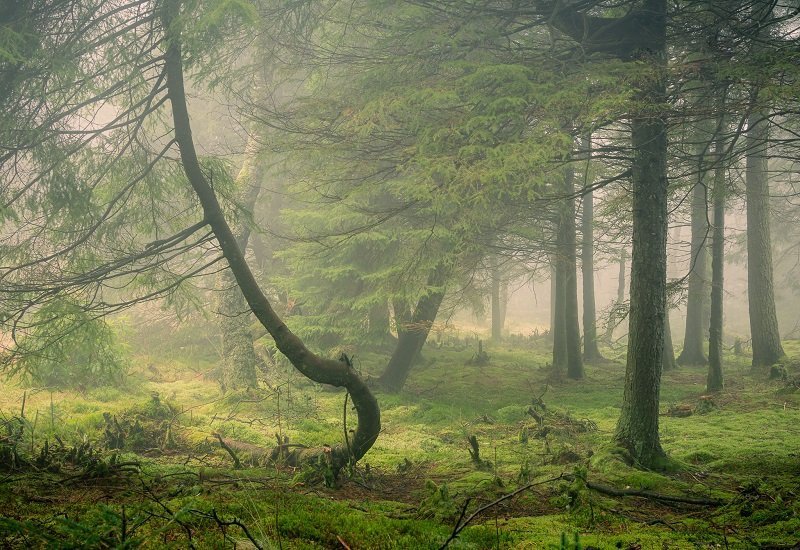
Usually, this standout feature will be instantly apparent to you, and is possibly the reason you chose this location in the first place. This isn’t always the case though, and in these situations it’s best to take a leaf (pun 100% intended) out of the Ultimate Guide to Forest Photography.
Woodland is notoriously difficult to find compositions in. It’s messy and cluttered and really hard to find a composition that works, but I’ve found an approach that helps (for me at least). This also works for those unfamiliar landscapes that don’t have a dominating feature to “anchor” your search for a shot.
Patience is the key.
Leaving your camera in the bag, just try wandering around. Don’t “look” for a shot, but walk as you would normally and just wait until something catches your eye. When something does – Stop.
Whatever it was that caught your eye is of interest, and we need to explore that interest. Take a closer look and figure out why it caught your eye in the first place. What attracted you to it?
If you’ve taken a closer look and still found it interesting, then congratulations! You have narrowed your search for a shot down.
Closing the Net
Once you know you want to include a certain feature in your shot the area to look for compositions becomes significantly smaller. Now it’s time to hone this down even further.
Think about where you would like the feature placed in your frame. If it’s a distant mountain peak would it look better in the upper right section or the upper left? Do you want some foreground interest to add to the scene or are you going for a more minimal feel?
There are already a bunch of really helpful articles here to help with the theory of composition, so I won’t bore you with them again! They’re listed below, and I urge you to have a read of all of them and start understanding what exactly makes an image ‘work’.
- Beginners Guide to Photography Composition
- 5 More Tips to Improve Your Composition
- Using Leading Lines to Improve your Composition
- Tearing up the Rulebook – 12 Photography ‘Rules’ and When to Ignore Them
- 8 Quick Tips to Transform your Landscape Photography
This step is all about tailoring your composition search to suit the image that you’re trying to capture. Some common scenarios are listed below, but this can’t be a one-size-fits-all solution – That simply leads to predictable photos that offer very little in the way of uniqueness.
Just use the image you have in your head and work towards that logically, and then we can start fine-tuning the shot once we’ve found the ideal composition.
- Do you have an interesting background? Think about whether some foreground interest or leading lines would improve the image, and if they would start looking closer to home to find an interesting subject to use.
- Do you have an interesting foreground subject? Think about what you want to do with it. Maybe isolate it and bring all focus towards it, or use it as a component to the wider landscape. Consider the direction of the light and the background.
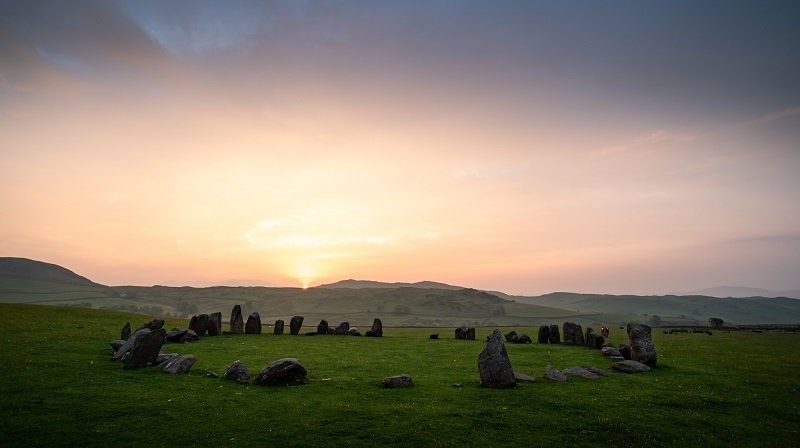
- Do you have an epic sky? An epic sky is nothing without the composition to back it up. Consider silhouetting interesting features against it to both bring attention to the sky but also retain interest in other areas of the landscape. Remember that placement of the horizon does make a difference.
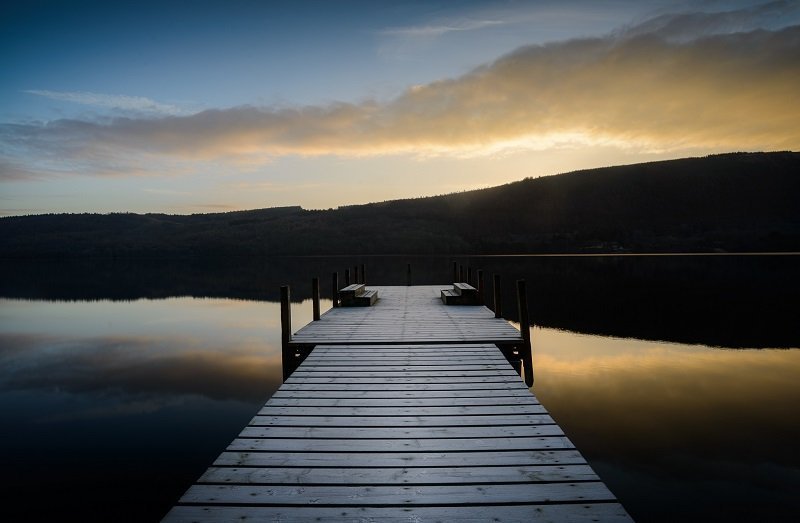
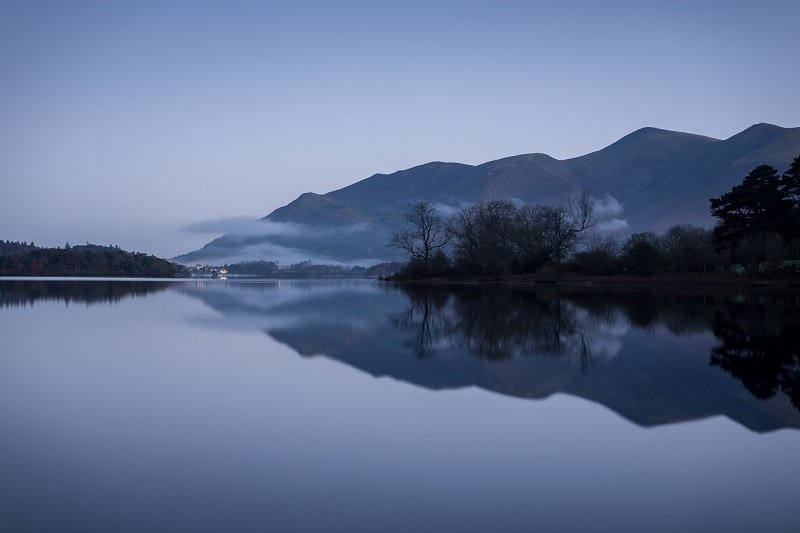
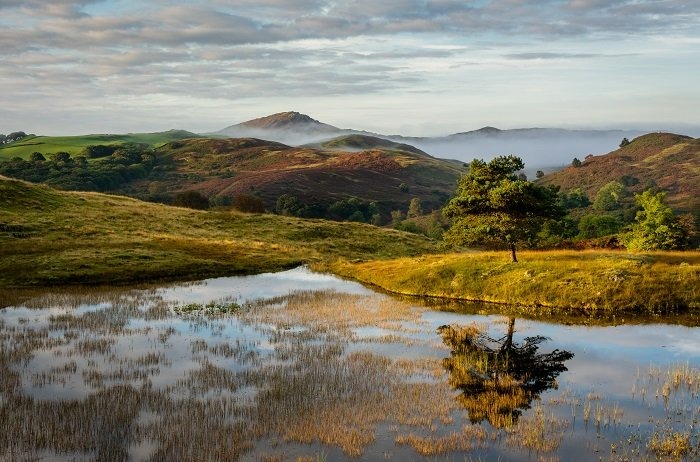
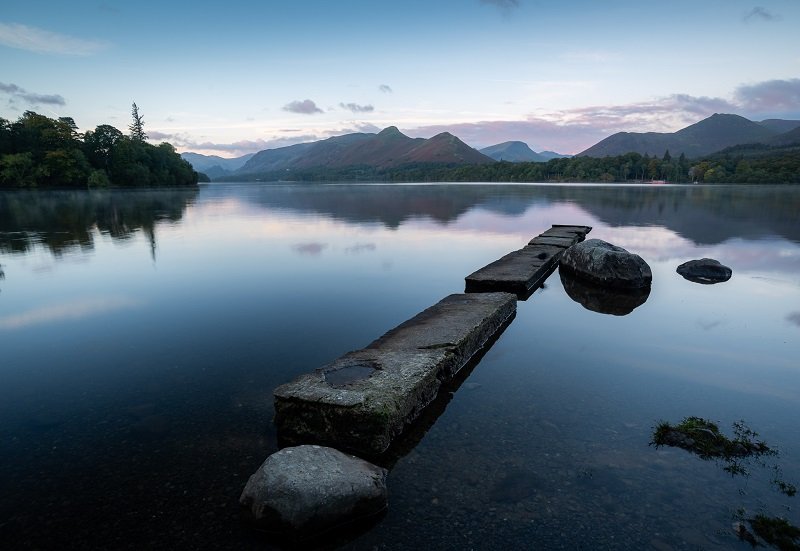
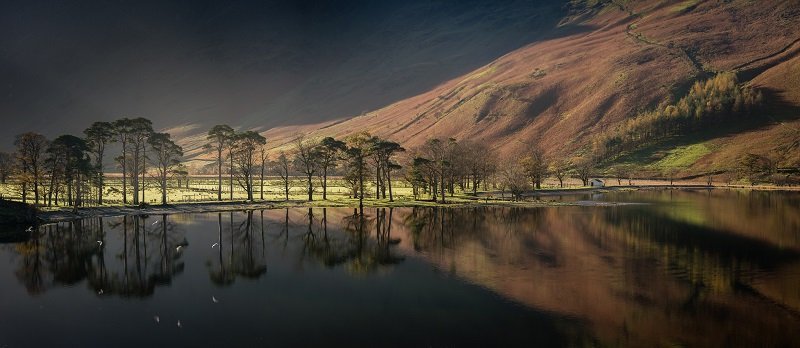
- Do you have reflections? Using foreground interest isn’t always the best way to go – Think about using the reflection as your main focal point.
As I said, this isn’t the sort of thing that can just be taught to you. With so many variables it’s simply impossible – Everything depends on the landscape, the equipment, the conditions, and of course the individual photographer.
Don’t be afraid to shy away from wide-angle photography either. Remember that you don’t have to include everything. Sometimes, getting a telephoto lens out of the bag and honing in on the interesting parts of a landscape is the best approach.
What I’m aiming for here is to get you thinking about how to construct your ideal landscape image. Pre-defined rules simply don’t work!
Putting it All Together
By now, hopefully you have made some sort of connection with the landscape and know what sort of mood you want to evoke with your final image, and you’ve narrowed down your ‘compositional search area’ to a more manageable size.
You’ve picked out the feature (or features) that you want in your image – Now it’s time to decide on what sort of image you’re actually aiming for. Do you want to show off the landscape as a whole or bring the viewer’s attention to a specific detail? Is it the grand vista you’re interested in, or is a more mysterious and abstract image your goal?
Once again, this is all subjective, and the below list of what you might want to aim for is by no means a comprehensive one, but it should give you some ideas to play with:
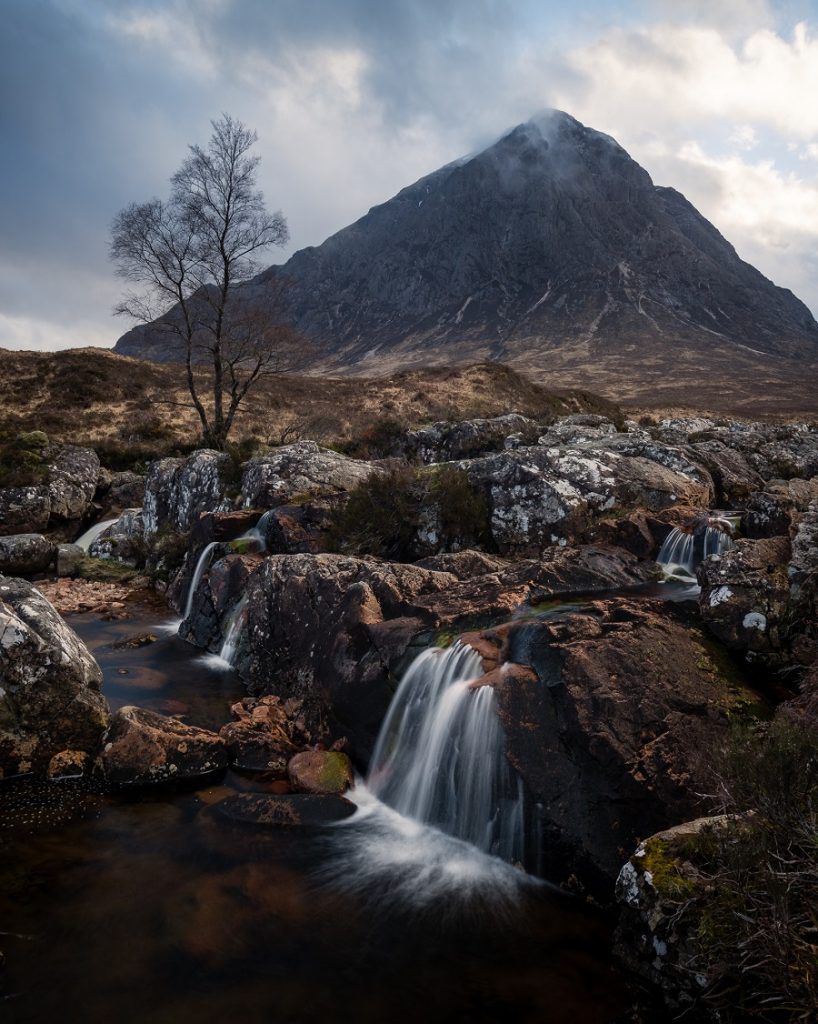
- Grand Vista – Focus on trying to create a sense of depth and scale. You can use foreground subjects and leading lines to create a sense of depth, while objects of a known size such as houses and people can give a sense of scale to the surrounding landscape.
- Foreground Interest in the Wider Landscape – Experiment with perspective and angle of view (more on this later) to bring as much focus as possible to your main subject, but make sure not to neglect the other areas of the image.
- Specific Detail – Don’t be afraid to hone in on the subject and exclude the wider landscape, which can sometimes be an unnecessary distraction. Try using a telephoto lens and a wide aperture to bring all attention to that detail.
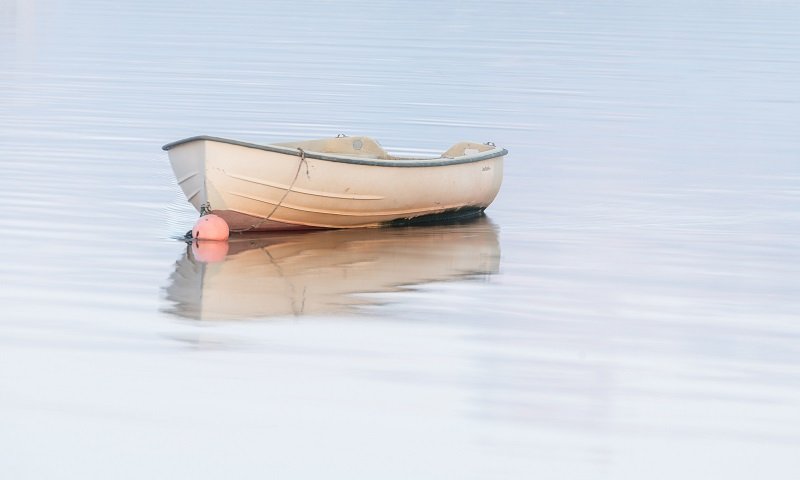
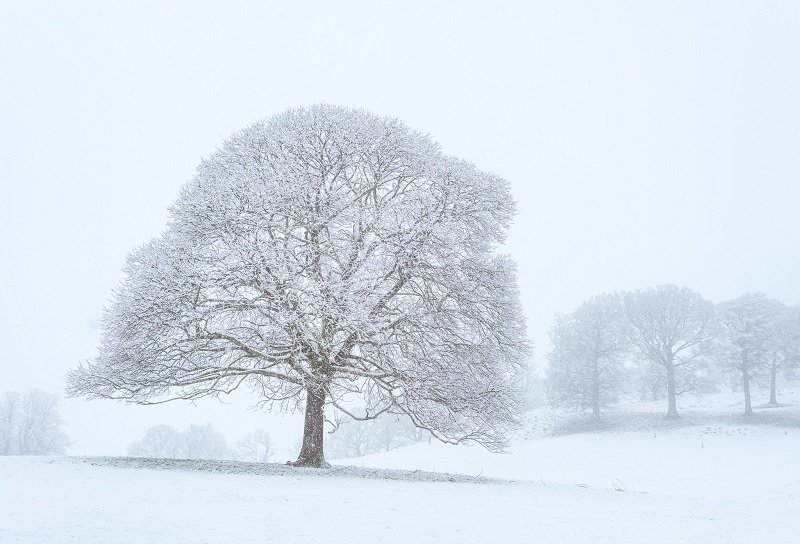
- Minimalistic – Exclude as much as humanly possible. You can zoom in on the subject or leave it as a small detail in the frame, but the main task is to eliminate as many distractions as possible. This could mean using a Neutral Density filter to blur water and/or clouds.
So, what’s important to you? Is it the grand and sweeping landscape, or the minute detail amid a world full of chaos and movement? Do you want to convey the dramatic scale of nature or the serenity of a misty sunrise on a windless lake?
This is all very dependant on the landscape, conditions, and photographer, but one thing we generally want to aim for is a balanced image.
Balance in Landscape Photography
Every single component in an image carries with it a certain level of visual weight, and we generally want to avoid creating a composition that is unbalanced in this regard.
This means thinking about whether you really want the rising sun to be on the same side of the frame as your main foreground subject, or whether the horizon should go near the top or the bottom of the frame.
Putting together your composition is all about considering each significant component in your image and balancing it with the other components around the frame to create an harmonious image.
It sounds complicated, but in practise it’s simple – Placing your foreground rock in the lower left third and the setting sun in the upper right third creates a more balanced image than if both subjects were on the same side of the frame. It can get more in-depth, but that’s a very good starting point for you.
But here’s the kicker – Even empty space carries visual weight!
That’s an entirely different subject best left for a future article, but it’s very important to consider that when working on a more minimalist image.
Fine Tuning the Composition
There you are – You’ve got your subject, your background, and the light is slowly creeping towards perfection. Now it’s time to put all of this together, fine tune the composition so it’s as good as it can be, and fire away!
Foreground, Middle Ground, Background
You know how you were always taught that stories had to have a beginning, a middle, and an end? Well, the same principle can be applied to landscape photography.
We need to consider the foreground, the middle ground, and the background of our image. and how each section contributes to the overall image.
Unless you’re lucky enough to stumble on the perfect landscape, the chances are that one of these three things will be less important and impressive than the others.
The key here is to bring attention to the things that are most important to us as photographers. Fortunately, there are a number of ways for us to enhance what we like and exclude what we don’t.
Perspective

One of the most effective ways to alter how much of the foreground, middle ground, and background the viewer sees is by using perspective.
This is a really simple method and one that I can’t stress the importance of enough.
Always think about the height of your camera
It makes a huge difference to the final image. Once you’ve got a composition in mind try slowly crouching down and noticing how the scene changes.
Getting down low enhances the foreground and can almost completely exclude the middle ground, whereas moving the camera higher brings that middle ground into play and sees the foreground diminish somewhat.
Play around with this simple tip and your ability to come up with compositions in your landscape photography will take a massive leap forward.
Camera Angles
Again, this is a really simple way to potentially drastically alter the perspective in your image, and all it takes is a minor adjustment and some experimentation.
The vertical angle of the camera plays a big part in how certain elements in our scene appear.
- Tilting the camera up – This can emphasise the foreground of your image if you’re also using a low angle, but beware that is diminishes the scale of things further away from the camera (mainly when using a wide-angle lens). So those background mountains will start to appear smaller.
- Tilting the camera down – This can bring more focus onto foreground subjects if your camera is higher up, and it also keeps the scale of any large background subjects looking suitably dramatic. Also very good for leading lines.
Once again, the best way to see this in action is to get out there and experiment!
Notice how any tall mountains or buildings appear to almost tilt backwards when the camera is angled upwards, and notice how a downward angle can enhance leading lines (such as train tracks or fences).
Border Patrol
One of the finest pieces of advice I ever heard with regards to photography was to conduct a thorough patrol of the borders before taking a shot. It’s a term that has stuck with me for years, and hopefully it will stick with you too.
But what do I actually mean by this?
Generally speaking, we want the viewer to stay within the confines of the frame when looking at our image. Ideally they shouldn’t feel confined by the frame, but instead be drawn into the landscape we’re portraying.
Do you know the easiest way to remind the viewer that they are confined to a frame is? By forgetting to exclude the half a deer that’s sticking into the edge of your image.
Keeping your image borders clear of distractions and clutter is paramount to making your viewers forget about the frame confining them. Draw them into the central portions of your image to make them feel immersed in the landscape.
The way to do this is simple. Before pressing the shutter just sweep around the edge of your frame. If there’s anything distracting hanging around there then make an effort to either exclude it by zooming or cropping or to include it by zooming out or moving your camera.
That really is all there is to it – Just be aware of what’s going on at the edges of your landscape images, make moves to correct anything that distracts the viewer, and I promise you that your images will be much better for it.
Exclude as Much as Possible
The main difference between a landscape artist and a landscape photographer is the state of the canvas before the final image is created. An artist starts with a blank canvas and adds what they like onto it, whereas a photographer starts with a chaotic canvas and must choose what to exclude.
In many cases, the best approach is to exclude as much as humanly possible.
This is somewhat counter intuitive when you’re looking at the incredible vista in front of you. Often, the first thing in a landscape photographer’s mind will be to try and include everything.
But including everything often just results in a dilution of the things that are really impressive. But by careful exclusion and honing in on what really matters we can bring all the attention to the best parts of a scene.
The Wide-Angle Fallacy
Beginners in landscape photography often think that a wide-angle lens is the only thing they need, but that couldn’t be further from the truth.
In fact, as a landscape photographer of many years I can sincerely tell you that the wide-angle is quite possibly my least used lens. That’s why we recommend so much more than just wide-angle lenses in our Best Lenses for Landscape Photography.
The reason for this is simple – It’s just too difficult to exclude all the clutter when using wide-angle lenses. They’re perfect, of course, when you’re working with strong foreground interest in a landscape, but for many other scenes they simply produce a cluttered image lacking any real focal point.
So the next time you feel overwhelmed and want to include everything, take a moment to think about how you can zone in on what’s really important in the scene.
This single piece of advice could completely transform your landscape photography.
Light and Shade in Landscape Photography
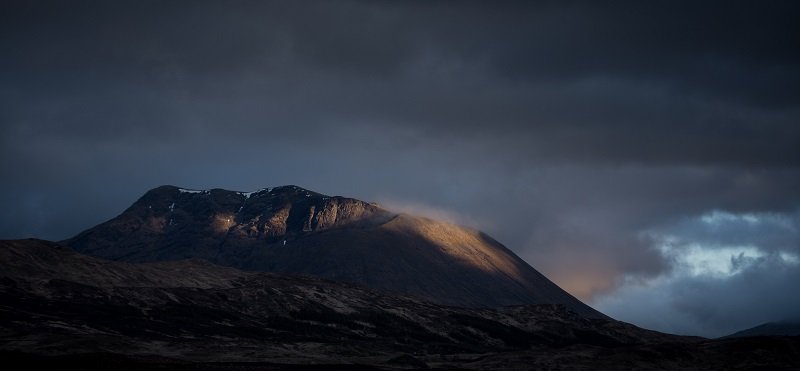
Light is the paintbrush with which we paint our landscape canvas, and it’s power should never be underestimated.
Without light we have no image, but not all light is created equal. We discussed the differing types of natural light in an earlier article, but it’s a point worth reiterating.
The reason we tend to focus our landscape photography efforts around sunrise and sunset is simply because most compositions are improved by nice dawn or dusk light. You can go out and find the best composition in the world, but the chances are it’s still not going to work if you’re shooting it at midday in June.
A great image is made from a combination of great composition and light that is suited to the subject.
Preference Progression
This is what happened to me, and is something I see happen to others all the time.
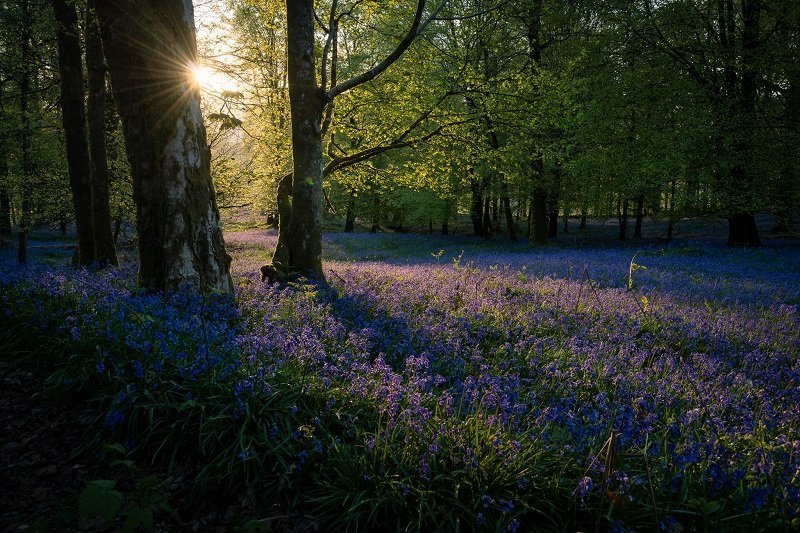
We landscape photographers start off with a heavy appreciation for a good sunset. We want skies resembling a nuclear explosion, and if we can’t have that then there’s no point going out.
Then we progress to appreciate the finer details. The dappled light playing on the landscape, or the first rays of the day washing over a nearby hillside. This play of light on the land becomes our primary focus, rather than the cliche nuclear-esque skies.
Finally, we get to a point where we can appreciate seemingly dull lighting situations. A flat, overcast day becomes a perfect day for minimalist compositions, or we notice that faint glow of sunlight through the clouds casting a silvery sheen to the landscape.
Getting to this stage takes time and practise, but just by me making you aware of it should speed things along a little.
Remember, a great landscape image can only be created by combining great composition and fitting natural light. Don’t neglect either of them!
Final Thoughts
As I mentioned at the start of this Ultimate Guide to Landscape Photography, my goal for this article wasn’t to tell you how to take photographs of the landscape.
There are plenty of those articles out there already.
Instead, I wanted to teach you how to think for yourself. Knowing about compositional rules is one thing, but knowing what height you should set your tripod to or which way to angle your camera is a skill that takes practise and consideration.
Simply thinking about all of this is the first step towards actually achieving it. Experimenting with it is the next step, so get out there and try new things!
Read More…
Beginner’s Guide to Astrophotography
Best Cameras for Landscape Photography
Cityscape Photography – 11 Tips to Take Your Cityscape Shooting Up a Level
Best Camera Bags for Photographers
 |
 |
 |
 |

About Alex W.
Alex is the owner and lead writer for Click and Learn Photography. An avid landscape, equine, and pet photographer living and working in the beautiful Lake District, UK, Alex has had his work featured in a number of high profile publications, including the Take a View Landscape Photographer of the Year, Outdoor Photographer of the Year, and Amateur Photographer Magazine.
Thoughts on "Ultimate Guide to Landscape Photography Part 4 – Shooting on Location"
|
|
|
|
You can Get FREE Gifts. Furthermore, Free Items here. Disable Ad Blocker to receive them all.
Once done, hit anything below
|
|
|
|