Your landscape photography camera settings determine whether you come home with a portfolio-worthy shot or a blurry, blown-out disappointment. In Part 1 of this guide, we covered the fundamentals. Now it's time to go deeper into the settings that separate good landscape photos from great ones, with practical techniques you can apply on your very next shoot.
Whether you're chasing golden hour light across rolling hills or shooting moody seascapes under overcast skies, the right combination of aperture, shutter speed, ISO, and focus technique makes all the difference. This guide covers the real-world settings, troubleshooting steps, and field-tested approaches that working landscape photographers rely on. For more foundational reading, check out our ultimate guides collection.
Contents
- Aperture Mastery for Tack-Sharp Landscapes
- Landscape Photography Camera Settings Myths That Hold You Back
- Focus Techniques That Guarantee Sharpness
- Exposure Settings for Tricky Lighting
- Shutter Speed Techniques for Creative Effects
- Essential Gear That Improves Your Settings
- Field Examples: Settings for Common Scenarios
- Frequently Asked Questions
- Next Steps
Aperture Mastery for Tack-Sharp Landscapes
Aperture is your primary creative control in landscape photography. It dictates depth of field, sharpness, and how much light reaches your sensor. But picking the right f-stop isn't as simple as cranking it to the highest number.
Finding Your Lens's Sweet Spot
Every lens has an aperture range where it produces the sharpest results. For most landscape lenses, this falls between f/8 and f/11. Here's how to find yours:
- Set your camera on a tripod pointed at a detailed subject (brick wall, tree bark)
- Shoot the same scene at every full aperture stop from f/2.8 to f/22
- Compare the center and edge sharpness at 100% zoom on your computer
- Note where sharpness peaks — that's your sweet spot
Creating Starburst Effects
When you include a point light source — the sun peeking over a ridge, a distant streetlight — narrow apertures like f/16 or f/18 produce beautiful starburst patterns. The number of points depends on your lens blade count. Lenses with an even number of blades produce that same number of points, while odd-numbered blades produce double.
Landscape Photography Camera Settings Myths That Hold You Back
Photography forums are full of absolute rules that sound logical but actually cost you image quality. Let's set the record straight on the two biggest offenders.
The "Always Shoot at f/22" Myth
You'll hear that maximum depth of field requires the smallest aperture. In theory, that's true. In practice, diffraction starts degrading your image well before f/22. On most APS-C sensors, diffraction becomes visible around f/13. On full frame, it kicks in around f/16. The depth of field you gain past these points is more than offset by the softness diffraction introduces across the entire frame.
The fix? Use f/8 to f/11 combined with hyperfocal distance focusing. You'll get front-to-back sharpness without the diffraction penalty.
The "ISO 100 or Nothing" Myth
Keeping ISO low is ideal, but not at the cost of a usable shot. Modern cameras handle ISO 400-800 with negligible noise. If you're shooting handheld at twilight or need a faster shutter speed to freeze wind-blown foliage, bumping ISO is the correct choice. A sharp photo at ISO 400 beats a blurry one at ISO 100 every time.

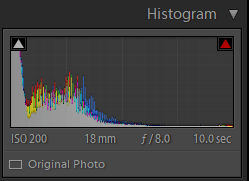
As you can see from the comparison above, noise increases dramatically past ISO 2500. Stay at or below ISO 800 when possible, but don't be afraid to push higher when conditions demand it.
Focus Techniques That Guarantee Sharpness
Getting your landscape photography camera settings right means nothing if your focus is off. Autofocus is fast but not always smart enough for landscapes. Here's how to take control.
Hyperfocal Distance
Hyperfocal distance is the single most useful focusing concept for landscape photographers. It's the closest focus point at which everything from half that distance to infinity appears acceptably sharp. Focus here, and you maximize depth of field without stopping down to diffraction territory.
Use a hyperfocal distance calculator app or chart in the field. For a 24mm lens on full frame at f/11, the hyperfocal distance is roughly 2.1 metres. Focus at that point, and everything from about 1 metre to infinity will be sharp.
Focus Stacking for Maximum Depth
When you have a strong foreground element inches from your lens, even hyperfocal distance won't render everything sharp. Focus stacking solves this:
- Switch to manual focus
- Take a shot focused on the nearest foreground element
- Take 2-4 more shots, shifting focus progressively toward infinity
- Merge the stack in Lightroom or Photoshop using auto-blend layers
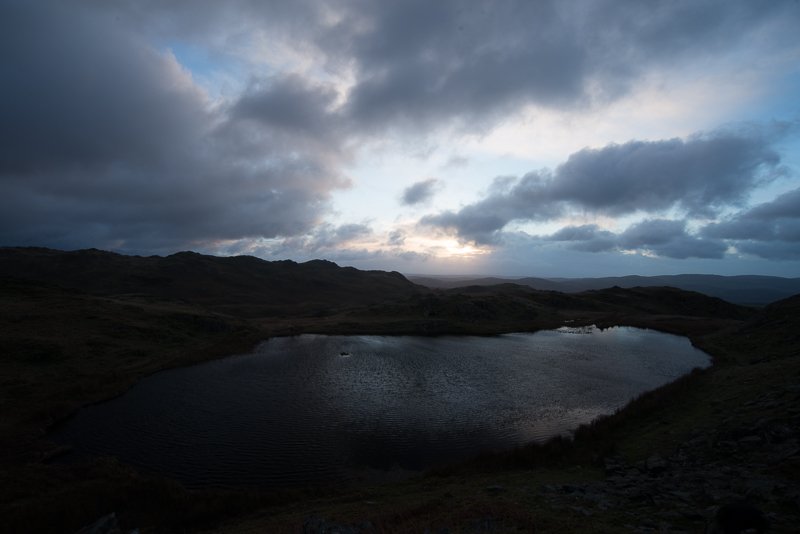
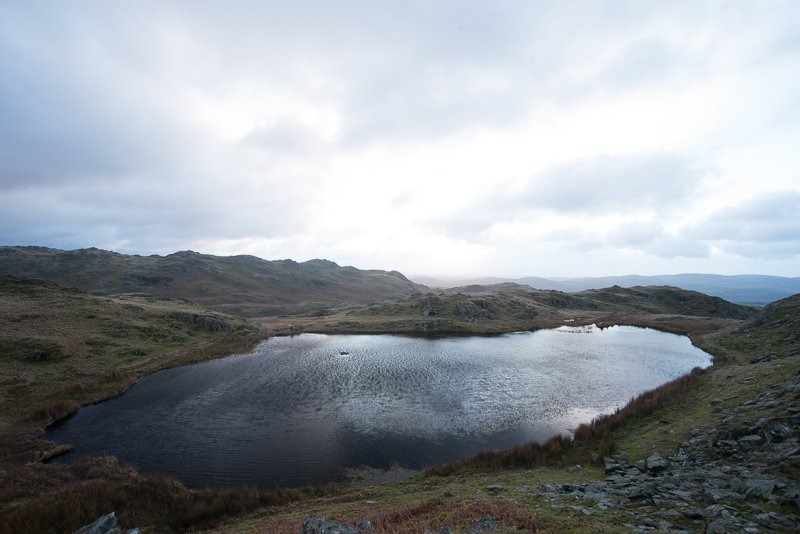
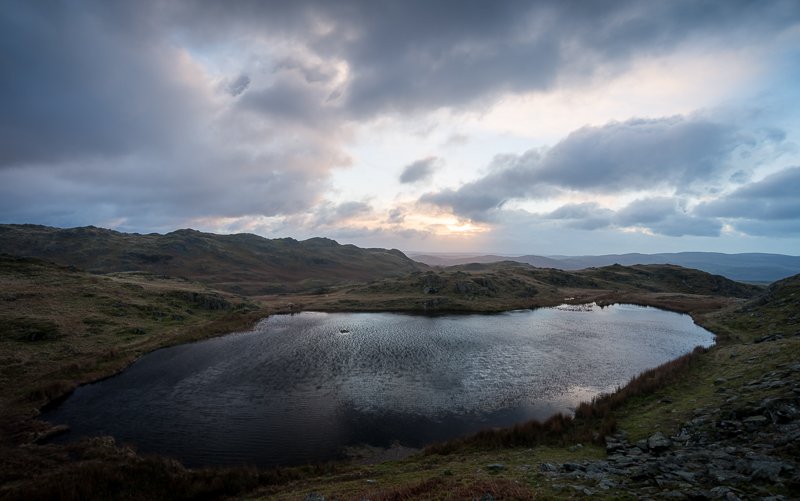
Exposure Settings for Tricky Lighting
Landscape scenes routinely exceed your camera's dynamic range. Bright skies and shadowed valleys in a single frame will fool any meter. Here's how to handle it.
Reading Your Histogram
Stop chimping the LCD — it lies depending on ambient light. Your histogram tells the real story. A healthy landscape exposure pushes data to the right without clipping highlights. This technique, called "exposing to the right" (ETTR), captures the maximum dynamic range in your RAW file.
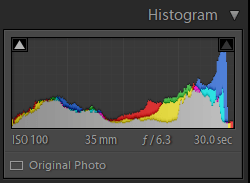
In the first histogram, the data is stacked hard left — shadows are clipped and you've lost detail in the dark areas permanently. The second histogram shows a well-distributed exposure with data spanning the full tonal range.
Exposure Bracketing
When the scene's dynamic range exceeds what a single exposure can capture, bracket your shots. Take three or five exposures at different EVs (typically -2, 0, +2) and merge them in post-processing as an HDR image.
The underexposed frame preserves sky detail. The overexposed frame preserves shadow detail. The final merged image combines both into a balanced result that closely matches what your eyes saw in the field.
Shutter Speed Techniques for Creative Effects
Shutter speed in landscape photography isn't just about getting a correct exposure — it's a creative tool that dramatically changes the mood of your images.
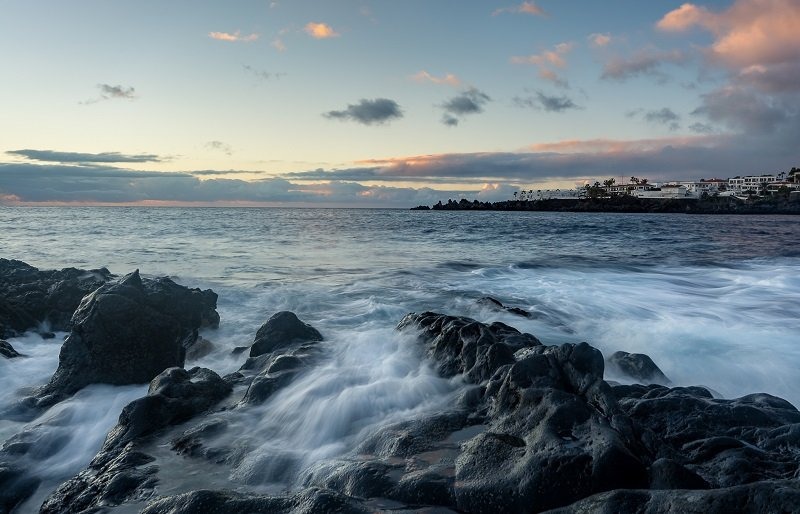
Long Exposure Settings
Long exposures transform moving water into silk, turn clouds into streaks, and eliminate crowds from busy scenes. Here are starting points for common subjects:
| Subject | Shutter Speed | Effect | ND Filter Needed |
|---|---|---|---|
| Waterfall (silky) | 1-4 seconds | Smooth, flowing water | ND 6-stop |
| Ocean waves (misty) | 15-30 seconds | Ethereal, fog-like water | ND 10-stop |
| Cloud streaks | 60-120 seconds | Dramatic sky movement | ND 10-stop |
| Star trails | 20-30 min (stacked) | Circular star patterns | None |
| River rapids (texture) | 1/4 - 1/2 second | Motion with detail | ND 3-stop |
Freezing Motion in Landscapes
Not every landscape benefits from blur. Crashing waves frozen mid-splash, wind-whipped grass captured in sharp detail, or rain caught as individual droplets all require faster shutter speeds. Use 1/500s or faster to freeze water spray, and 1/250s for wind-blown vegetation. You'll likely need to bump your ISO to compensate, which brings us back to our earlier point — don't be afraid of moderate ISO values.
Essential Gear That Improves Your Settings
The right accessories don't replace good technique, but they expand what your landscape photography camera settings can achieve. Here's what actually earns a spot in your bag.
Filters Worth Carrying
- Circular polarizer — cuts reflections, deepens blue skies, and boosts colour saturation. This is the one filter you cannot replicate in post-processing.
- ND filter (6-stop and 10-stop) — enables long exposures in daylight conditions. A 10-stop ND turns a 1/125s exposure into an 8-second one.
- Graduated ND filter — balances a bright sky against a darker foreground. Useful when you don't want to bracket or deal with HDR merging.
Skip UV filters for landscapes. They add another glass surface that can introduce flare and reduce contrast, with no meaningful benefit on digital cameras.
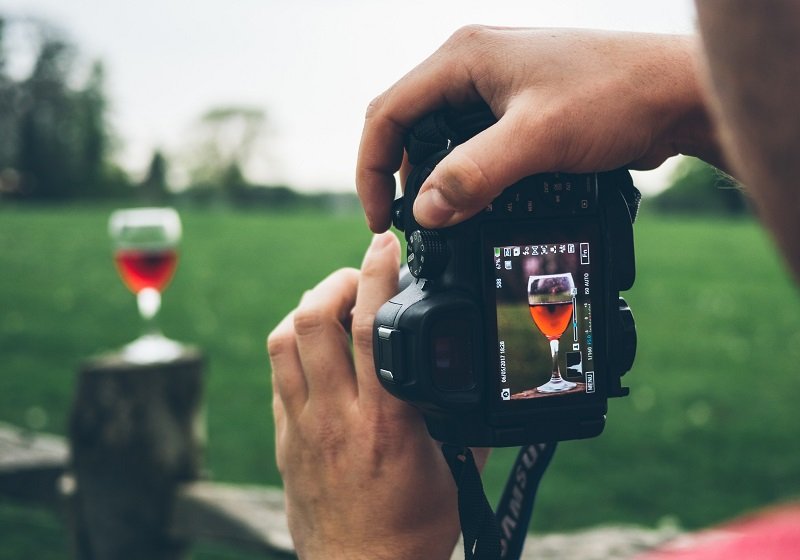
Tripod and Remote Release
A sturdy tripod is non-negotiable for landscape photography. Any exposure longer than 1/focal length will show camera shake handheld. Pair it with a remote shutter release or use your camera's 2-second timer to eliminate vibration from pressing the shutter button. For more on choosing the right support, read our guide on using natural light effectively — lighting conditions dictate how much stability you need.
Mirror lock-up (on DSLRs) or electronic front curtain shutter (on mirrorless) further reduces vibration during the exposure.
Field Examples: Settings for Common Scenarios
Theory is useful, but nothing beats seeing actual settings applied to real shooting situations. Here are three scenarios you'll encounter regularly, with the exact settings to use as starting points.
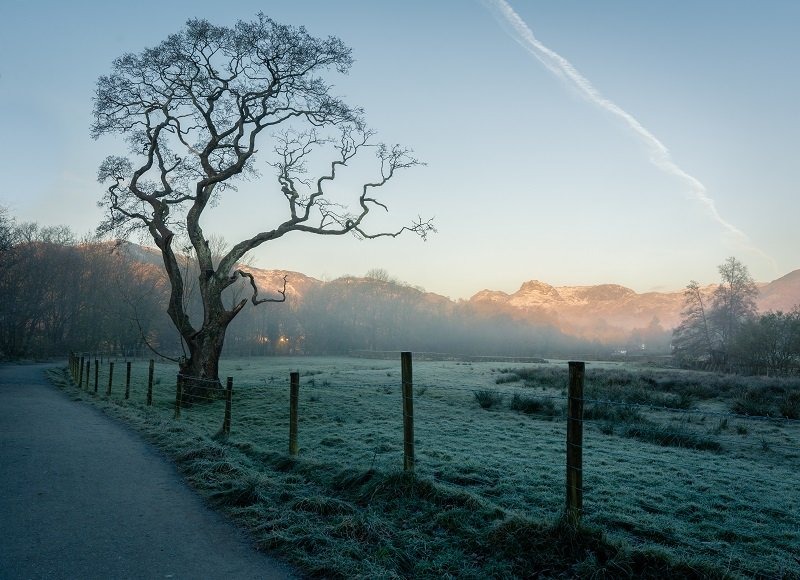
Golden Hour Meadow
The light is warm and directional. You want everything sharp from the wildflowers at your feet to the mountains on the horizon.
- Mode: Manual
- Aperture: f/11
- ISO: 100
- Shutter speed: 1/30s to 1/125s (depends on exact light)
- Focus: Hyperfocal distance for your focal length
- White balance: Daylight (preserves the warm tones)
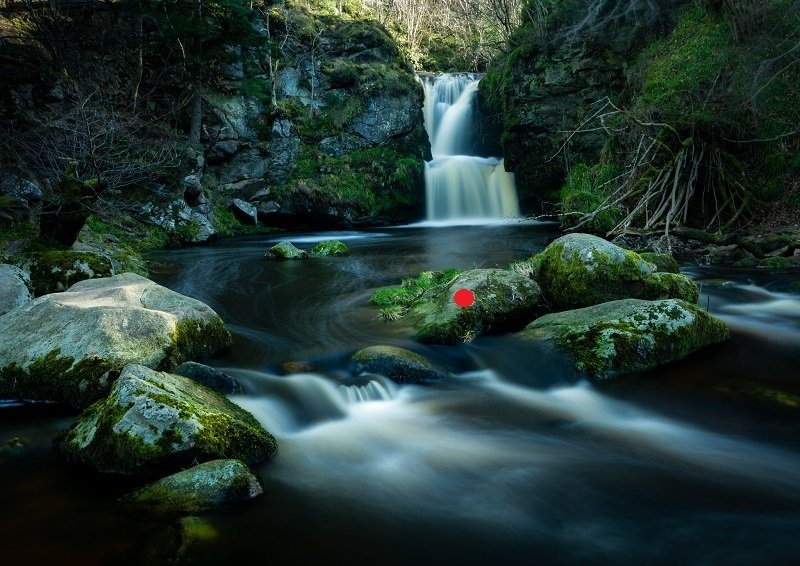
Waterfall with Silky Water
You want that smooth, flowing effect on the water while keeping the surrounding rocks and foliage tack-sharp.
- Mode: Manual
- Aperture: f/11
- ISO: 100 (or 50 if available)
- Shutter speed: 1-4 seconds
- Filter: ND 6-stop
- Focus: Manual, on the rocks beside the waterfall
- Tripod: Essential — no exceptions
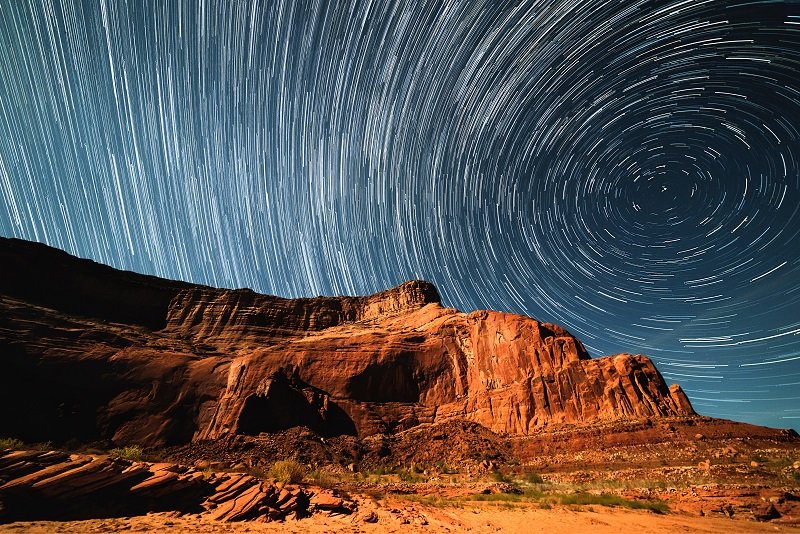
Star Trails
Star trail photography pushes your camera to its limits. The key is stacking multiple shorter exposures rather than one extremely long one, which reduces noise and lets you recover from interruptions.
- Mode: Manual
- Aperture: f/2.8 (widest available)
- ISO: 800-1600
- Shutter speed: 30 seconds per frame, 60-120 frames stacked
- Focus: Manual, on a bright star using live view at 10x zoom
- Interval timer: 1-second gap between frames
Frequently Asked Questions
What is the best aperture for landscape photography?
For most landscape scenes, f/8 to f/11 delivers the sharpest results across the frame. This range sits at most lenses' optical sweet spot while providing sufficient depth of field. Only go narrower if you specifically need starburst effects or have no foreground elements close to the lens.
Should you always use a tripod for landscape photography?
A tripod is essential for any exposure longer than about 1/60s with a wide-angle lens. It's also critical for techniques like focus stacking, bracketing, and long exposures. That said, during bright midday conditions with fast shutter speeds, handheld shooting works fine and lets you react quickly to changing compositions.
How do you avoid blurry landscape photos?
Use a tripod, enable mirror lock-up or electronic shutter, trigger the shutter remotely or with a 2-second delay, and focus manually using live view at high magnification. Also check that you're not stopped down past f/16 where diffraction softens the image. Wind vibration on your tripod is another common culprit — hang your bag from the centre column for added stability.
When should you use exposure bracketing in landscapes?
Bracket whenever the scene has a brightness range your sensor can't capture in one shot — typically any scene that includes both a bright sky and deep shadows. Sunrise, sunset, and any backlit scene are prime candidates. If your histogram shows clipping on both ends simultaneously, bracketing is the answer.
Next Steps
- Find your lens's sweet spot this weekend — run the aperture sharpness test described above and note the optimal f-stop for each lens you own. Write it on a small card and keep it in your camera bag.
- Practice reading your histogram in the field — on your next three shoots, force yourself to check the histogram after every shot instead of the LCD preview. Train your eye to spot clipped highlights and shadows instantly.
- Try one long exposure session — pick a moving water subject (stream, fountain, ocean), bring your tripod, and experiment with shutter speeds from 1/4s to 30 seconds. Compare the results side by side to see exactly how different speeds change the look of water.
- Download a hyperfocal distance app — install one on your phone and practice using it at three different focal lengths. Within a few sessions, you'll start estimating hyperfocal distance intuitively.
 |
 |
 |
 |

About Alex W.
Alex is a landscape, equine, and pet photographer based in the Lake District, UK, with years of experience shooting in one of Britain's most photographically demanding natural environments. His work has been featured in Take a View Landscape Photographer of the Year, Outdoor Photographer of the Year, and Amateur Photographer Magazine — publications that reflect a serious, competitive standard of image-making. At Click and Learn Photography, he shares the camera settings, gear choices, and compositional techniques he has developed through real-world shooting and competition-level work.
You can Get FREE Gifts. Furthermore, Free Items here. Disable Ad Blocker to receive them all.
Once done, hit anything below
|
|
|
|