Last autumn, I spent three hours deep in a beech forest waiting for the light to filter through the canopy just right, and when I finally got the shot, I realized the raw file looked nothing like what my eyes had seen. That's when forest photography Lightroom presets became a permanent part of my editing workflow — they bridged the gap between the flat raw capture and the rich, moody atmosphere I remembered standing among those trees. If you're shooting in woodland environments and want a reliable starting point for your edits, free presets designed specifically for forest scenes will transform how you approach landscape photography post-processing.
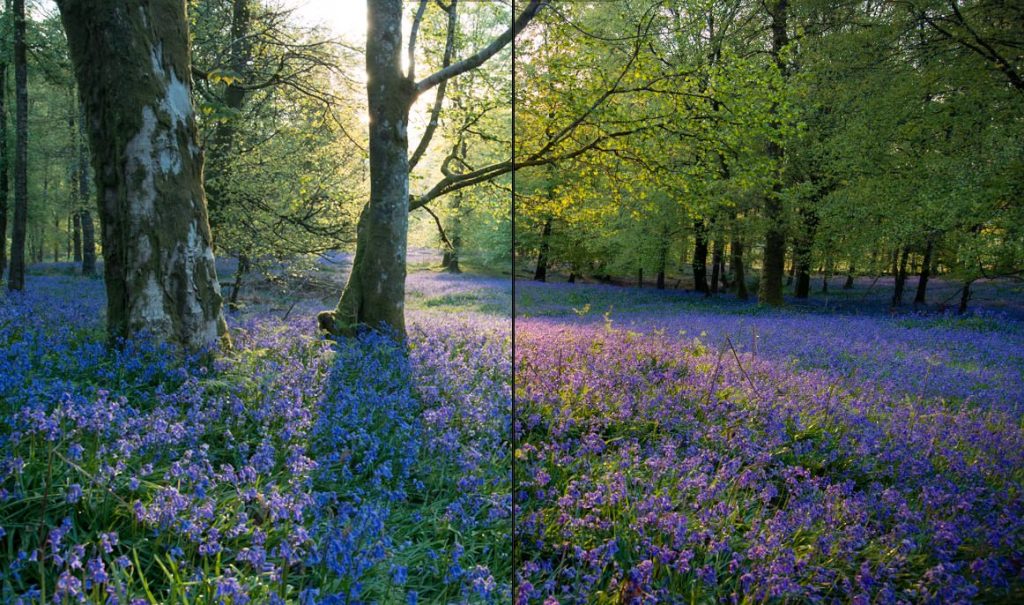
Forest environments present unique editing challenges that generic landscape presets simply don't address well. You're dealing with extreme dynamic range between bright sky patches and deep shadows, mixed color temperatures from filtered sunlight, and an overwhelming amount of green that can easily look oversaturated or muddy. Purpose-built forest presets handle all of this out of the box, giving you a polished baseline in a single click that you'd otherwise spend twenty minutes building from scratch.
Whether you're brand new to Lightroom or you've been editing for years, this guide walks you through everything you need to know about finding, installing, and actually getting good results from free forest photography presets — including the mistakes that trip up most photographers.
Contents
- Starter Presets vs. Advanced Forest Editing Workflows
- How to Install and Apply Forest Presets in Lightroom
- Best Practices for Editing Forest Photos with Presets
- Quick Adjustments That Instantly Improve Forest Shots
- Fixing Common Preset Problems in Forest Images
- Forest Preset Myths You Should Stop Believing
- Editing Mistakes That Ruin Woodland Photos
- Frequently Asked Questions
Starter Presets vs. Advanced Forest Editing Workflows
Not every forest photo needs the same level of post-processing attention, and understanding where presets fit into your workflow will save you both time and frustration. The distinction comes down to how much creative control you want over the final result versus how quickly you need to deliver the image.
When a One-Click Preset Is All You Need
Starter-level forest presets work best in these situations:
- You're batch-processing a large set of images from a single forest shoot with consistent lighting conditions
- You want a cohesive look across your social media feed without spending hours on individual edits
- The original exposure and white balance are already close to where you want them
- You're working with well-lit, mid-day forest scenes where the dynamic range isn't extreme
If you're still getting comfortable with Lightroom's interface, our guide to free Lightroom presets covers several versatile options that work across multiple genres, including woodland scenes.
When You Need a More Hands-On Approach
You'll want to treat any preset as a starting point rather than a final destination when you're working with backlit canopy shots, foggy morning conditions, or heavy shade under dense tree cover. These scenarios involve such extreme tonal variation that no single preset can account for all of them accurately, and you'll need to manually adjust highlights, shadows, and individual color channels after the preset does its initial work.
How to Install and Apply Forest Presets in Lightroom
Getting presets into Lightroom is straightforward, but the process differs slightly depending on which version you're running. Here's how to handle each one without any confusion.
Desktop Classic and CC Installation
- Download the preset files — they'll typically arrive as
.xmpfiles or a.zipcontaining them - Unzip the archive to a folder you'll remember, such as a dedicated "Presets" directory on your desktop
- Open Lightroom and navigate to the Develop module (Classic) or the Edit panel (CC)
- In the Presets panel on the left, click the three-dot menu and select "Import Presets"
- Navigate to your unzipped files, select them all, and click Import
- Your new forest presets will appear under a new group in the Presets panel immediately
For a more detailed walkthrough with screenshots, check out our complete guide to installing Lightroom presets which covers older .lrtemplate formats as well.
Lightroom Mobile Import
- Download the
.dngpreset files directly to your phone's camera roll - Open Lightroom Mobile and import the DNG files as new photos
- Open each DNG, tap the three-dot menu, and select "Create Preset"
- Name the preset, choose a group, and select which settings to include
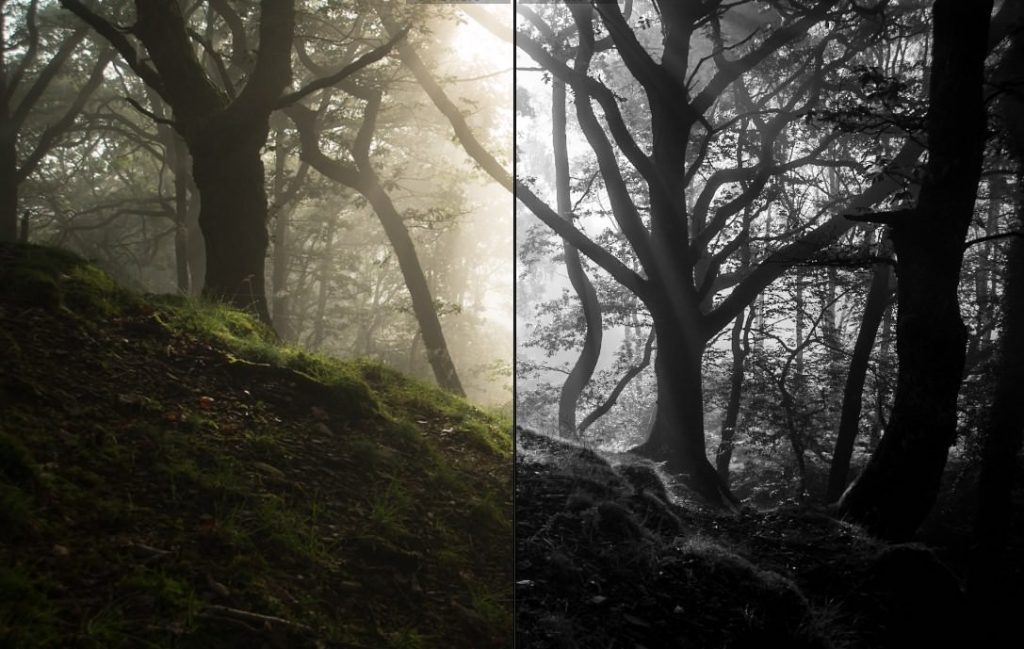
Best Practices for Editing Forest Photos with Presets
Applying a preset is the easy part — getting a professional result from it requires a bit more intentionality. These practices will ensure your forest images look natural and polished rather than over-processed.
Always Start with RAW Files
This is non-negotiable. Forest scenes contain so much tonal information in the shadows and highlights that JPEG compression throws away exactly the data you need most. Presets manipulate tone curves, color channels, and detail sliders that simply don't have enough latitude in an 8-bit JPEG to produce clean results. If you're not already shooting RAW, read our breakdown of why RAW files matter before going any further.
Fine-Tune After Applying
Every forest scene has different lighting, so treat the preset as roughly eighty percent of the work and handle the remaining twenty percent yourself:
- Exposure — adjust by ±0.3 to ±0.7 stops to match your specific scene's brightness
- White balance — shift the temperature slider slightly warmer for golden hour shots or cooler for misty mornings
- HSL greens — nearly every forest preset needs its green hue and saturation tweaked to match the specific foliage you photographed
- Shadows — open them up if the preset crushes too much detail in the darker underbrush areas
- Sharpening — increase the masking slider to prevent sharpening noise in smooth out-of-focus backgrounds
If a preset looks perfect on the preview thumbnail without any manual adjustments, you got lucky — that almost never happens with forest shots, so always zoom to 100% and check your shadows and highlights before exporting.
Quick Adjustments That Instantly Improve Forest Shots
You don't always need to spend fifteen minutes tweaking sliders after applying a forest photography Lightroom preset. These five adjustments take under a minute combined and dramatically improve most woodland images:
- Add a radial filter to brighten the natural light source — place it where sunbeams enter the frame and boost exposure by +0.5
- Drop the dehaze slider to -10 or -15 if the preset adds too much contrast to misty scenes you want to keep soft
- Pull the luminance noise reduction up to 25-30 for shaded areas that show grain after shadow recovery
- Apply a subtle vignette at -15 to -25 to draw the eye toward the center of your composition
- Use the calibration panel's green primary hue slider to shift foliage from an artificial neon tone toward a more believable olive or emerald
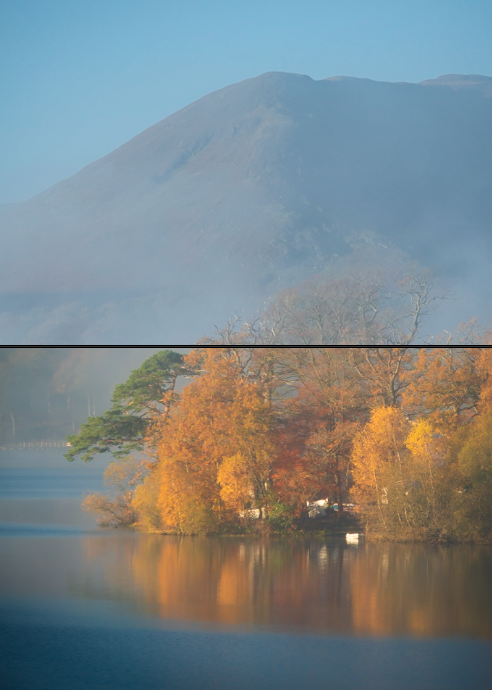
For more techniques on capturing better source material in the field, our forest photography tips guide covers composition, timing, and gear choices that make editing significantly easier.
Fixing Common Preset Problems in Forest Images
Even well-designed forest photography Lightroom presets can produce unexpected results depending on your camera sensor, shooting conditions, and the specific forest environment. Here's how to diagnose and fix the most frequent issues.
Dealing with Excessive Green Cast
Many forest presets boost green saturation to make foliage pop, which can leave skin tones, paths, and rocks with an unnatural green tint. The fix is targeted rather than global:
- Open the HSL panel and reduce green saturation by 10-20 points from wherever the preset set it
- Shift the green hue slider toward yellow by 5-10 degrees to warm up the foliage naturally
- Use a local adjustment brush on non-foliage areas and desaturate greens there specifically
Recovering Blown Sky Patches
Gaps in the canopy often blow out to pure white when a preset lifts the overall exposure, and those bright patches pull the viewer's eye away from your subject. Pull highlights to -80 or lower, and if that's not enough, use a luminosity mask or graduated filter targeting only the brightest areas to bring texture back into those sky openings.
| Common Problem | Likely Cause | Quick Fix |
|---|---|---|
| Muddy, flat shadows | Preset lifts blacks too aggressively | Pull blacks slider to -20 to -40 for contrast |
| Oversaturated greens | Global saturation boost in the preset | Reduce HSL green saturation by 15-25 |
| Blown canopy highlights | Preset raises exposure or whites | Highlights to -80, whites to -30 |
| Orange/magenta bark | Split toning pushing warm tones into midtones | Reduce color grading midtone saturation |
| Noisy shadow areas | Heavy shadow recovery amplifies sensor noise | Luminance NR to 25-35, detail to 50 |
| Unnatural fog color | White balance shift in preset | Reset WB to As Shot, then adjust manually |
Forest Preset Myths You Should Stop Believing
There's a surprising amount of misinformation floating around photography forums about what presets can and can't do, and these myths lead to wasted time and disappointing results.
- "Paid presets are always better than free ones." This is flatly wrong. Many free forest photography Lightroom presets from established photographers rival anything you'd pay for, because the underlying adjustments are identical sliders available to everyone. What you pay for with premium packs is usually volume, organization, and customer support — not fundamentally better editing science.
- "Presets make every photo look the same." Only if you apply them blindly without adjusting afterward. A preset is a starting point, not a finished product, and two different forest images run through the same preset will still look distinct once you tailor exposure and color balance to each shot.
- "You need camera-specific presets." Modern Lightroom processes all RAW files through Adobe's standardized rendering pipeline regardless of camera brand. A preset built on Canon files works perfectly fine on Sony or Nikon RAW data — you might need minor white balance tweaks, but the tonal adjustments translate cleanly.
- "More presets means better editing." Having two hundred presets installed actually slows you down because you spend more time auditioning looks than editing. Keep a curated set of five to ten forest presets that you genuinely use and delete everything else.
Understanding how digital image processing works at a technical level helps you see through marketing claims — the Wikipedia article on raw image formats provides solid background on how sensor data becomes an editable file.
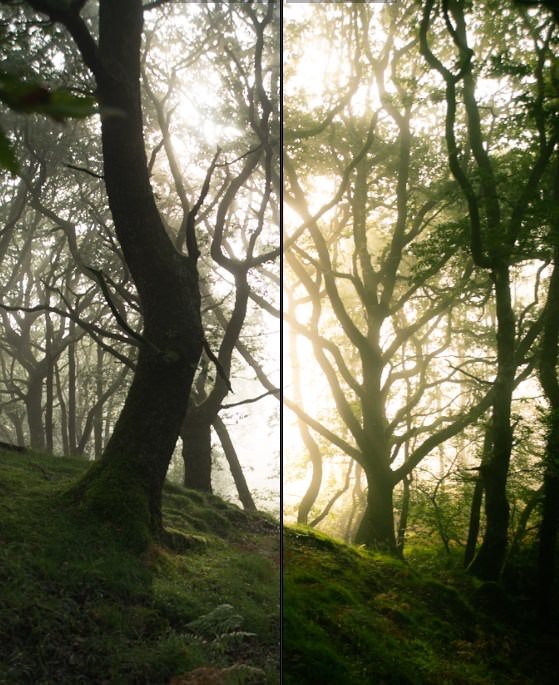
Editing Mistakes That Ruin Woodland Photos
Even experienced photographers fall into these traps when editing forest images, and presets can actually amplify the problem if you're not watching for them.
- Over-sharpening fine detail — forests are full of intricate textures like bark, moss, and individual leaves, and too much sharpening creates harsh halos that look crunchy rather than crisp. Keep the sharpening amount under 80 and raise the masking slider to 60 or higher so only edges receive sharpening.
- Crushing the blacks for "mood" — lifting the black point in the tone curve is a popular trend that works in portraits but destroys the depth and dimension that makes forest photography compelling. Your darkest shadows should actually be dark.
- Ignoring the histogram — applying a preset and judging the result on your uncalibrated laptop screen at fifty percent brightness is a recipe for images that look completely different on any other display. Trust the histogram, not your eyes.
- Boosting clarity on every image — clarity adds mid-tone contrast that enhances texture in bark and rocks, but it also hardens the look of soft elements like mist, moss, and distant foliage. Use it selectively with local adjustments rather than globally.
- Neglecting chromatic aberration correction — high-contrast transitions between bright sky and dark branches are prime territory for purple and green fringing that most presets don't address. Always enable the "Remove Chromatic Aberration" checkbox in the Lens Corrections panel.
If you're looking for more guidance on planning your next woodland shoot so you capture better images from the start, our landscape photography planning guide covers the preparation side of things thoroughly.
Frequently Asked Questions
Are free forest photography Lightroom presets safe to download?
Yes, as long as you download from reputable photography websites and established creators. Preset files are simply XML-based settings files that Lightroom reads — they cannot contain executable code or malware. Stick to well-known photography blogs and avoid any site that asks you to run an installer.
Do forest presets work with Lightroom Mobile?
They do, but you'll need DNG versions of the presets rather than the standard XMP files used by the desktop application. Many creators offer both formats, and you can also sync presets from Lightroom Classic to Mobile through Adobe's Creative Cloud ecosystem automatically.
Can you use forest presets on photos that weren't taken in a forest?
You absolutely can, and you'll sometimes get interesting results on garden shots, park scenes, and other green-heavy environments. The presets primarily adjust green tones, shadow recovery, and warm highlight treatment, so any scene with similar characteristics will benefit from the same adjustments.
How many presets should you keep installed at once?
Keep between five and ten forest-specific presets that you actually use regularly, and delete everything else. A bloated preset library slows down Lightroom's interface and makes you spend more time auditioning looks than actually editing your images.
Will presets make my photos look over-edited or fake?
Only if you apply them at full strength without any manual adjustment afterward. The key is treating any preset as a starting point and then dialing back the intensity or tweaking individual sliders to match your specific image. Subtle application always produces more natural-looking results.
Do I need to shoot in RAW for presets to work properly?
Presets technically work on JPEG files, but the results will be noticeably worse because JPEG compression discards the shadow and highlight detail that forest presets rely on for their adjustments. Shooting in RAW gives you the full tonal range that makes presets genuinely effective.
A preset gets you eighty percent of the way there in one click — the other twenty percent, the part where you make the image yours, is the only editing that actually matters.
 |
 |
 |
 |

About Alex W.
Alex is a landscape, equine, and pet photographer based in the Lake District, UK, with years of experience shooting in one of Britain's most photographically demanding natural environments. His work has been featured in Take a View Landscape Photographer of the Year, Outdoor Photographer of the Year, and Amateur Photographer Magazine — publications that reflect a serious, competitive standard of image-making. At Click and Learn Photography, he shares the camera settings, gear choices, and compositional techniques he has developed through real-world shooting and competition-level work.
You can Get FREE Gifts. Furthermore, Free Items here. Disable Ad Blocker to receive them all.
Once done, hit anything below
|
|
|
|